Электронный детектор модели WJL-6000 для обнаружения утечки хладагента, содержащего хлор или фтор. →
-
Описание
-
Характеристики
-
Отзывов (0)
-
Задать вопрос о товаре
Универсальный детектор модели WJL-6000 применяется для обнаружения утечки хладагента в холодильных установках или системах кондиционирования.
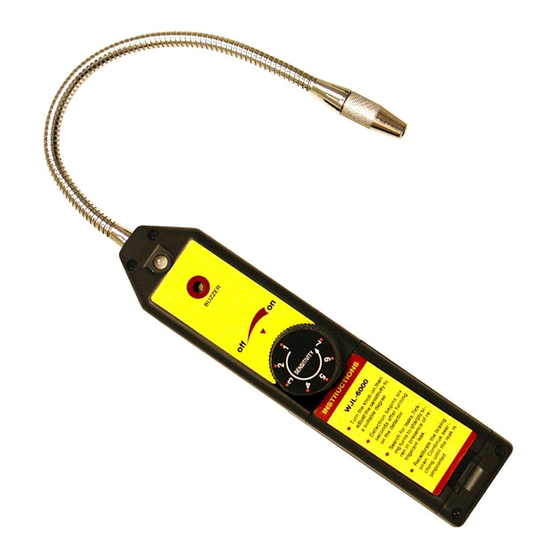
Конструкция детектора утечки хладагента WJL-6000:

Обнаружение утечки хладагента происходит с помощью сенсорного наконечника (1), который находится на конце щупа (2). Щуп детектора имеет гибкую конструкцию и позволяет проводить исследования в труднодоступных местах. Длина щупа составляет 20 см.
Для проведения поиска утечки хладагента система кондиционирования или холодильная установка должны быть заполнены таким количеством хладагента, который обеспечивает в неработающей системе уровень давления не менее 340 кПа (в противном случае утечку обнаружить не удастся). Во время проверки сенсорный наконечник должен находиться на расстоянии не более 5 мм от обследуемой поверхности.
При необходимости проверяемую поверхность нужно очистить от грязи и конденсата. Примечание: ни в коем случае не используйте чистящие средства или жидкости, потому что детектор может оказаться чувствительным к их ингредиентам.
При обнаружении утечки хладагента детектор начнет издавать звуковой сигнал (пищать) и начнет быстро мигать светодиодный индикатор (3). Чем больше утечка, тем интенсивнее будет звуковая и световая индикации.
Для работы детектору нужно питание 6 В постоянного тока. Питание осуществляется с помощью четырех батареек типоразмера ААА (в комплект поставки не входят). Батарейки устанавливаются в бокс (4) в нижней части корпуса.
Включение устройства происходит поворотом регулировочного колеса (5) по часовой стрелкой до щелчка. После включения детектор издаст звуковой сигнал и начнет мигать светодиодный индикатор. Если индикатор мигает зеленым цветом, то заряда батареи достаточно для нормальной работы устройства. Если индикатор мигает оранжевым цветом, то уровень заряда батареи снизился до минимального уровня и требуется замена батареек.
При включении детектора происходит сброс настроек и автоматическая подстройка для игнорирования скопившегося на конце щупа уровня хладагента. Это позволяет настроится на лучшее обнаружение утечки.
Также с помощью регулировочного колеса происходит настройка чувствительности детектора. На колесе имеется циферблат соответствующий определенному уровню чувствительности (от 1 до 7). Будьте внимательны, с повышением чувствительности будет повышаться вероятность ложной тревоги, так как в окружающем воздухе может находиться определенный уровень концентрации галоидов и прибор среагирует на них.
Выключение прибора происходит с поворотом колеса против часовой стрелки до щелчка.
Детектор утечки хладагента модели WJL-6000 реагирует на все галогенированные (содержащие хлор или фтор) хладагенты, такие как:
- CFC типа (например, R12, R11, R500 и т.д.);
- HCFC типа (например R22, R123, R124 и т.д.);
- HFC типа (например R134a, R404a, R125 и т.д.);
- смеси AZ-50, HP62, MP39 и т.д.;
- оксид этилена в медицинских стерилизационных системах;
- гексафторид серы в выключателях в сетях высокого напряжения;
- большинство газов, содержащих хлор, фтор и бром (галоидные газы);
- чистящие средства, используемые при сухой химчистке, такие как перхлорэтилен;
- галоидные газы в системах пожаротушения.
Для того чтобы снизить количество ложных срабатываний и продлить срок службы детектора сенсорный наконечник требуется хранить защищенным от грязи, влаги, жира. В случае необходимости очистки наконечника, погрузите его на несколько секунд в слабый спиртовой раствор. После этого очистите сжатым воздухом или полотенцем.
Примечание: ни в коем случае не используйте такие средства как бензин, скипидар и т.д., так как от них остаются следы, на которые реагирует устройство, что может привести к снижению чувствительности сенсорного датчика.
В комплекте поставки также имеется чехол с ремешком для удобной переноски детектора.
Характеристики:
модель: WJL-6000;
рабочая температура: 0-52 °С;
максимальная чувствительность: 6 г/год;
питание: 4 батарейки ААА 1.5 В (в комплект не входят);
длина щупа: 20 см;
габариты детектора (д х ш х в): 149 х 35,2 х 43,4 мм;
вес детектора: 137 г;
вес комплекта поставки: 221 г;
цвет корпуса: черный.
Комплект поставки:
- детектор утечки хладагента WJL-6000;
- чехол;
- инструкция на английском языке.
| Тип | Детекторы |
| Питание | 4 х ААА, 6 В |
| Дополнительные характеристики | рабочая температура: 0-52 °С; максимальная чувствительность: 6 г/год; длина щупа: 20 см |
| Комплектация | детектор утечки хладагента WJL-6000; чехол; инструкция на английском языке |
| Размеры | 149 х 35,2 х 43,4 мм |
| Вес | 0.221 кг |
| Страна-производитель товара | Китай |
| Гарантия | 1 месяц |
Нет отзывов об этом товаре.
!!! Возможны незначительные отличия товара от представленного на сайте, но это не влияет на его эксплуатационные показатели и функциональность.
Download
Add to my manuals
Share
URL of this page:
HTML Link:
Bookmark this page
Manual will be automatically added to «My Manuals»
Print this page
- Manuals
- Brands
- Elenco Electronics Manuals
- Security Sensors
- WJL-6000
- Customer’s manual
Halogen leak
Hide thumbs
1
2
3
4
5
6
7
8
-
page
of
8/
8 -
Bookmarks
Advertisement
Quick Links
Download this manual
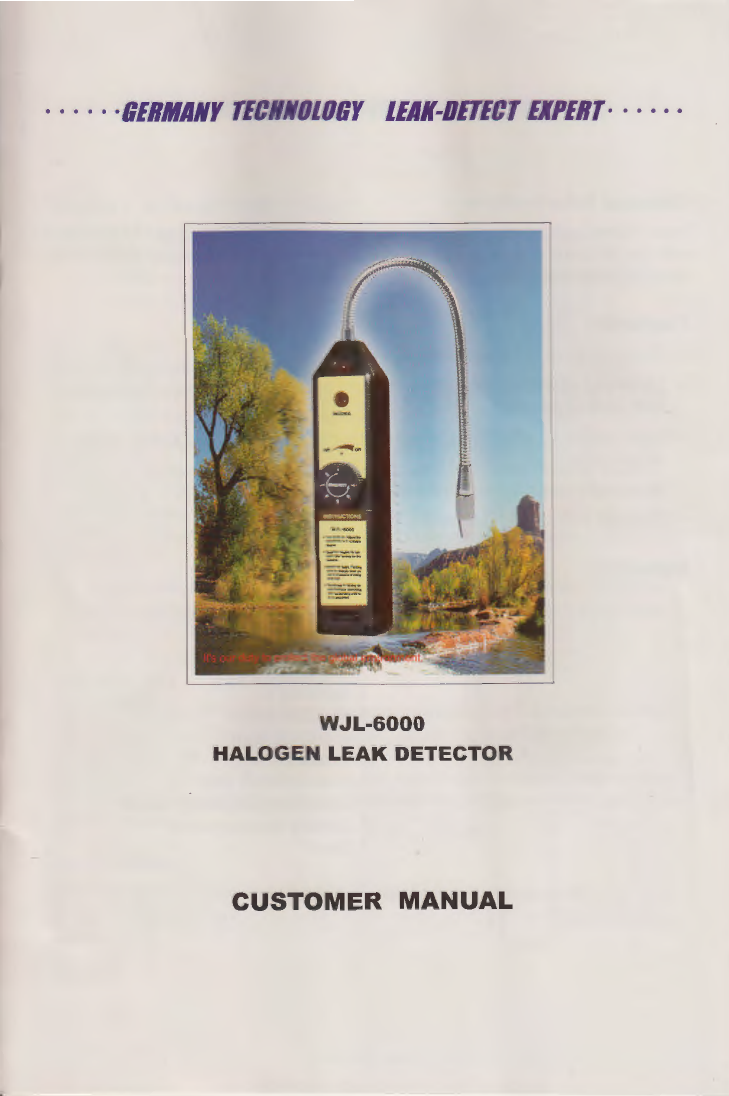
WJL-6000
HALOGEN LEAK DETECTOR
CUSTOMER MANUAL
······GERMANY TEC
‘LOGY lEAK-DETECT EXPERT······
Previous Page
Next Page
- 1
- 2
- 3
- 4
- 5
Advertisement
Related Manuals for Elenco Electronics WJL-6000
-
Security Sensors Elenco Electronics K-44 Assembly And Instruction Manual
Lie detector kit (8 pages)
-
Security Sensors Elenco Electronics AK-510 Assembly And Instruction Manual
Motion detector kit (21 pages)
General Information
Incorporated with advanced leak detect technology, WJL-6000 is a product with the functions of easy operation, stable function and small appearance. It’s an ideal and economic halogen leak detector.
Features
- Detect all kinds of halogen refrigerants.
Sensitivity adjusted at any time and it can be adjusted automatically to the best state of detecting. Designed with precise IC with Ultra-Low consume circuit design, more stable, longer battery time.
- Dual-color visual display of battery voltage.
- Excellent sensor, high sensitivity, longer use time.
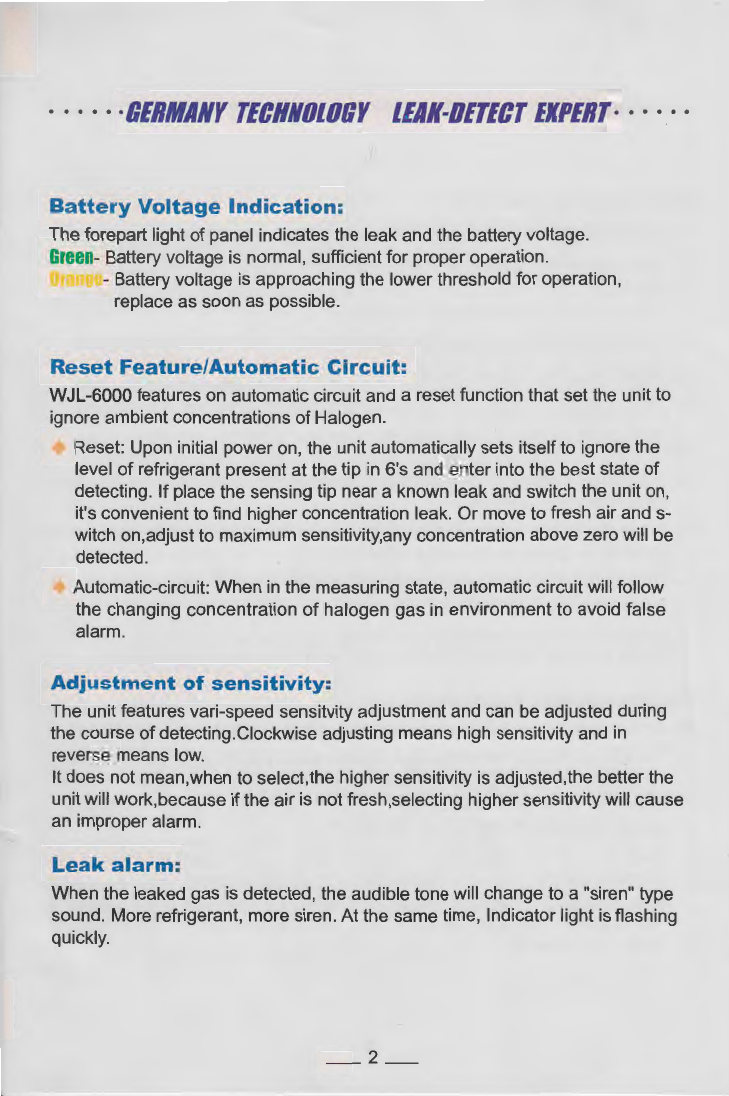
Battery Voltage Indication
The forepart light of panel indicates the leak and the battery voltage. Green-Battery voltage is normal, sufficient for proper operation. Red-Battery voltage is approaching the lower threshold for operation, replace as soon as possible.
Reset Feature/Automatic Circuit
WJL-6000 features on automatic circuit and a reset function that set the unit to ignore ambient concentrations of Halogen. Reset: Upon initial power on, the unit automatically sets itself to ignore the level of refrigerant present at the tip in 6’s and enter into the best state of detection. If place the sensing tip near a known leak and switch the unit on, it’s convenient to find higher concentration leak. Or move to fresh air and switch on the device, adjust to maximum sensitivity, any concentration above zero will be detected. Automatic circuit: When it is in the measuring state, the circuit will follow the changing concentration of halogen gas in environment to avoid false alarm.
Adjustment of sensitivity
The unit features sensitivity adjustment. Turn the button clockwise to adjust to high sensitivity; counterclockwise to lower sensitivity. It does not mean, the higher sensitivity, the better the unit will work, because if the air is not fresh, by selecting higher sensitivity will cause an false alarm.
Leak alarm
When the leaked gas is detected, the detector will beep quicker. The more refrigerant gas was detected, the higher the beep frequency will be. The light indicator will flash quickly at the same time.
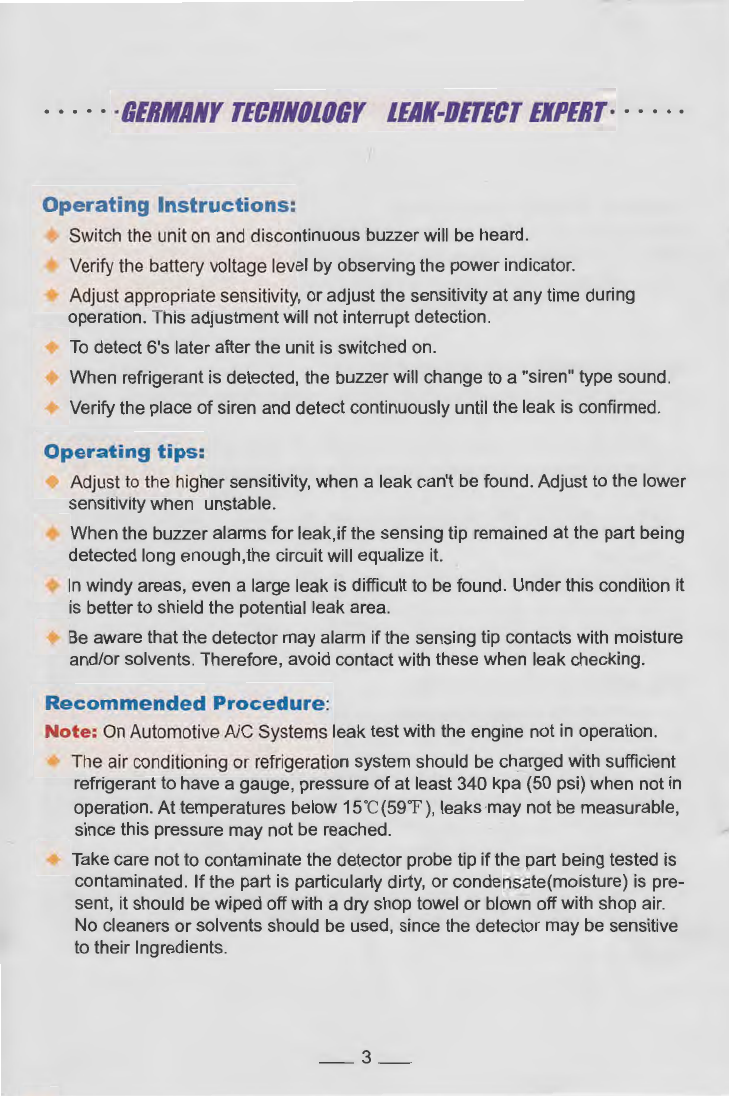
Operating Instructions
Switch on the unit, the buzzer will beep constantly. Check the battery voltage level by observing the power indicator. Adjust appropriate sensitivity or adjust the sensitivity at any time during operation. This adjustment will not interrupt detection. Wait for 6s to warm up after the unit is switched on. When a leak refrigerant is detected, the buzzer will beep in a higher frequency. Verify the potential leak place and detect continuously until the leak is confirmed.
Operating tips
Adjust to the higher sensitivity, when a leak can’t be found. Adjust to the lower sensitivity when unstable. When the buzzer alarms for leak and if the sensing tip remained at the place being detected long enough, the circuit will equalize it. In windy areas, even a large leak is difficult to be found. In this condition, it is better to shield the potential leak area. Be aware that the detector may alarm if the sensing tip contacts with moisture and/or solvents. Therefore, avoid contact with these when leak checking.
Recommended Procedure
A Note
On Automotive A/C Systems leak test with the engine not in operation. The air conditioning or refrigeration system should be charged with sufficient refrigerant to have a gauge, pressure of at least 340 kpa (50 psi) when not in operation. At temperatures below 15°C(59T), leaks may not be measurable, since this pressure may not be reached.
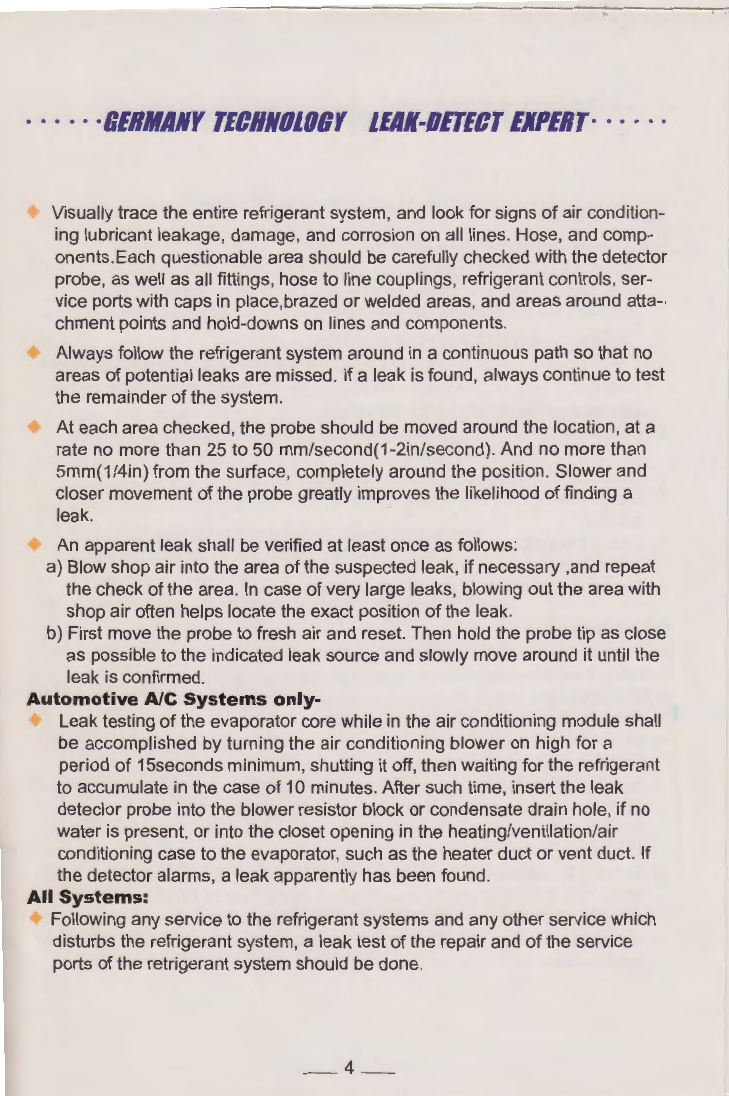
Please do not contaminate the sensor tip. If the part is particularly dirty, or condensate(moisture) is present, it should be wiped off with a dry shop towel or blown off with shop air. No cleaners or solvents should be used, the detector may be sensitive to their ingredients. Visually trace the entire refrigerant system, and look for signs of air conditioning lubricant leakage, damage, and corrosion on all lines. Hose, and components. Each of the suspected area should be carefully checked with the detector probe, as well as all fittings, hose to line couplings, refrigerant controls, service ports with caps in place, brazed or welded areas, and areas around attachment points and hold-downs on lines and components. Always follow the refrigerant system around in a continuous path so that no areas of potential leaks are missed. If a leak is found, always continue to test the remainder of the system. At each area checked, the probe should be moved around the location, at a rate no more than 25 to 50 mm/second(1-2in/second). And no more than 5mm(1/4in) from the surface, completely around the position.
Slower and closer movement of the probe greatly improves the likelihood of finding a leak. An apparent leak shall be verified at least once as follows: a) Blow shop air into the area of the suspected leak, if necessary, and repeat the check of the area. In case of very large leaks, blowing out the area with shop air often helps locate the exact position of the leak. b)First move the probe to fresh air and reset. Then hold the probe tip as close as possible to the indicated leak source and slowly move around it until the leak is confirmed.
Automotive A/C Systems only
Leak testing of the evaporator core while in the air conditioning module shall be accomplished by turning the air conditioning blower on high for a period of 15 seconds minimum, shutting it off, then wait for the refrigerant to accumulate in the case of 10 minutes. After that, insert the leak detector probe into the blower resistor block or condensate drain hole, if no water is present, or into the closet opening in the heating/ventilation/air conditioning case to the evaporator, such as the heater duct or vent duct. If the detector alarms, a leak apparently has been found.
All Systems
Following any service to the refrigerant systems and any other service which disturbs the refrigerant system, a leak test of the repair and of the service ports of the refrigerant system should be done.
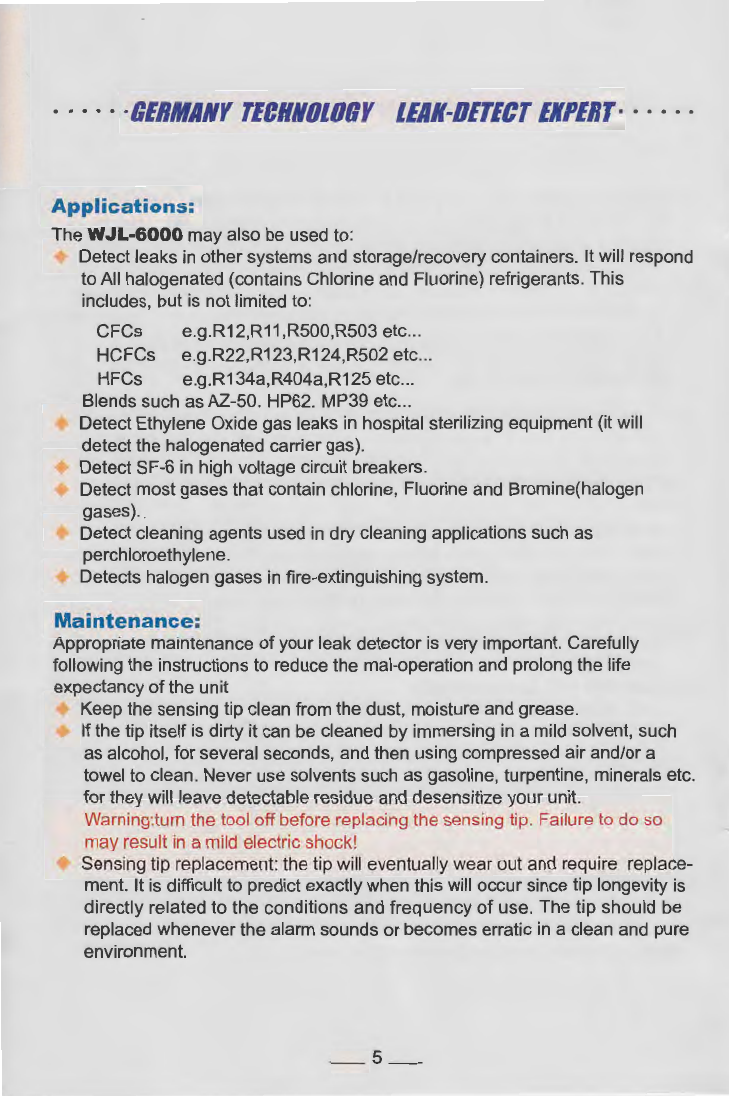
Applications
The WJL-6000 may also be used to: Detect leaks in other systems and storage/recovery containers. It will respond to All halogenated (contains Chlorine and Fluorine) refrigerants. This includes, but is not limited to: CFCS e.g., R12, R11, R500, R503 etc… HCFCS e.g.R22, R123, R124, R502 etc… HFCS e.g., R134a, R404a, R125 etc… Blends such as AZ-50. HP62. MP39 etc… Detect Ethylene Oxide gas leaks in hospital sterilizing equipment (it will detect the halogenated carrier gas).
- Detect SF-6 in high voltage circuit breakers. Detect most gases that contain chlorine, Fluorine and Bromine (halogen gases). Detect cleaning agents used in dry cleaning applications such as perchloroethylene. Detects halogen gases in fire-extinguishing system.
Maintenance
Appropriate maintenance of your leak detector is very important. Carefully follow the instructions to reduce the mal-operation and prolong the service life of the unit. Keep the sensing tip clean from the dust, moisture and grease. If the tip is dirty, it can be cleaned by immersing in a mild solvent, such as alcohol, for several seconds, and then use compressed air and/or a towel to clean. Never use solvents such as gasoline, turpentine, minerals etc. for they will leave detectable residue and desensitize the unit.
A Wamina
Turn the detector off before replacing the sensing tip. Failure to do so may result in a mild electric shock!
Sensing tip replacement: the tip will eventually wear out and require replacement. It is difficult to predict exactly when should the sensor tip be replaced as it is related to the condition and frequency of use. The tip should the sensor tip be replaced as it is related to the condition and frequency of use.
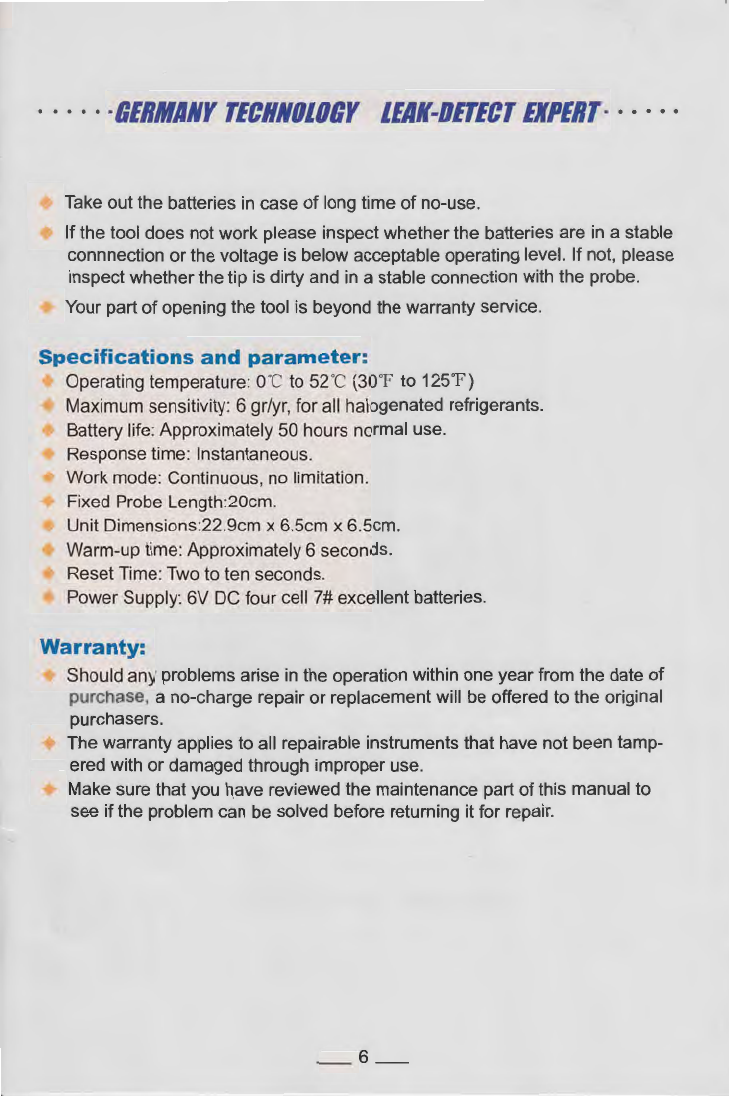
Take out the batteries in case the detector is left unused for a long time. If the tool does not work, please inspect if the batteries are well contacted or the voltage is below acceptable operating level. If not, please inspect if the tip is dirty and not well contacted with the probe. Your part of opening the tool is beyond the warranty service.

······GERMANY
TEC
‘LOGY
lEAK-DETECT
EXPERT······
WJL-6000
HALOGEN
LEAK
DETECTOR
CUSTOMER
MANUAL
······GERMANY
TECHNOlOGY
lEAK-DETECT
EXPERT······
General
Information:
Incorporated with advanced leak detect technology, WJL-6000
is
our new product
with the functions of easy operation, stable function and small appearance, it’s
an
ideal and economic halogen leak detector.
Features:
Detect all kinds of halogen refrigerants.
Sensitivity adjusted at any time and it can be adjusted automatically to the
best state of detecting.
Inner precise
IC
with Ultra-Low consume circuit design, more stable, longer
battery time.
Two-color visual display of battery voltage.
Excellent sensor, high sensitivity, longer use time.
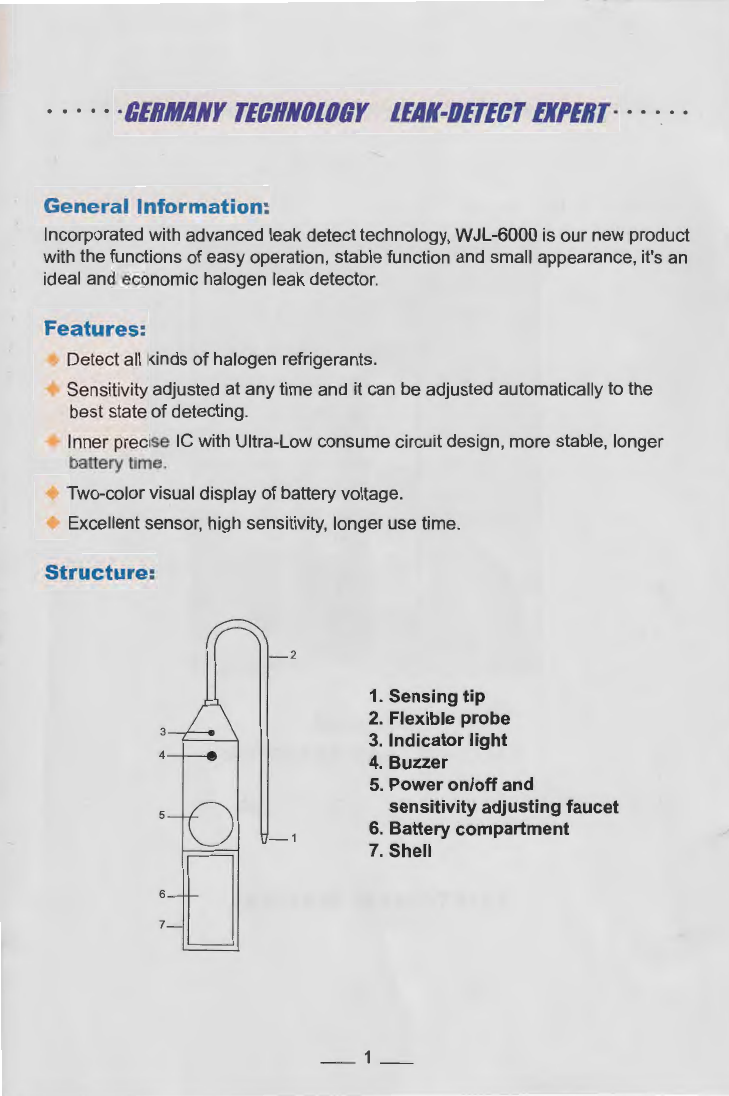
Structure:
1.
Sensing tip
2.
Flexible probe
3.
Indicator light
4.
Buzzer
5.
Power on/off and
sensitivity adjusting faucet
6. Battery compartment
7.
Shell
_1_
· · · · ·
·GERMANY
TECHNOLOGY
lEAK-DETECT
EXPERT·
· · · · ·
Battery
Voltage
Indication:
The forepart light of panel indicates the leak and the battery voltage.
Green
—Battery voltage
is
normal, sufficient for proper operation.
—Battery voltage
is
approaching the lower threshold for operation,
replace as soon as possible.
Reset
Feature/Automatic
Circuit:
WJL-6000 features
on
automatic circuit and a reset function that set the unit to
ignore ambient concentrations of Halogen.
Reset: Upon initial power
on
, the unit automatically sets itself to ignore the
level
of
refrigerant present at the tip
in
6’s and enter into the best state of
detecting. If place the sensing tip near a known leak and switch the unit
on
,
it’s convenient to find higher concentration leak. Or move to fresh air and
s-
witch on,adjust to maximum sensitivity,any concentration above zero will be
detected.
Automatic-circuit: When
in
the measuring state, automatic circuit will follow
the changing concentration of halogen gas
in
environment to avoid false
alarm.
Adjustment
of
sensitivity:
The unit features vari-speed sensitvity adjustment and can be adjusted during
the course of detecting.Ciockwise adjusting means high sensitivity and
in
reverse means low.
It does not mean,when to select, the higher sensitivity
is
adjusted,the better the
unit will work, because if the air
is
not fresh ,selecting higher sensitivity will cause
an
improper alarm.
Leak
alarm:
When the leaked gas
is
detected, the audible tone will change to a «siren» type
sound. More refrigerant, more siren. At the same time, Indicator light
is
flashing
quickly.
_2_
· · · · ·
·OERMIINY
TECHNOLOGY
lEAK-DETECT
EXPERT·
· · · · ·
Operating
Instructions:
Switch the unit
on
and discontinuous buzzer will be heard.
Verify the battery voltage level by observing the power indicator.
Adjust appropriate sensitivity, or adjust the sensitivity at any time during
operation. This adjustment will not interrupt detection.
To
detect 6’s later after the unit is switched
on
.
When refrigerant is detected, the buzzer will change to a «siren» type sound.
Verify the place of siren and detect continuously until the leak is confirmed.
Operating
tips:
Adjust to the higher sensitivity, when a leak can’t be found. Adjust to the lower
sensitivity when unstable.
When the buzzer alarms for leak, if the sensing tip remained at the part being
detected long enough,the circuit will equalize
it.
In
windy areas, even a large leak
is
difficult to
be
found. Under this condition it
is better to shield the potential leak area.
Be
aware that the detector may alarm if the sensing tip contacts with moisture
and/or solvents. Therefore, avoid contact with these when leak checking.
Recommended
Procedure
:
Note:
On
Automotive A!C Systems leak test with the engine not
in
operation.
J
J
The air conditioning or refrigeration system should
be
charged with sufficient j
refrigerant to have a gauge, pressure of at least 340 kpa (50 psi) when not
in
operation. At temperatures below 15‘C(59
‘F
),
leaks
may
not
be
measurable, J
since this pressure may not be reached. «‘-
Take
care not to contaminate the detector probe tip if the part being tested is
contaminated. If the part is particularly dirty, or condensate( moisture)
is
pre-
sent, it should
be
wiped off with a dry shop towel or blown off with shop air.
No cleaners or solvents should be used, since the detector may
be
sensitive
to their Ingredients.
_3_
· · · · ·
·BERMIINY
TECHNOLOGY
lEAK-DETECT
EXPERT·
· · · · ·
Visually trace the entire refrigerant system, and look for signs of air condition—
ing lubricant leakage, damage, and corrosion
on
all lines. Hose, and comp-
onents. Each questionable area should be carefully checked with the detector
probe, as well as all fittings, hose to line couplings, refrigerant controls, ser-
vice ports with caps
in
place, brazed or welded areas, and areas around atta-
chment points and hold-downs
on
lines and components.
Always follow the refrigerant system around
in
a continuous path so that no
areas
of
potential leaks are missed. If a leak is found, always continue to test
the remainder
of
the system.
At each area checked, the probe should be moved around the location, at a
rate no more than 25 to 50 mm/second(1-2in/second). And no more than
5mm(1/4in) from the surface, completely around the position . Slower and
closer movement of the probe greatly improves the likelihood of finding a
leak.
An
apparent leak shall
be
verified at least once
as
follows:
a) Blow shop air into the area of the suspected leak, if necessary ,and repeat
the check of the area.
In
case of very large leaks, blowing out the area with
shop air often helps locate the exact position
of
the leak.
b) First move the probe to fresh air and reset. Then hold the probe tip
as
close
as possible to the indicated leak source and slowly move around it until the
leak
is
confirmed.
Automotive
A/C
Systems
only-
Leak testing of the evaporator core while
in
the air conditioning module shall
be accomplished by turning the air conditioning blower on high for a
period
of
15seconds minimum, shutting it off, then waiting for the refrigerant
to accumulate
in
the case of 10 minutes. After such time, insert the leak
deteclor probe into the blower resistor block or condensate drain hole, if no
water
is
present, or into the closet opening
in
the heating/ventilation/air
conditioning case to the evaporator, such as the heater duct or vent duct. If
the detector alarms, a leak apparently has been found .
All
Systems:
Following any service to the refrigerant systems and any other servi
ce
whi
ch
disturbs the refrigerant system, a leak test
of
the repair and of the servi
ce
ports of the retrigerant system should
be
done.
_4
_
· · · · ·
·GERMANY
TECHNOLOIIY
lEAK-DETECT
EXPERT·
· · · · ·
Applications:
The
WJL-6000
may also
be
used to:
Detect leaks
in
other systems and storage/recovery containers. It will respond
to All halogenated (contains Chlorine and Fluorine) refrigerants. This
includes, but
is
not limited to:
CFCs e.g.R12,
R11
,R500,R503 etc
..
.
HCFCs e.g.R22,R123,R124,R502 etc
..
.
HFCs e.g.R134a ,R404a,R125 etc .. .
Blends such as AZ-50. HP62. MP39 etc .. .
Detect Ethylene Oxide gas leaks
in
hospital sterilizing equipment (it will
detect the halogenated carrier gas).
Detect SF-6
in
high voltage circuit breakers.
Detect most gases that contain chlorine, Fluorine and Bromine(halogen
gases).
Detect cleaning agents used
in
dry cleaning applications such as
perchloroethylene.
Detects halogen gases
in
fire-extinguishing system.
Maintenance:
Appropriate maintenance of your leak detector
is
very important. Carefully
following the instructions to reduce the mal-operation and prolong the life
expectancy of the unit
Keep the sensing tip clean from the dust, moisture and grease.
If the tip itself
is
dirty
it
can be cleaned by immersing
in
a mild solvent, such
as alcohol, for several seconds, and then using compressed air and/or a
towel to clean. Never use solvents such as gasoline, turpentine, minerals etc.
for they will leave detectable residue and desensitize your unit.
Warning:turn the tool off before replacing the sensing tip. Failure to do
so
may result in a mild electric shock!
Sensing tip replacement: the tip will eventually wear out and require replace-
ment.
It
is difficult to predict exactly when this will occur since tip longevity is
directly related to the conditions and frequency
of
use. The tip should be
replaced whenever the alarm sounds or becomes erratic
in
a clean and pure
environment.
_5_
······GERMANY
TECHNOLOGY
lEAK-DETECT
EXPERT······
Take out the batteries
in
case of long time of no-use.
If the tool does not work please inspect whether the batteries are
in
a stable
connnection or the voltage
is
below acceptable operating level. If not, please
inspect whether the tip
is
dirty and
in
a stable connection with the probe.
Your part of opening the tool is beyond the warranty service.
Specifications
and
parameter:
Operating temperature: OOC to
52
°C (30°F to 125r )
Maximum sensitivity: 6 gr/yr, for all halogenated refrigerants.
Battery life: Approximately
50
hours normal use.
Response time: Instantaneous.
Work mode: Continuous, no limitation.
Fixed Probe Length:20cm.
Unit Dimensions:22.9cm x 6.5cm x 6.5cm.
Warm—up time: Approximately 6 seconds.
Reset Time: Two to ten seconds.
Power Supply: 6V
DC
four cell 7# excellent batteries.
Warranty:
Should any problems arise
in
the operation within one year from the date of
purchase, a no-charge repair or replacement will be offered to the original
purchasers.
The warranty applies to all repairable instruments that have not been tamp—
ered with or damaged through improper use.
Make sure that you have reviewed the maintenance part of this manual to
see if the problem can be solved before returning it for repair.
_6_
······GERMANY
TECHNOLOGY
lEAK-DETECT
EXPERT······
-
Bookmarks
Quick Links
https://aprvtiotech.com/
sales@aprvtiotech.com
REFRIGERANT LEAK DETECTOR
+1 713 701 1986
https://aprvtiotech.com/
WJL-6000
INSTRUCTIONS
WJL-6000
TURN THE KNOB ON, THEN
ADJUST THE SENSITIVITY TO
A SUITABLE DEGREE.
DETECTION BEGINS SIX
SECONDS AFTER TURNING
ON THE DETECTOR.
SEARCH FOR LEAKS.TICK-
ING TURNS TO SHARPLY
SIREN IN PRESENCE OF
REFRIGERANT LEAK.
RECALIBRATE THE TICKING
SIREN.CONTINUE SEARC-
HING UNTIL THE LEAK IS
PINPOINTED.
sales@aprvtiotech.com
+1 713 701 1986