Посмотреть инструкция для GoPro Max бесплатно. Руководство относится к категории спортивные камеры, 23 человек(а) дали ему среднюю оценку 8.7. Руководство доступно на следующих языках: русский. У вас есть вопрос о GoPro Max или вам нужна помощь? Задайте свой вопрос здесь
Не можете найти ответ на свой вопрос в руководстве? Вы можете найти ответ на свой вопрос ниже, в разделе часто задаваемых вопросов о GoPro Max.
Какой вес GoPro Max?
GoPro Max имеет вес — g.
Что такое мегапиксель?
Количество мегапикселей обозначает количество пикселей в датчике. 1 мегапиксель равен 1 миллиону пикселей. Чем больше пикселей, тем выше потенциальное качество изображения.
Что означает аббревиатура MП?
МП обозначает «мегапиксели».
Что такое Bluetooth?
Bluetooth — это способ обмена данными по беспроводной сети между электронными устройствами с помощью радиоволн. Расстояние между двумя устройствами обменивающимися данными в большинстве случаев составляет не более десяти метров.
Какая высота GoPro Max?
GoPro Max имеет высоту 69 mm.
Какая ширина GoPro Max?
GoPro Max имеет ширину 64 mm.
Какая толщина GoPro Max?
GoPro Max имеет толщину 24 mm.
Какой тип USB-подключения GoPro Max имеет?
GoPro Max имеет USB Type-C подключение.
Инструкция GoPro Max доступно в русский?
Да, руководствоGoPro Max доступно врусский .
Не нашли свой вопрос? Задайте свой вопрос здесь
- Manuals
- Brands
- GoPro Manuals
- Action Cameras
- MAX
- User manual
-
Contents
-
Table of Contents
-
Troubleshooting
-
Bookmarks
Quick Links
Related Manuals for GoPro MAX
Summary of Contents for GoPro MAX
-
Page 1
USER MANUAL… -
Page 2
Join the GoPro Movement facebook.com/GoPro youtube.com/GoPro twitter.com/GoPro instagram.com/GoPro… -
Page 3: Table Of Contents
Tech Specs: Protune Exposure Control Customer Support Controlling Your GoPro with Your Voice Trademarks Tips for Capturing with MAX HEVC Advance Notice Playing Back Your Media Regulatory Information Connecting to Other Devices Transferring Your Media MAX — Regulatory Model Number SPCC1…
-
Page 4: Meet Your Gopro Max
7. Battery 3. Status Light 3. Status Light 8. USB-C Port 4. Mode Button [ 4. Door 9. Shutter Button [ 5. Door Latch Learn how to use the accessories that came with your GoPro. Mounting Your GoPro (page 67).
-
Page 5: Setting Up Your Camera
• Class 10 or UHS-I rating • Capacity up to 256GB For a list of recommended microSD cards, visit gopro.com/microsdcards. Heads Up: Be sure your hands are clean and dry before handling your SD card. Check the manufacturer’s guidelines to see your card’s acceptable temperature range and other important information.
-
Page 6
Setting Up Your Camera 3. Insert the battery. UPDATING YOUR CAMERA’S SOFTWARE To get the latest features and best performance from your GoPro, make sure it’s using the most current software. Updating With the GoPro App 1. Download the app from the Apple… -
Page 7: Getting To Know Your Gopro
To learn more, see Recording Video (page 23). Photo Includes Photo, Burst, and Night. WARNING: Use caution when using your GoPro and related To learn more, see Taking Photos (page 28). mounts and accessories. Always be aware of your surroundings to avoid injuring yourself and others.
-
Page 8
LEVEL HORIZON CAPTURE MODES Information about level horizon here. This screen gives you total access to your camera’s capture settings and provides information about your GoPro. The settings shown vary by mode. HERO MODE Infomation about 1-lens capture here. 1. Current Mode (Video, Photo, or Time Lapse) 2. -
Page 9
Getting to Know Your GoPro Getting to Know Your GoPro USING THE TOUCH SCREEN USING THE SHUTTER BUTTON 1. Press the Shutter button to start recording. 2. Press the Shutter button again to stop recording (Video, Time Lapse, and Live Streaming only). -
Page 10
Getting to Know Your GoPro Getting to Know Your GoPro 5. Tap the setting you want to change. 3. Choose a capture mode from the list. 4. Tap the settings if you want to change the resolution or make Your choices will appear in white. Options that are not compatible with other adjustments. -
Page 11: Using Quikcapture
Using QuikCapture Using QuikCapture QuikCapture is the fastest and easiest way to power on your GoPro TAKING TIME LAPSE WITH QUIKCAPTURE and get the shot. All it takes is the push of a single button. 1. With your camera off, press and hold the Shutter button until your camera turns on (about 3 seconds).
-
Page 12: Adding Hilight Tags
Adding HiLight Tags Recording Video Mark favorite moments in your videos and photos by pressing the Mode Your GoPro has one Video mode that can be used to capture 360 content button during recording or playback. This adds a HiLight Tag that or traditional videos.
-
Page 13
Recording Video Recording Video SHOOTING SPHERICAL CONTENT USING TOUCH ZOOM More info to come. Touch Zoom helps you capture a closer view of the action. 1. From the Video screen, tap SHOOTING TRADITIONAL VIDEO More info to come. 2. Use the slider to choose how much you want to zoom. 3. -
Page 14: Video Settings
Video Settings Video Settings Tap the settings to adjust the video resolution, frame rate, and more. Heads Up: Available fields of view will vary based on the resolution and frame rate you select. To learn more, see Field of View (Video) (page 85).
-
Page 15: Taking Photos
Taking Photos Taking Photos Your GoPro has four Photo capture modes. Three of these modes–Photo, SHOOTING SPHERICAL PHOTOS Burst, and Night–can capture spherical or traditional photos. The fouth More info to come. mode, Panoramic, can be used with either the front or back lens.
-
Page 16
Taking Photos Taking Photos USING TOUCH ZOOM Touch Zoom helps you capture a closer view of the action. 1. From the Photo screen, tap 3. Press the Shutter button . Your camera will start the countdown. It will also beep and the front status light will blink. Both will speed up as the time winds down before snapping the photo. -
Page 17: Photo Settings
Photo Settings Photo Settings Tap the settings to adjust the field of view, turn RAW Photo on, and more. To learn more, see Burst Rate (page 87). SHUTTER (NIGHT) Set how long your camera’s shutter stays open for night shots. Choose longer exposures for darker shots.
-
Page 18: Capturing Time Lapse
TIMEWARP VIDEO More info to come. MAX lets you speed up time by capturing super stabilized time lapse video while you’re on the move. This makes it perfect for mountain bike runs, hikes, and more. The default settings are 1440p video with a Tap the settings to adjust the video resolution, field of view, and more.
-
Page 19: Live Streaming
SETTING UP A LIVE STREAM All TimeWarp and Time Lapse videos are captured with a Wide field of 1. Connect to the GoPro app. For details, see Connecting to the GoPro view. Time Lapse and Night Lapse photos can be captured in either a (page 51).
-
Page 20: Exposure Control
Exposure Control Exposure Control MAX scans the entire scene to choose the exposure level for your shot. SETTING EXPOSURE CONTROL USING LOCKED EXPOSURE Exposure Control lets you decide if only a section of the shot should be With this option, your camera locks the exposure until you cancel it.
-
Page 21: Controlling Your Gopro With Your Voice
Controlling Your GoPro With Your Voice Turning Exposure Control Off Voice Control gives you easy hands-free control of your GoPro. It’s great Exposure Control is automatically turned off when you switch capture when you’re busy with handlebars, ski poles, and more. Just tell your modes or restart your camera.
-
Page 22
Mode Command Description These commands let you switch modes on the fly. If you just recorded a video, you can say “GoPro take a photo” to snap a photo without manually GoPro Video mode Switches your camera to Video mode switching modes. -
Page 23: Tips For Capturing With Max
5. Turn on your camera by saying “GoPro turn on” or “GoPro • For the best results, attach MAX to the mounts that came with the camera. Using the mounts moves the camera away from your hand start recording.”…
-
Page 24: Playing Back Your Media
Swipe up to see the last video, photo or burst you took. Swipe left and right to flip through the other files on your SD card. • To prevent additional work during editing, do not rest MAX on its side when capturing.
-
Page 25
Playing Back Your Media Playing Back Your Media USING GALLERY VIEW Adjust the playback volume Gallery view gives you quick access to all of the videos and photos stored on your SD card. Go to the previous or next photo in a burst or group 1. -
Page 26: Connecting To Other Devices
Connecting to Other Devices VIEWING VIDEOS + PHOTOS ON A MOBILE DEVICE CONNECTING TO THE GOPRO APP Use the GoPro mobile app to control your MAX, share videos and photos 1. Connect your camera to the GoPro app. For details, see Connecting on the go and automatically transform your footage into QuikStories—…
-
Page 27: Transferring Your Media
USB-C cable. SETTING THE CONNECTION SPEED 4. Power on your camera and follow the on-screen instructions Your GoPro is set to use the 5GHz Wi-Fi band (the fastest available) in the Quik app. when connecting to other mobile devices. Transferring Directly From Your SD Card Change the Wi-Fi band to 2.4GHz if your device or region does not…
-
Page 28
Transfer your non-spherical media to the cloud without waiting for your spherical media to the cloud where you can view, edit, and share it from camera to fully charge. (Your GoPro must still be connected to a power any device. -
Page 29: Customizing Your Gopro
Manage your Auto Upload settings, set up your wireless network, Voice Control and more. 1. Swipe down to access the Dashboard. Camera Beeps 2. Tap Preferences > GoPro Plus. QuikCapture Heads Up: GoPro Plus will be available in your Preferences after you’ve signed up. Screen Lock…
-
Page 30
Dashboard. GPS is unavailable (gray) Default Mode Set the mode your GoPro captures in when you turn it on using the Camera is connected to the GoPro app (white) Mode button . This setting does not affect QuikCapture. -
Page 31
Turn on GPS to track your speed, distance, and more. Add performance when you connect your camera to the GoPro app or Quik desktop app. stickers in the GoPro app to show how fast, far, and high you were going Date Format in your videos. -
Page 32: Important Messages
Customizing Your GoPro Important Messages Problems are rare, but MAX will let you know if anything comes up. Here are some of the messages you might see. INPUT/OUTPUT Set up how you want to use your camera’s HDMI output and find the right setting for your external microphone.
-
Page 33: Resetting Your Camera
FILE REPAIR for 10 seconds. This will restart your camera. There will be no changes MAX will automatically try to fix damaged files. Files can be damaged if to your settings. your camera loses power while recording or if there’s a problem saving the RESTORE ALL SETTINGS TO THE DEFAULTS file.
-
Page 34: Mounting Your Gopro
RESTORING FACTORY SETTINGS This will restore all of your camera’s original settings, clear all device connections, and deregister your camera from GoPro Plus. This is useful if you’re giving your camera to a friend and want to completely reset it to its original state.
-
Page 35
Flip up the mounting buckle plug. Depending on the mount you’re using, you’ll either use a mounting buckle or attach your GoPro directly to the mount itself. b. Slide the buckle into the mount until it clicks into place. -
Page 36
WARNING: The Curved MAX Mount is not recommended Follow these guidelines when attaching adhesive mounts to helmets, for helmet mounting. To mount MAX on a helmet, use the vehicles, and gear: Curved Adhesive Mount and Mounting Buckle. These items are available in the Grab Bag, sold separately at gopro.com. -
Page 37: Removing The Door
USING YOUR GOPRO IN + AROUND WATER There might be times when you need to remove your camera’s door. MAX is waterproof to 16ft (5m) with the door closed. You won’t need an additional housing before diving in. WARNING: Only remove the door in a dry, dust-free environment.
-
Page 38: Maintenance
Scratches to the lenses are not covered under the warranty. • To protect the lenses from damage, do not rest MAX on its front or back side. Be sure the lenses are not resting against any surface. • To clean the lenses, wipe them with a soft, lint-free cloth. If debris becomes lodged between the lens and the trim ring, flush it out with water or air.
-
Page 39: Battery Information
You can use the USB-C cable that came with your camera to shoot videos and photos while your camera is plugged in to a USB-charging adapter, the GoPro Supercharger, another GoPro charger, or the GoPro Portable Power Pack. This is perfect for capturing long videos and time lapse events.
-
Page 40
BATTERY STORAGE + HANDLING BATTERY DISPOSAL MAX is full of sensitive components, including the battery. Avoid exposing Most rechargeable lithium-ion batteries are classified as non-hazardous your camera to very hot or cold temperatures. Extreme temperatures may waste and are safe for disposal in the normal municipal waste stream. -
Page 41: Troubleshooting
Beautiful high-resolution content. Enables • The computer doesn’t work with HEVC files. Try downloading the 1080p30 OverCapture videos with the latest version of the Quik desktop app for free at gopro.com/apps. 5.7K30 traditional GoPro look and feel. Results in a •…
-
Page 42
Tech Specs: Video Tech Specs: Video This chart compares the frame size of each resolution: Video Resolution Best Use VIDEO RESOLUTION (TRADITIONAL) More info to come. Tall 4:3 aspect ratio fits more into the frame than 1440p 1080p. Great for capturing fast action, point-of- view shots and sharing to social media. -
Page 43
Best Use Higher video resolutions capture more detail and clarity, but they’re generally available at lower fps values. Max SuperWide More info to come. Lower video resolutions capture less detail and clarity, but they can Large field of view that’s great for action shots be shot at higher fps values. -
Page 44: Tech Specs: Photo
(up to 30 seconds) If heat’s a problem, try recording shorter videos. Also limit use of features that take a lot of power, like the GoPro app. The GoPro Smart Remote Dawn, dusk, twilight, traffic at night, Ferris 2, 5, 10, or 15 seconds (sold separately) can control your GoPro while using less energy.
-
Page 45
GoPro app) and a .gpr file. The .gpr file is based on the Adobe .dng format. These files can be used in Adobe Camera Raw (ACR), version 9.7 or later. -
Page 46: Tech Specs: Time Lapse
Tech Specs: Time Lapse Tech Specs: Time Lapse TIMEWARP VIDEO SPEED VIDEO RESOLUTION (TIMEWARP, TIME LAPSE VIDEO) You can increase TimeWarp Video speed up to 30x to turn longer activities More info to come. into shareable moments. Use this chart to estimate the length of your videos. For example, recording at 2x speed for 1 minute will give you about 30 seconds of TimeWarp video.
-
Page 47
Tech Specs: Time Lapse Tech Specs: Time Lapse TIME LAPSE INTERVAL Time Lapse Video Recording Time The Interval sets how often your camera takes a shot in Time Lapse Video Use this chart to determine the length of your videos. For example, and Time Lapse Photo modes. -
Page 48: Tech Specs: Protune
NIGHT LAPSE PHOTO INTERVAL PROTUNE Choose how often your GoPro snaps a shot in Night Lapse Photo mode. Protune unlocks your camera’s full creative potential by giving you manual Night Lapse intervals are Auto, 4, 5, 10, 15, 20, and 30 seconds, and 1, 2, control of Color, White Balance, Shutter Speed, and more.
-
Page 49
Lower values result in darker images with less image noise. Scroll between the options on the right side of the Color screen to see Provides GoPro color-corrected profile (same GoPro Color (default) great color as when Protune is turned off). -
Page 50
Tech Specs: Protune Tech Specs: Protune SHUTTER EXPOSURE VALUE COMPENSATION (EV COMP) The Protune Shutter setting only applies to the Video and Photo modes. Exposure Value Compensation affects the brightness of your videos and This setting determines how long the shutter stays open. Scroll between photos. -
Page 51
Tech Specs: Protune Tech Specs: Protune SHARPNESS RAW AUDIO Sharpness controls the quality of details captured in your video footage This setting creates a separate .wav file for your video, in addition to the or photos. Options for this setting are High (default), Medium, and Low. standard .mp4 audio track. -
Page 52: Customer Support
GoPro, Inc. in the United States and other countries. cleanest audio track possible. © 2019 GoPro, Inc. All rights reserved. Made in China. Hecho en China. Use when wind is not a factor and you want to For patent information, visit gopro.com/patents. GoPro, Inc., 3000 Stereo ensure that your GoPro is recording in stereo.
-
Page 53: Regulatory Information
WITH HEVC ENCODED CONTENT IS DEEMED ACCEPTANCE OF THE LIMITED AUTHORITY TO USE AS NOTED ABOVE. Regulatory Information To see the complete list of country certifications, refer to the Important Product + Safety Instructions included with your camera or visit gopro.com/help.
This manual is also suitable for:
Spcc1
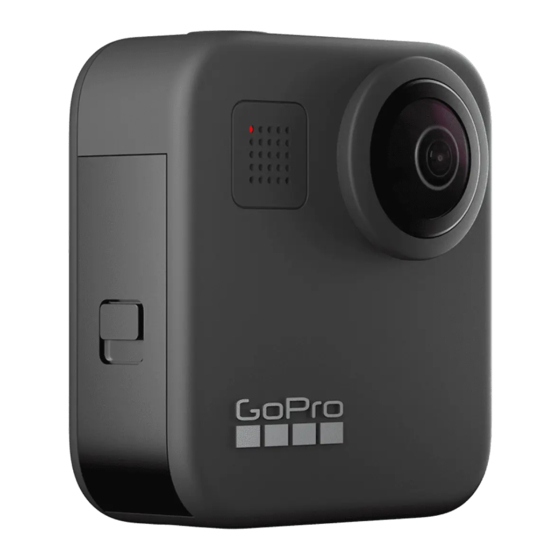
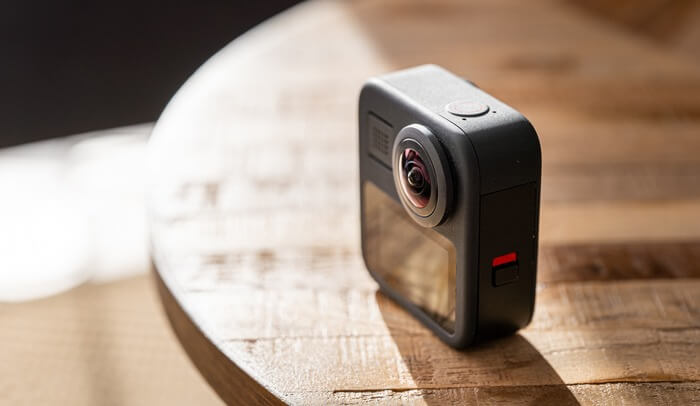
Панорамная камера GoPro MAX заменила модель Fusion. Её обновлённый интерфейс позволит любому пользователю, от новичка до опытного оператора, легко управляться с камерой.
От подобной высококлассной техники мы ждём таких же первоклассных результатов, но прежде чем их получить, необходимо тщательно и корректно настроить камеру перед первыми съёмками.

«Преднастройка»
Перед тем, как мы приступим к настройке камеры, важно убедиться, что её аккумулятор полностью заряжен, а в соответствующий слот вставлена совместимая с GoPro MAX карта памяти.
Восстановление потенциала батареи занимает порядка 3-х часов, что же касается карты, непосредственно эта модель камеры работает со всеми существующими картами памяти — от microSD до microSDXC, максимальной ёмкостью до 256 ГБ класса 10/UHS-I.
Съёмная батарея и карта флэш-памяти размещаются в отведённом для этого «отсеке», который открывается обычным сдвигом переключателя и оттягиванием самой дверцы. Вставляем расходники, закрываем дверцу и защелкиваем переключатель.
Следующий шаг — включаем камеру, осуществляется это нажатием кнопки «mode». Далее переходим к настройке.

Настройка
Существует два метода управления камерой MAX:
- голосовое;
- используя сенсорный экран и кнопки.
Важно отметить, что удалённое управление через приложение Quik даст вам большую манёвренность, рассмотрим, как происходит его работа.
I. Загружаем приложение Quik:
Его можно скачать через магазин App Store/Google Play, в зависимости от операционной системы вашего смартфона.

II. Синхронизируем со смартфоном:
Включаем камеру и переходим в «параметры». Находим вкладку «подключения», заходим в «подключить устройство», выбираем наше приложение.
Далее идём по инструкции, которая отобразится на экране камеры перед привязкой к ней смартфона.
P. S. Не забываем, что ваш телефон также должен быть полностью заряжен, так как вероятнее всего потребуется включение на нём функции Bluetooth.
III. Присваиваем камере имя:
После завершения процесса синхронизации вам предложат переименовать вашу GoPro. Это делать совсем не обязательно, но для удобства работы, мы рекомендуем всё же присвоить экшн-камере личный никнейм.
IV. Обновляем прошивку:
Не забывайте регулярно обновлять прошивку, которая в свою очередь значительно повышает производительность камеры MAX.
Обновление камеры может включать в себя какие-то новые функции, улучшение функциональности, повышение удобства использования и другое.
P. S. При загрузке обновления камера должна быть обязательно включена.
V. Управляем камерой дистанционно:
Нажимаем кнопку «контроль над GoPro», появляется сообщение о том, что WiFi-соединение не может получить доступ в Интернет, игнорируем данное сообщение нажатием на «ОК».
После этих действий дисплей смартфона начнет дублировать экран камеры.
VI. Выбираем режим съёмки:
Для выбора режима съёмки на экране камеры необходимо провести пальцем в левую или правую сторону.
Для выполнения этого же действия на смартфоне нужно нажимать значки для перехода между режимами внизу дисплея телефона.
VII. Разбираемся с настройками:
В приложении на телефоне нажимаем значок «гаечный ключ», нам отобразятся все доступные настройки камеры.
Можно установить управление голосом, включить GPS, настроить яркость дисплея, изменить дату, оценить потенциал батареи и т. д.
Чтобы открыть параметры камеры и перейти к настройкам на самой камере необходимо лишь провести вниз с верхней части, а затем нажать значок «параметры».

VIII. Переходим от режима 360 градусов к экшн-камере:
Как понять, что камера уже в сферическом режиме?
Изначально под значком «гаечный ключ» можно заметить значок «глобуса» — он и укажет нам, что камера снимает в сферическом режиме.
Для перехода в другой режим, а именно режим экшн-камеры, касаемся «глобуса», изображение автоматически перейдёт на стандартное.
Переключение между линзами камеры происходит при нажатии иконки со стрелками в форме круга.
Проведение выше перечисленных шагов происходит аналогично, как на камере, так и в приложении на смартфоне.
IX. Просматриваем снятый контент:
Воспроизвести полученные материалы возможно путем нажатия на крайний полученный снимок, либо ролик, которые будут отображены слева внизу экрана приложения на телефоне.
Сделать то же самое на MAX можно протянув пальцем вверх по экрану с нижнего края.
X. Выключаем камеру:
Для завершения работы камеры на смартфоне, нажимаем на значок кнопки питания справа вверху экрана. Или нажимаем и удерживаем кнопку «mode» непосредственно на камере.
Регулировка видеорежима на GoPro MAX
Настройка видеорежимов на камере происходит достаточно просто и быстро, а все действия, которые мы перечислим ниже, применимы как на камере, так и в приложении на телефоне.
Слева в нижней части экранов располагается значок, который показывает нам включенный на данный момент режим съёмки: «камера» — режим экшн-камеры, «глобус» — сферический режим.
С правой стороны от значка мы можем задать нужное разрешение и частоту кадров.
Выбираем панель, а затем нажимаем на «карандаш» для корректировки настроек.
После того, как мы провалимся в меню параметров, возникнет достаточно обширное количество опций, подлежащих изменению.
Можно настроить, как разрешение, так и длину короткого клипа и объективы.
Параметры доступны для регулировки в обоих режимах.
