
Korg AX3000G. Руководство пользователя
1
О
Оф
фи
иц
ци
иа
ал
лььн
ны
ый
й и
и ээк
ксск
кл
лю
юззи
иввн
ны
ый
й д
ди
исст
тр
ри
иб
бьью
ют
то
ор
р к
ко
ом
мп
па
ан
ни
ии
и K
Ko
orrg
g н
на
а т
теер
рр
ри
ит
то
ор
ри
ии
и Р
Ро
осссси
ии
и,, сст
тр
ра
ан
н
Б
Ба
ал
лт
ти
ии
и и
и С
СН
НГ
Г —
— к
ко
ом
мп
па
ан
ни
ия
я A
A&
&T
T T
Trra
ad
dee..
Д
Да
ан
нн
но
оее р
руук
ко
овво
од
дсст
твво
о п
пр
реед
до
осст
та
аввл
ля
яеет
тсся
я б
беессп
пл
ла
ат
тн
но
о..Е
Ессл
ли
и ввы
ы п
пр
ри
ио
об
бр
реел
ли
и д
да
ан
нн
ны
ый
й п
пр
ри
иб
бо
ор
р н
нее уу
о
оф
фи
иц
ци
иа
ал
лььн
но
огго
о д
ди
исст
тр
ри
иб
бьью
ют
то
ор
ра
а ф
фи
ир
рм
мы
ы K
Ko
orrg
g и
ил
ли
и а
аввт
то
ор
ри
иззо
овва
ан
нн
но
огго
о д
ди
ил
леер
ра
а к
ко
ом
мп
па
ан
ни
ии
и A
A&
&T
T T
Trra
ad
dee,,
к
ко
ом
мп
па
ан
ни
ия
я A
A&
&T
T T
Trra
ad
dee н
нее н
неессеет
т о
от
тввеет
тсст
тввеен
нн
но
осст
ти
и зза
а п
пр
реед
до
осст
та
аввл
леен
ни
иее б
беессп
пл
ла
ат
тн
но
огго
о п
пеер
реевво
од
да
а н
на
а
р
руусссск
ки
ий
й я
яззы
ык
к р
руук
ко
овво
од
дсст
твва
а п
по
ол
лььззо
овва
ат
теел
ля
я,, а
а т
та
ак
кж
жее зза
а о
оссуущ
щеесст
тввл
леен
ни
иее гга
ар
ра
ан
нт
ти
ий
йн
но
огго
о ссеер
рвви
иссн
но
огго
о
о
об
бссл
лууж
жи
ивва
ан
ни
ия
я..
©
© ®
® A
A&
&T
T T
Trra
ad
dee,, IIn
ncc..
Гарантийное обслуживание
По всем вопросам, связанным с ремонтом или сервисным обслуживанием гитарного процессора эффектов
AX3000G, обращайтесь к представителям фирмы Korg — компании A&T Trade.
Телефон для справок (095) 796-9262; e-mail: synth@attrade.ru
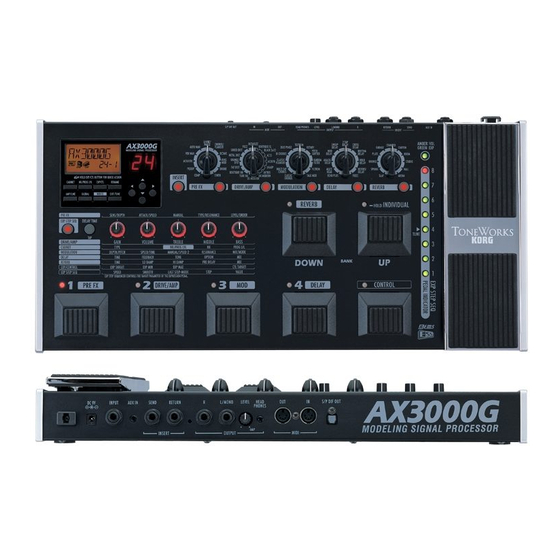
Korg AX3000G
Руководство пользователя
Гитарный процессор эффектов
- Manuals
- Brands
- Korg Manuals
- Music Pedal
- ToneWorks AX3000G
- Service manual
-
Contents
-
Table of Contents
-
Bookmarks
Quick Links
AX3000G / AX3000B
CONTENTS
Block Diagram
Circuit Diagrams
Test Mode Instruction : Page 6 — 13
Parts List
S S
e e
r r
v
i i
c c
e e
M M
v
S
e
r
v
i
c
e
M
: Page 2
: Page 3 — 5
: Page 14 — 17
an
u u
a a
l l
a
n
a
n
u
a
l
Issued date: February 3
Issued by: KORG Inc.
1st Edition
rd
, 2006
Related Manuals for Korg AX3000G
Summary of Contents for Korg AX3000G
-
Page 1
AX3000G / AX3000B CONTENTS Block Diagram : Page 2 Circuit Diagrams : Page 3 — 5 Test Mode Instruction : Page 6 — 13 Parts List : Page 14 — 17 1st Edition Issued date: February 3 , 2006 Issued by: KORG Inc. -
Page 2
X-3570_BLK.sch-1 — Thu Dec 08 14:53:38 2005… -
Page 6
AX3000G / 3000B TEST MODE instructions How to start Turn the power on by pressing following switches for each operation as follows. LCD shows AX3000G (or AX3000B) and software version number. Each checking mode starts when you release from those switches. Switches (to press) Modes Internal check →… -
Page 7
1. 2217.461047Hz (C#7) TUNER HI 6. TUNER 2. 25.9565436Hz (G#0) TUNER LO After NG occurred on INTERNAL CHECK, you can resume by pressing AMP/LINE switch and the following switch for each case; Switch How to resume INTERNAL CHECK CUR_LEFT Reexamine the NG step CUR_RIGHT Skip the NG step and proceeds to next step. -
Page 8
2. L->L , RETURN SW On DSP So1L (0.031(=1/2*16)) —> DSP Si1L (0.338713 +-30%) INSERT(*1/2) +——> PHONE L ¦ ¦ CODEC (AK4522) ¦ +—> PHONE R ¦ ¦ +——-+——-+ ¦ ¦ IN —+(—>)+— *16 —>¦ Ain L ¦ AoutL ¦—-+-¦——> OUT-L ↑… -
Page 9
INTERNAL CHECK — 6.TUNER Output sine wave from AX1L of DSP2 Internal Check 6. TUNER ( PHONE—>INPUT is needed to be connected by the testing cable. When the error occured, «TUNER HI», «TUNERLO»(LCD) will be shown. Operation Check Initial Item Initial Display(LED) Display(LCD) 1. -
Page 10
LED BANK LED SW All Lighting 1 CABINET All Lighting 2 NR/PROG LVL All Lighting 3 EXP/CTL All Lighting 4 RENAME All Lighting 5 AMP/LINE All Lighting 6 GLOBAL All Lighting 7 WRITE All Lighting 8 EXIT/TUNER All Lighting 9 CUR_LEFT All Lighting 10 CUR_UP All Lighting 11 CUR_RIGHT All Lighting 12 CUR_DOWN… -
Page 11
When hold down #AMP/LINE Switch and press WRITE, EXIT/TUNE, it is possible to move the step. Operation Check 5. VOLUME A/D «VOL KNOB»(LCD) 1. GAIN: Turn the knobs of AX3000G(or VOLUME:AX300B) to MAX(Most Right) and check that the DOT of BANK LED can be lighting. 2. Turn it to Minimum(Most Left). -
Page 12
Try the same test following the process below. 2. VOLUME:AX3000G(GAIN/MID FREQ:AX3000B) 3. TREBLE:AX3000G(BASS/DIRECT:AX3000B) 4. MIDDLE:AX3000G(MIDDLE:AX3000B) 5. BASS:AX3000G (TREBLE/TONE:AX3000B) When hold down #AMP/LINE Switch and press WRITE, EXIT/TUNE, it will be able to move the step. Operation Check 6. Pedal Calibration «PEDAL»(LCD) 1_1. -
Page 13
MIDI Check(Internal check item 7) Just before start checking, connect «MIDI IN» and «MIDI OUT». Hold down AMP/LINE Switch and WRITE Switch and turn on(?). If there is no problem, the display shows «b1″(BANK LED). Testing Cable ——————————————————————————— (Testing Cable 1) PHONES Jack -> INPUTJack [PHONES] (mini stereo) [INPUT](mono phone) PHONE R —(100Ω)—+… -
Page 14
PART CODE PART NAME NOTE Q’TY 500304000070 TRANSISTOR 2SA812-T1B M5-7 M6 RANK (S) KLM-2569/70 AX-3000G 500304020150 TRANSISTOR 2SC1623-T1B AL6 (S) KLM-2569/70 AX-3000G 500304050220 TRANSISTOR DTC114ESA TP (S) KLM-2568 AX-3000G 500304050240 TRANSISTOR DTA114ESA TP (LEAD) (D) KLM-2568 AX-3000G 500304050250 TRANSISTOR DTC114EUA T106 (SC-70) (S) KLM-2569/70 AX-3000G 500314001800 DIODE 1SS355 TE17 (S) -
Page 15
PART CODE PART NAME NOTE Q’TY 510374520002 TACT SWITCH SKHHDTA010 13MM (D) KLM-2568 AX-3000G 510374520008 TRIMER RH0614CN4J (33K) (D) KLM-2569/70 AX-3000G 510374522010 TACT SW TC-0408T-A00 (D) KLM-2568 AX-3000G 510402511508 EMI BEADS BLM18AG102SN1 (1608) (S) KLM-2569/70 AX-3000G 510405500013 LCD A77A009X AX-3000G 510450520502 PHONE JACK EJS-5-1035B (MINI STEREO) (D) KLM-2569/70 AX-3000G… -
Page 16
PART CODE PART NAME NOTE Q’TY 500304000070 TR 2SA812-T1B (M5-7) (TS) KLM-2569/70 AX-3000B 500304020150 TR 2SC1623-T1B (L7) (TS) KLM-2569/70 AX-3000B 500304050220 TR DTC114ESA TP (TR) KLM-2568 AX-3000B 500304050240 TR DTA114ESA TP KLM-2568 AX-3000B 500304050250 TR DTC114EUA T106 (TS) KLM-2569/70 AX-3000B 500314001800 DIODE 1SS355 TE-17 (TS) KLM-2569/70 AX-3000B… -
Page 17
PART CODE PART NAME NOTE Q’TY 510360522510 VR R0913N1RA1-B10K L=25F KLM-2568 AX-3000B 510374520002 TACT SWITCH SKHHDTA010 13MM(D) KLM-2568 AX-3000B 510374520008 TRIMER RH0614CN4J (33K) (D) KLM-2569/70 AX-3000B 510374522010 TACT SW TC-0408T-A00 (D) KLM-2568 AX-3000B 510402511508 EMI BEADS BLM18AG102SN1 KLM-2569/70 AX-3000B 510405500013 LCD A77A009X AX-3000B 510450520016 DIN JACK DIN-520BX2(D) KLM-2569/70 AX-3000B…
This manual is also suitable for:
Ax3000b

Summary of Content for KORG AX3000G Owner’s Manual PDF
Precautions
Location Using the unit in the following locations can result in a malfunction.
In direct sunlight Locations of extreme temperature or humidity Excessively dusty or dirty locations Locations of excessive vibration Close to magnetic elds
Power supply
Please connect the designated AC adapter to an AC outlet of the correct voltage. Do not connect it to an AC outlet of voltage other than that for which your unit is intended.
Interference with other electrical devices Radios and televisions placed nearby may experience reception interference. Operate this unit at a suitable distance from radios and televisions.
Handling To avoid breakage, do not apply excessive force to the switches or controls.
Care If the exterior becomes dirty, wipe it with a clean, dry cloth. Do not use liquid cleaners such as benzene or thinner, or cleaning compounds or ammable polishes.
Keep this manual After reading this manual, please keep it for later reference.
Keeping foreign matter out of your equipment Never set any container with liquid in it near this equipment. If liquid gets into the equipment, it could cause a breakdown, re, or electrical shock. Be careful not to let metal objects get into the equipment. If something does slip into the equipment, unplug the AC adapter from the wall outlet. Then contact your nearest Korg dealer or the store where the equipment was purchased.
THE FCC REGULATION WARNING (for U.S.A.) This equipment has been tested and found to comply with the limits for a Class B digital device, pur- suant to Part 15 of the FCC Rules. These limits are designed to provide reasonable protection against harmful interference in a residential installation. This equipment generates, uses, and can radiate radio frequency energy and, if not installed and used in accordance with the instructions, may cause harmful interference to radio communications. However, there is no guarantee that interfer- ence will not occur in a particular installation. If this equipment does cause harmful interference to radio or television reception, which can be determined by turning the equipment off and on, the user is encouraged to try to correct the interference by one or more of the following measures:
Reorient or relocate the receiving antenna. Increase the separation between the equipment and receiver. Connect the equipment into an outlet on a circuit different from that to which the receiver is
connected. Consult the dealer or an experienced radio/TV technician for help.
Unauthorized changes or modication to this system can void the users authority to operate this equipment.
* Company names, product names, and names of formats etc. are the trademarks or regis- tered trademarks of their respective owners.
CE mark for European Harmonized Standards CE mark which is attached to our companys products of AC mains operated apparatus until Decem- ber 31, 1996 means it conforms to EMC Directive (89/336/EEC) and CE mark Directive (93/68/EEC). And, CE mark which is attached after January 1, 1997 means it conforms to EMC Directive (89/336/ EEC), CE mark Directive (93/68/EEC) and Low Voltage Directive (73/23/EEC). Also, CE mark which is attached to our companys products of Battery operated apparatus means it conforms to EMC Directive (89/336/EEC) and CE mark Directive (93/68/EEC).
Table of Contents Introduction ……………………………………………………………………………………. 1
Welcome Aboard! ……………………………………………………………………………………….1
Main Features…………………………………………………………………………………………….1
A Guitarists Guided Panel Tour ……………………………………………………….. 3 Front panel…………………………………………………………………………………………………3
Effect edit section ………………………………………………………………………………..3 Parameter Edit section …………………………………………………………………………5 The Program Write/Exit section and Other settings…………………………………..5 Display/Cursor section………………………………………………………………………….6 Bank display ……………………………………………………………………………………….7 Bank/Program select section …………………………………………………………………8 Effect Control section……………………………………………………………………………8 ESS/Pedal indicator/Tuner display …………………………………………………………9
Rear panel ……………………………………………………………………………………………….10 Power supply …………………………………………………………………………………….10 Inputs and Outputs …………………………………………………………………………….10 MIDI …………………………………………………………………………………………………11 S/P DIF OUT……………………………………………………………………………………..11
Setup…………………………………………………………………………………………….. 12 Output settings………………………………………………………………………………………….12
Output select function ………………………………………………………………………….12
Basic connections……………………………………………………………………………………..12 Example of connection to a guitar amp (or amps) ……………………………………13 Example of connections to a mixer or recorder ……………………………………….14
Using the AX3000G with a MIDI device or computer………………………………………14
Playing the AX3000G …………………………………………………………………….. 15 Program Select mode ………………………………………………………………………………..15
Selecting a program…………………………………………………………………………….15
Individual mode…………………………………………………………………………………………15 Operations in Individual mode ………………………………………………………………16
Activating or deactivating the Key Lock function…………………………………………….16 Activating the Key Lock function……………………………………………………………16 Deactivating the Key Lock function………………………………………………………..16
Creating and Storing your own Programs……………………………………….. 17 Signal path ……………………………………………………………………………………………….17
Creating your own Program………………………………………………………………………..17
Naming a program (rename)……………………………………………………………………….19
Storing a program ……………………………………………………………………………………..19
Restoring a setting to its original value (Original Value) ………………………………….20
Tuner (Bypass, Mute)……………………………………………………………………… 21 Tuning procedure………………………………………………………………………………………21
Calibrating the tuner…………………………………………………………………………………..22
Explanations of the Effect Types …………………………………………………….. 23 A. DRIVE/AMP models ………………………………………………………………………………23
Drive models………………………………………………………………………………………23 Amp models……………………………………………………………………………………….24
B. CABINET models ………………………………………………………………………………….25
C. PRE effect ……………………………………………………………………………………………26
D. MOD (Modulation) effects ………………………………………………………………………30
E. DELAY effects ………………………………………………………………………………………34
F. REVERB effects ……………………………………………………………………………………38
Using the expression pedal to control parameters ………………………….. 40 Expression pedal settings…………………………………………………………………………..40
Expression Target Quick Assign……………………………………………………………40 Setting the Expression Target ………………………………………………………………41
Control switch settings ……………………………………………………………………………….43 Switching each effect on/off………………………………………………………………….43 Using TAP TEMPO to set a parameter…………………………………………………..43 Effect control………………………………………………………………………………………43 Controlling ESS ………………………………………………………………………………….43
Adjusting the sensitivity of the pedal…………………………………………………………….44
Using ESS to control a parameter……………………………………………………. 45 ESS parameters …………………………………………………………………………………45 Specifying the target parameter controlled by ESS………………………………….46 Example ESS settings …………………………………………………………………………46 Using the control switch to operate ESS ………………………………………………..47
Control via MIDI …………………………………………………………………………….. 48 Connecting a MIDI Device or Computer ……………………………………………………….48
Setting the MIDI Channel (GLOBAL MIDI CH)…………………………………………….49
Program Change (GLOBAL PCHG OUT) …………………………………………………..49
Control Change (GLOBAL CCHG I/O) ……………………………………………………….49
Parameter Change (GLOBAL SYEX OUT) …………………………………………………50
Backing up and Restoring Program Data (GLOBAL DUMP CUR, DUMP ALL) ……………………………………………………….51
Backing Up ………………………………………………………………………………………..51 Restoring …………………………………………………………………………………………..52
Restoring the Factory Preset Programs…………………………………………… 53
Troubleshooting ……………………………………………………………………………. 54
Specifications………………………………………………………………………………… 56
Appendix ………………………………………………………………………………………. 57 Effect parameters………………………………………………………………………………………57
Index …………………………………………………………………………………………….. 59
In tro
du cti
on Pa
ne l T
ou r
Se tu
p Pl
ay in
g Cr
ea tin
g an
d St
or in
g Ef
fe ct
Ty pe
Pe da
ls ES
S x
MI DI
/D IG
ITA L
Fa cto
ry se
tti ng
s Tr
ou bl
e- sh
oo tin
g Sp
ec .
Tu ne
r Ap
pe nd
ix
Introduction
WELCOME ABOARD! any thanks for adding the TONEWORKS Modeling Signal Processor AX3000G to your sonic arsenal. Whether youre playing live or recording in the studio, were sure itll give you countless hours of great guitar tones
that will feel as good as they sound!
To maximize your chances of enjoying a long and toneful relationship with your AX3000G, please read this manual at least once, and (as they say), use the prod- uct as directed. Keep the manual for future reference after youve read it; youll want to re-read it later at some point to pick up cool tips you may have missed the rst time around.
MAIN FEATURES Detailed and powerful modeling sounds delivered by Korgs REMS modeling
technology.
72 different modeling effect variations are built-in, and you can use up to seven different effects simultaneously (including noise reduction). You can also use insert effects at the same time.
Use the effect model select knobs to instantly change your selection for each of the ve effect categories (pre-effect, drive/amp, modulation, delay, reverb).
You can connect your own external effect device(s) as an insert effect. A sound you create using the AX3000Gs modeling effects (including the on/off
status of an external effect) can be saved as a program. Internal memory can hold 96 of your own original programs, and 32 preset programs are provided.
Theres also an Individual Mode that lets you use the foot switches to individu- ally turn each effect on/off.
You can assign the expression pedal to control a variety of effect parameters, as well as using it as a wah pedal or volume pedal a great feature for live perfor- mances.
Theres a Quick Assign function that makes it easy to assign parameters to the expression pedal.
M
What is ?
(Resonant structure and Electronic circuit Modeling System) is KORGs proprietary sound modeling technology which precisely reproduces the complex character and nature of both acoustic and electric instruments as well as electronic circuits in real world envi- ronments. emulates a wide variety of sound generation char- acteristics including instrument bodies, speakers & cabinets, acoustic elds, microphones, vacuum tubes, transistors, etc.
The AX3000G features an Expression Step Sequencer (abbreviated as ESS in this manual) that provides step control of a variety of effect parameters, giving you new possibilities of sounds that were unavailable until now.
The delayed sound can be maintained when you switch between programs that have the same delay type and TIME parameter settings. (The HOLD function of HOLD DELAY or the FREEZ function of the FREEZ effect assigned to the con- trol switch will be cancelled at this time.) Reverb can also be maintained when you switch between programs of the same reverb type.
The AX3000G provides a control switch that allows you to do things like set the delay time via TAP TEMPO, switch insert effects on/off, or switch the speed of a rotary speaker … again, must-have features for live performance.
An Auto Chromatic Tuner with a highly-visible LED indicator is built-in, letting you tune while bypassed or muted.
AUX IN jacks let you play along with the playback from a connected audio device.
S/P DIF optical output jack and MIDI IN/OUT jacks provide great potential for recording and expansion.
You can use the AX3000G Sound Editor editor/librarian software to visually edit the AX3000Gs numerous parameters, and to save programs. Contact a Korg service center for details on how to obtain this software and about its oper- ating requirements. You can download the software from the following website.
*http://www.korg.co.jp
In tro
du cti
on Pa
ne l T
ou r
Se tu
p Pl
ay in
g Cr
ea tin
g an
d St
or in
g Ef
fe ct
Ty pe
Pe da
ls ES
S x
MI DI
/D IG
ITA L
Fa cto
ry se
tti ng
s Tr
ou bl
e- sh
oo tin
g Sp
ec .
Tu ne
r Ap
pe nd
ix
A Guitarists Guided Panel Tour Here were going to learn about the buttons and other controls on the AX3000Gs top and rear panel.
FRONT PANEL
EFFECT EDIT SECTION
1.1 Effect Category buttons Use these buttons to select the effect category you want to edit using value knobs 15, or to switch individual effects on/off. The button for an effect will be lit if that effect is on, blinking while that effect is being edited, or dark if that effect is turned off.
1
2
3
4 5
6 7
8
1
1.2
1.1 1.31.4 1.5 1.6 1.7
When you press a button, its LED will blink; now you can use value knobs 15 to edit the effect parameters of that category. If you want to turn off an effect that is currently on, press the effect category button for that effect (it will blink), and then press the button again to turn the effect off (the LED will go dark); the display will indicate —OFF—.
1.2 Effect Model selectors Use these to select the effect model that you want to use for each effect cate- gory. You can choose from eleven types of pre-effects, sixteen types of drive/ amp models, and eleven types of modulation, delay, and reverb effects. When you operate a selector, its Effect Category button will light, and you can use value knobs 15 to edit its parameters.
NOTE: The parameters will be initialized when you change the effect type.
NOTE: When you change the drive/amp model type, the cabinet model will auto- matically change to an appropriate type.
1.3 INSERT button This turns an insert effect on/off. The indicator will be lit if the signal input/out- put to an external effect device is turned on, or dark if this is turned off.
1.4 CABINET button Use this button to turn a cabinet model on/off, or when you want to change the cabinet model type that was automatically chosen when you selected a drive/ amp model. To turn the cabinet model off, press the cabinet model button to make the display indicate the cabinet model name (this means that the cabinet model is on), and then press the cabinet model button once again. The display indicates —OFF— and the cabinet model will be turned off.
NOTE: If the cabinet model and the drive/amp model are both on, the LCD display shows the cabinet icon .
1.5 NR/PROG LVL (Noise reduction/Program level) button Use this button when you want to adjust the noise reduction or the level (vol- ume) of each program.
HINT: The factory program level is 5.0. For details on how to create your own sounds, refer to Creating your own Program on p.17.
1.6 EXP/CTL (Expression/Control) pedal assignment button Use this button when you want to change the assignment of the expression pedal or control switch.
HINT: For details, refer to Using the expression pedal to control parameters on p.40.
1.7 RENAME button Use this to change the program name (p.19). Use the / buttons to move between spaces (characters) in the display, and use value knob 1 or the / buttons to change the character at that space.
In tro
du cti
on Pa
ne l T
ou r
Se tu
p Pl
ay in
g Cr
ea tin
g an
d St
or in
g Ef
fe ct
Ty pe
Pe da
ls ES
S x
MI DI
/D IG
ITA L
Fa cto
ry se
tti ng
s Tr
ou bl
e- sh
oo tin
g Sp
ec .
Tu ne
r Ap
pe nd
ix
PARAMETER EDIT SECTION
2.1 Value knobs 15 Use these knobs to adjust the parameters of each effect. From the left, we refer to these as value knobs 15. These knobs edit the settings of the effect youve selected from an effect category button (when the button is blinking), as well as the settings for the cabinet, noise reduction, program level, expression pedal, ESS, and control switch settings. The LEDs will light to indicate the knobs that are currently active. The knob LED will change to blinking for the parameter that youre currently operating. However, it will not blink if theres only one knob to operate.
HINT: For details on the parameters controlled by each knob, refer to Explanations of the Effect Types on p.23.
NOTE: When youre performing a RENAME or WRITE operation or making GLO- BAL settings, you can use value knob 1 to change the value.
2.2 Delay Time Tap button You can set the delay time by pressing this button at the desired interval.
2.3 ESS button Use this button when you want to start or make settings for the ESS (Expres- sion Step Sequencer).
HINT: For details, refer to Using ESS to control a parameter on p.45
THE PROGRAM WRITE/EXIT SECTION AND OTHER SETTINGS
2
2.12.22.3
3
3.1 3.2 3.3 3.4
3.1 AMP/LINE button This button lets you make appropriate settings for the device to which your
AX3000G is connected. The icon in the display will change depending on the destination device youve selected (p.12).
3.2 GLOBAL button You can press the GLOBAL button and use the / buttons to move through the menus in the following order. After youve selected a menu item, use value knob 1 or the / buttons to edit the value.
3.3 WRITE button Use this button when you want to save the settings youve created (p.19).
3.4 EXIT/TUNE button Use this button to cancel a program save operation or a setting youve made. If the name display shows a program name, pressing this button will start up the built-in Tuner. By pressing and holding down this button, you can enable or dis- able the Key Lock function, which disables operation of the buttons, selectors, and knobs (p.16, 21).
DISPLAY/CURSOR SECTION
This area displays the program name, and the name and value of the parame- ters youre editing in the amp or effect section.
4.1 / buttons Use these to edit the value of parameters.
MIDI CH: MIDI channel setting (p.49) PCHG OUT: Program change message output setting (p.49) CCHG I/O: Control change message input/output setting (p.49) SYEX OUT: System exclusive message output setting (p.50) DUMP CUR: Send the current program data from the MIDI OUT jack (p.51) DUMP ALL: Send all of the AX3000Gs data from the MIDI OUT jack (p.51) DOUT LVL Set the S/P DIF output level in a range of ve levels;
12, 6, 0, +6, +12 [dB]
4
4.1
4.2
4.3 4.4
4.5
4.6
4.7
4.8
In tro
du cti
on Pa
ne l T
ou r
Se tu
p Pl
ay in
g Cr
ea tin
g an
d St
or in
g Ef
fe ct
Ty pe
Pe da
ls ES
S x
MI DI
/D IG
ITA L
Fa cto
ry se
tti ng
s Tr
ou bl
e- sh
oo tin
g Sp
ec .
Tu ne
r Ap
pe nd
ix
4.2 / buttons Use these to select the parameter you want to edit, or to edit the program name.
4.3 Name display Displays program names, effect names, or parameter names.
4.4 Value display This indicates the value of the parameter you are editing. If the displayed parameter value matches the unedited value (i.e., the value thats stored in the program), the Original Value icon will light. If the name display shows the program name, and the program name or BANK LED are not blinking, the bank number and program number are shown in the form of 2-1 (which in this example indicates bank 2, program 1).
4.5 OUTPUT icon This indicates the AX3000Gs output destination setting (AMP/LINE).
4.6 CABINET icon This will light when the Cabinet model is active.
4.7 EXP icon This will light when the expression pedal can be used.
4.8 Quick Assign icon This will light if youre operating a parameter that can be assigned to the expression pedal, indicating that the Quick Assign function is available.
BANK DISPLAY
5.1 Bank display This indicates the bank number. If the Tuner is operating, it indicates the note name (p.21).
5
5.1
BANK/PROGRAM SELECT SECTION
6.1 BANK UP/DOWN switches In Program Select mode (p.15), pressing Bank Up will increment the bank, and pressing Bank Down will decrement the bank. In Program Select mode, you can press and hold the Bank Up switch which turns on Individual mode (the LED located at the upper left of the switch will light green). In Individual mode, you can use the program select switches to turn the Pre-Effect, Drive/Amp model, Modulation effect, and Delay effect on/ off individually. You can also use the Bank Down switch to turn the Reverb effect on/off.
6.2 Program Select switches, Program LEDs Use these switches to select programs. The program LED located at the upper left of each switch will light red to indicate your selection. In Individual mode, you can use these switches to turn the Pre-Effect, Drive/Amp model, Modula- tion effect, and Delay effect on (LED lit green) or off individually.
EFFECT CONTROL SECTION
6
6.1
6.2
7
7.1
7.2
In tro
du cti
on Pa
ne l T
ou r
Se tu
p Pl
ay in
g Cr
ea tin
g an
d St
or in
g Ef
fe ct
Ty pe
Pe da
ls ES
S ex
MI DI
/D IG
ITA L
Fa cto
ry se
tti ng
s Tr
ou bl
e- sh
oo tin
g Sp
ec .
Tu ne
r Ap
pe nd
ix
7.1 CONTROL switch This switch controls an effect. For each program, you can assign what effect parameter this switch will control. For details, refer to Control switch settings on p.43.
7.2 EXP (Expression) pedal This controls volume, wah, or another effect parameter. For each program, you can assign just what this pedal will control (p.40). When using ESS, manual control of the sequence speed or step is assigned to this pedal. By advancing this pedal forward to press the switch thats mounted under it, you can turn the expression pedal or the effect being controlled by ESS on/off. (This switching operation is not available if the EXP pedal is controlling the volume.)
ESS/PEDAL INDICATOR/TUNER DISPLAY
8.1 ESS/Pedal indicator/Tuner display When youre using ESS, this indicates the total number of steps (LED: green) and the current step (LED: red). When youre using the expression pedal, this indicates the current position of the pedal (LED: red). When the Tuner is oper- ating, this functions as a tuning meter (LED: red or green).
NOTE: What happens when you change programs will depend on the target thats assigned to the expression pedal, as follows. If the expression pedal is assigned to VOLUME, DELAY INPUT, or REVERB INPUT, or if it is assigned to the same target as in the previous program, the pedal position will be valid immediately after the program change, and the pedal indicator will light. In other cases, the value specied within the program will be valid immediately after the program change, and the pedal indicator will be dark until you move the pedal.
8
8.1
10
REAR PANEL
POWER SUPPLY
DC9V Connect the included AC adapter here.
I
NPUTS
AND
O
UTPUTS
10.1 INPUT jack
Connect your guitar to this jack.
10.2 AUX IN jack (stereo mini)
Connect the analog output of your audio device here.
NOTE:
This convenient input jack lets you connect your CD/MP3 player or other audio device and play your guitar along with a favorite song. Use the output volume of your audio device to adjust the playback volume.
10.3 INSERT jacks (SEND, RETURN)
You can connect external effect processors or stompboxes to these jacks.
Connect SEND to the input of your external effect device.
Connect RETURN to the output of your external effect device.
10.4 OUTPUT jacks (L/MONO, R)
These are analog output jacks (balanced/unbalanced TRS). If youre using a mono output, use the L/MONO jack.
10.5 LEVEL knob
Adjusts the output level from the OUTPUT jacks and the PHONE jack.
10.6 PHONE jack (stereo mini)
Connect your headphones to this jack.
9 10 11 12
9
10
10.1 10.2 10.3 10.4 10.5 10.6
In tro
du cti
on Pa
ne l T
ou r
Se tu
p Pl
ay in
g Cr
ea tin
g an
d St
or in
g Ef
fe ct
Ty pe
Pe da
ls ES
S x
MI DI
/D IG
ITA L
Fa cto
ry se
tti ng
s Tr
ou bl
e- sh
oo tin
g Sp
ec .
Tu ne
r Ap
pe nd
ix
MIDI
11.1 MIDI OUT jack This jack transmits MIDI data. Use it when you want to control a connected external MIDI device from your AX3000G.
11.2 MIDI IN jack This jack receives MIDI data. Use it when you want to control your AX3000G from a connected external MIDI device.
S/P DIF OUT
12.1 S/P DIF OUT jack This is an optical digital jack for S/P DIF output.
11
11.1 11.2
12
12.1
Setup NOTE: You must turn off the power of all your equipment before you make connec- tions. If you ignore this warning, you may damage your guitar amp or speaker sys- tem, and may experience malfunctions!
OUTPUT SETTINGS
OUTPUT SELECT FUNCTION
Heres where to specify whether youre connecting your AX3000G to a guitar amp or to a mixer/recorder. If youre connecting the output from a guitar amp model to the input jack of your guitar amp, you must make this setting so that the necessary compensation can be applied. The TUBE OD, BOUTIQUE OD, FAT DIST, ORANGE DIST, METAL DIST, SHRED DIST, FUZZ, and OCTAFUZZ drive models are not affected by this setting, since they dont require compensation. Likewise, this setting is not used if the drive/amp model is turned off.
1. Press the AMP/LINE button.
2. Use Value knob 1 or the / buttons to select the connection destination.
AP1: Choose this setting if youre connected to a clean-sounding amp such as an open-backed US-manufactured combo amp.
AP2: Choose this setting if youre connected to an amp with a distinctive- sounding mid-range such as a UK-manufactured open-back combo amp.
AP3: Choose this setting if youre connected to a stack with a closed-back 4 x 12 cabinet(s).
Ln: Choose this setting if youre using the line output (including S/P DIF OUT), connecting directly to a recorder or to the power amp input of your guitar amp.
If you select AP1, AP2, or AP3, the LCD display will show the to AMP portion of the OUTPUT icon . If you select Ln, the display will indicate to LINE.
NOTE: The amps mentioned above are general examples. The best setting may differ depending on the type of amp youre using, and how it is set.
BASIC CONNECTIONS 1. Use audio cables to connect the AX3000Gs OUTPUT L/MONO and R jacks to
a mixer/recorder or guitar amp (p.14). If desired, you can also connect an external effect processor. To do this simply connect SEND to the input of your external processor, and RETURN to the output of your external processor.
NOTE: If youre making connections in mono, use the OUTPUT L/MONO jack. However to take full advantage of your AX3000G, we strongly recommend that you use stereo connections.
In tro
du cti
on Pa
ne l T
ou r
Se tu
p Pl
ay in
g Cr
ea tin
g an
d St
or in
g Ef
fe ct
Ty pe
Pe da
ls ES
S In
de x
MI DI
/D IG
ITA L
Fa cto
ry se
tti ng
s Tr
ou bl
e- sh
oo tin
g Sp
ec .
Tu ne
r Ap
pe nd
ix
13
NOTE:
If you want to use headphones, plug them into the PHONES jack. If you do, signal from the OUTPUT jack(s) will no longer be heard.
2.
Turn the LEVEL knob located on the rear panel of AX3000G all the way toward the left (as seen from the rear), setting the volume to 0.
3.
Plug your guitar into the rear panel INPUT jack.
4.
Connect the included AC adapter to the rear panel DC9V power supply jack, and then connect the plug to an AC outlet.
5.
To adjust the volume, turn up your amp or mixer and the AX3000Gs rear panel LEVEL knob to a desired level.
NOTE: Use the GLOBAL menu setting DOUT LVL to adjust the S/P DIF OUT out- put level.
E
XAMPLE
OF
CONNECTION
TO
A
GUITAR
AMP (
OR
AMPS
)
If you want to connect the AX3000G to your guitar amps, connect the OUTPUT L/MONO and R jacks to the inputs of your amps. Be sure to select the appropri- ate connection (p.12).
HINT:
If youre connecting the AX3000G directly before your combo amp or head, set the rear panel LEVEL knob to the maximum position.
INPUT
AX3000G
R OUTPUT L/MONO
LINE/AMP
SEND RETURN PHONES
External effect processor to your mixer/recorder or guitar amp
Headphones
Monaural phone jack INPUT
Guitar to your MIDI sequencer/computer
R OUTPUT L/MONO
AX3000G
INPUT
Guitar
INPUT INPUT Monaural phone jack
Monaural phone jack
Guitar amp(s)
Monaural phone jack
EXAMPLE OF CONNECTIONS TO A MIXER OR RECORDER
When using the AX3000G for direct-line recording, connect the OUTPUT L/ MONO and R jacks to the input jacks of your mixer or recorder. Be sure to select the appropriate connection (p.12).
HINT: If youre using a stereo connection, pan the input channels of your mixer/ recorder hard left and right respectively.
USING THE AX3000G WITH A MIDI DEVICE OR COMPUTER By using MIDI you can control the AX3000G from a sequencer or control an exter- nal MIDI device from the AX3000G. You can also save the AX3000Gs programs on a sequencer or MIDI data ler that is able to transmit and receive MIDI exclu- sive data, and then load the program data back into the AX3000G when desired.
HINT: For details on MIDI-related connections, refer to Connecting a MIDI Device or Computer on p.48.
INPUT
AX3000G
Tape Retuen
LINE IN 1 PAN L
LINE IN 2 PAN RR
OUTPUT L/MONO
Tape Send
MIC1
BAL OR
UNBAL
LINE IN 1 LOW CUT
75Hz 18dB/OCT
TRIM +10dB -40dB
10 60
U
-10dBV
MIC GAIN
LINE IN 7-8
L
R
BAL OR
UNBAL
MONO
+4 -10
LEVEL
LINE IN 9-10
L
R
BAL OR
UNBAL
MONO
+4 -10
LEVEL
LINE IN 11-12
L
R
BAL OR
UNBAL
MONO
+4 -10
LEVEL
LINE IN 13-14
L
R
BAL OR
UNBAL
MONO
+4 -10
LEVEL
PHONES
MIC2
BAL OR
UNBAL
LINE IN 2 LOW CUT
75Hz 18dB/OCT
TRIM +10dB -40dB
10 60
U
-10dBV
MIC GAIN
MIC3
BAL OR
UNBAL
LINE IN 3 LOW CUT
75Hz 18dB/OCT
TRIM +10dB -40dB
10 60
U
-10dBV
MIC GAIN
MIC4
BAL OR
UNBAL
LINE IN 4 LOW CUT
75Hz 18dB/OCT
TRIM +10dB -40dB
10 60
U
-10dBV
MIC GAIN
MIC5
BAL OR
UNBAL
LINE IN 5 LOW CUT
75Hz 18dB/OCT
TRIM +10dB -40dB
10 60
U
-10dBV
MIC GAIN
MIC6
BAL OR
UNBAL
LINE IN 6 LOW CUT
75Hz 18dB/OCT
TRIM +10dB -40dB
10 60
U
-10dBV
MIC GAIN
U
+15
U
+15
AUX 1
MON/ EFX
2 EFX
U
+15
U
+12
-15
-12
U
+15-15
PAN
SOLO
1 MUTE A LT 3 4
EQ
MID 2.5kHz
LOW 80Hz
L R
dB 10
5
U
5
10
20
U
+15
U
+15
AUX 1
MON/ EFX
2 EFX
U
+15
U
+12
-15
-12
U
+15-15
PAN
SOLO
2 MUTE A LT 3 4
EQ
MID 2.5kHz
LOW 80Hz
L R
dB 10
5
U
5
10
20
60
30
40 50
60
30
40 50
60
30
40 50
60
30
40 50
60
30
40 50
60
U
+15
U
+15
AUX 1
MON/ EFX
2 EFX
U
+15
U
+12
-15
-12
U
+15-15
PAN
SOLO
3 MUTE A LT 3 4
EQ
MID 2.5kHz
LOW 80Hz
L R
dB 10
5
U
5
10
20
30
40 50
60
U
+15
U
+15
AUX 1
MON/ EFX
2 EFX
U
+15
U
+12
-15
-12
U
+15-15
PAN
SOLO
4 MUTE A LT 3 4
EQ
MID 2.5kHz
LOW 80Hz
L R
dB 10
5
U
5
10
20
30
40 50
60
U
+15
U
+15
AUX 1
MON/ EFX
2 EFX
U
+15
U
+12
-15
-12
U
+15-15
PAN
SOLO
5 MUTE A LT 3 4
EQ
MID 2.5kHz
LOW 80Hz
L R
dB 10
5
U
5
10
20
30
40 50
60
U
+15
U
+15
AUX 1
MON/ EFX
2 EFX
U
+15
U
+12
-15
-12
U
+15-15
PAN
SOLO
6 MUTE A LT 3 4
EQ
MID 2.5kHz
LOW 80Hz
L R
dB 10
5
U
5
10
20
30
40 50
60
U
+15
U
+15
AUX 1
MON/ EFX
2 EFX
U
+15
U
+12
-15
-12
U
+15-15
PAN
SOLO
78 MUTE A LT 3 4
EQ
MID 2.5kHz
LOW 80Hz
L R
dB 10
5
U
5
10
20
30
40 50
60
U
+15
U
+15
AUX 1
MON/ EFX
2 EFX
U
+15
U
+12
-15
-12
U
+15-15
PAN
SOLO
910 MUTE A LT 3 4
EQ
MID 2.5kHz
LOW 80Hz
L R
dB 10
5
U
5
10
20
30
40 50
60
U
+15
U
+15
AUX 1
MON/ EFX
2 EFX
U
+15
U
+12
-15
-12
U
+15-15
PAN
SOLO
1112 MUTE A LT 3 4
EQ
MID 2.5kHz
LOW 80Hz
L R
dB 10
5
U
5
10
20
30
40 50
60
U
+15
U
+15
AUX 1
MON/ EFX
2 EFX
U
+15
U
+12
-15
-12
U
+15-15
PAN
SOLO
1314 MUTE A LT 3 4
EQ
MID 2.5kHz
LOW 80Hz
L R
dB 10
5
U
5
10
20
30
40 50
dB 10
5
U
5
10
20
5
U
5
10
20
U
+10
U
+20
U
+20
1
2 AUX 1 MASTER
NORMALLED
AUX 1 SELECT
AUX RETURNS
LEFT RIGHT
CLIP+28
+10
+7
+4
+2
0
-2
-4
-7
-10
-20
-30
0dB=0dBu
RUDE SOLO LIGHT
ALT 3-4
TAPE
NORMAL(AFL) LEVEL SET(PFL)
SOLO MODE
PHANTOM POWER
CONTROL ROOM / PHONES MAIN MIX
PHONES
Guitar Monaural phone jack
Mixer/recorder
Headphones
S/P DIF OUT
AX3000G
INPUT
Monaural phone jack
Digital Mixer/recorder
Headphones
Guitar
S/P DIF IN
PHONES
In tro
du cti
on Pa
ne l T
ou r
Se tu
p Pl
ay in
g Cr
ea tin
g an
d St
or in
g Ef
fe ct
Ty pe
Pe da
ls ES
S x
MI DI
/D IG
ITA L
Fa cto
ry se
tti ng
s Tr
ou bl
e- sh
oo tin
g Sp
ec .
Tu ne
r Ap
pe nd
ix
Playing the AX3000G
PROGRAM SELECT MODE (LED at the upper left of the Bank Up switch is not lit)
Settings for each effect, the expression pedal, ESS, and other functions can be given a name and stored in the AX3000G as a program. The AX3000G can hold 96 programs (24 banks x 4 programs in each bank), and all of these programs are rewritable. When the AX3000G is shipped from the factory, banks 18 contain 32 preset programs. In Program Select mode you can switch between various types of sounds by selecting the desired program.
HINT: Banks 916 and 1724 contain the same preset programs as banks 18.
SELECTING A PROGRAM
As an example, heres how to select program 2-3 (bank 2, program 3).
1. Make sure that your AX3000G is in Program Select mode. If the LED located at the upper left of the Bank Up switch is lit green, Individual Mode is selected. Press the Bank Up switch to choose Program Select mode. If the bank display shows something other than a bank (124), or if the bank display is blinking, press the EXIT/TUNER button to choose Program Select mode.
2. Press the Bank Up or Bank Down switch to select bank 2. When youre select- ing a bank, the bank number will blink in the bank display.
3. Press the program select 3 switch.
Program 2-3 will be displayed instantly. The program select 3 switch LED will light, and the bank number will also change and stay lit.
HINT: When youve selected the Bank but not the Program, the previously-selected program is still active. So if youre playing live and your next program change requires you to switch to a different bank, you can select that bank ahead of time, ensuring a timely, seamless change.
INDIVIDUAL MODE (LED at the upper left of the Bank Up switch is lit green)
In this mode you can individually turn each effect on/off just as if you were using a collection of stompboxes. You can select Individual mode from any program.
OPERATIONS IN INDIVIDUAL MODE
As an example, heres how to switch the pre-effect and reverb on/off while youre playing.
1. If the Bank Up switch LED is dark, youre in Program Select mode. Press and hold the Bank Up switch for about one second; youll enter Individual mode, and the LED above the Bank Up switch will light green. Program LEDs 14 and the LED at the upper left of the Bank Down switch will be lit green or dark to indicate the on/off status of the pre-effect, drive/amp model, modulation effect, delay effect, and reverb effect respectively.
2. Press the program select switch 1 to turn the pre-effect on/off. The LED 1 lit/ dark state indicates the on/off status of the pre-effect.
3. Press the Bank Down switch to turn the reverb on/off. The LED at the upper left of the Bank Down switch will be lit or dark to indicate the reverbs on/off state.
4. To exit Individual mode, press the Bank Up switch and the green LED will go dark (not lit)
ACTIVATING OR DEACTIVATING THE KEY LOCK FUNCTION Heres how you can use the Key Lock function to disable the AX3000Gs buttons, selectors, and knobs so they cant be accidentally changed during a live perfor- mance.
NOTE: While the Key Lock function is activated, you wont be able to operate any controls except for the switches, pedals and the EXIT button.
NOTE: The Key Lock setting is cancelled when you turn off the power; it will be dis- abled when you turn on the power once again.
ACTIVATING THE KEY LOCK FUNCTION
1. If the name display shows anything other than a program name, or if the char- acters of the program name are blinking, press the EXIT button.
2. With the program name shown in the name display, press and hold the EXIT button for at least one second. The name display will indicate KEY LOCK for one second, and then the value knob LEDs will go dark.
DEACTIVATING THE KEY LOCK FUNCTION
1. If the name display shows anything other than a program name, press the EXIT button.
2. Press and hold the EXIT button for at least one second. The name display will indicate LOCK OFF for one second, and the Key Lock function will be disabled.
In tro
du cti
on Pa
ne l T
ou r
Se tu
p Pl
ay in
g Cr
ea tin
g an
d St
or in
g Ef
fe ct
Ty pe
Pe da
ls ES
S x
MI DI
/D IG
ITA L
Fa cto
ry se
tti ng
s Tr
ou bl
e- sh
oo tin
g Sp
ec .
Tu ne
r Ap
pe nd
ix
Creating and Storing your own Programs
SIGNAL PATH
There are two ways you can do this; by tweaking an existing program or by start- ing from scratch.
CREATING YOUR OWN PROGRAM If you want to tweak an existing program, select one thats close to the sound you want. Set the CATEGORY select switches to the amp, cabinet and effects you want to use, and use value knobs 15 to adjust the sound. For example, you might start with a certain preset that has a crunchy, modern rhythm sound that you like, but create a complementary lead sound that is louder, has a bit more gain, and boosted mid-range.
Now heres how to create your own program from scratch.
NOTE: Before you proceed, you must rst perform the setup procedure described on p.12 to correctly specify the type of equipment to which your AX3000G is con- nected.
1. Select any program (p.15).
HINT: It doesnt matter which program you select, because were starting from scratch.
2. In the PRE FX, MODULATION, DELAY, or REVERB section, press all category select switches that are lit two times. This will turn off (bypass) all effects except the amp and cabinet models.
3. Use the DRIVE/AMP selector to select the drive/amp model you want to use.
4. Use value knobs 15 to adjust the GAIN, VOLUME, TREBLE, MIDDLE, BASS, and CH VOLUME as desired.
HINT: Adjust the VOLUME so that theres not too much difference in volume when the drive/amp model is switched on/off. If VOLUME is raised excessively, distortion may occur in the effects located after drive/amp.
5. When you choose an amp model, the appropriate cabinet model will be selected automatically. If you want to use the cabinet model (for example if the AX3000G is connected to a mixer or recorder), press the CABINET button to turn it on; the icon appears in the LCD display. If you want to change the cabinet model, turn value knob 1. If you dont want to use a cabinet model,
Input Insert effect Pre-effect Drive/amp cabinet
ModulationDelayReverbAmp/line selectOutput
press the CABINET button once again to turn it off; the icon will disappear from the LCD display.
6. Press the NR/PROG LVL button, and adjust NR SENS (value knob 4) so that you dont hear noise when youre not playing your guitar. The effect will become stronger as you increase the noise reduction setting (0.2, 0.410.0). If this is off, no noise reduction is applied.
HINT: Depending on the guitar youre using, raising the noise reduction excessively may cause notes to be cut off prematurely or to be delayed. Adjust the setting so that your playing doesnt feel unnatural.
7. In each section, choose the effect you want to use. For example if you want to add spring reverb, use the REVERB selector to select SPRING.
HINT: At this time, the reverb model will automatically be turned on, and the LEDs below the value knobs for each reverb parameter will light. For example, the param- eters for SPRING are TIME, LO DAMP, HI DAMP, PRE DELAY, and MIX, which are controlled by value knobs 15 respectively.
8. To adjust the reverb mix amount, use value knob 5 which controls the MIX parameter. In the same way for PRE FX, MODULATION, and DELAY effects, use the selector to choose an effect and the value knobs to adjust the parameters.
9. If you want to use an externally-connected processor as an insert effect, press the INSERT button to turn on the signal route to the external device.
HINT: In some cases, it may be easier to adjust PRE FX or an insert effect while listening to the original sound unprocessed by the modulation, delay, and reverb effects. When using PRE FX or an insert effect, make the desired amp and cabinet settings rst, and then adjust your PRE FX or insert effect settings before the remaining effects.
NOTE: For some models, the name of the parameter will differ from the names printed in the parameter lines of the edit section. The actual name is shown in the display when you turn the value knob. For details on the parameters, refer to Explanations of the Effect Types on p.23.
10. Press the NR/PROG LVL button, and adjust PROG LVL (value knob 5) so that the volume is consistent with other programs. Some effect settings may cause clipping (distortion) to occur, so lower the PROG LVL if this happens.
NOTE: The factory program level setting is 5.0.
11. If you want to continue making adjustments, simply press the select button for the model you want to edit, and turn the value knobs.
In tro
du cti
on Pa
ne l T
ou r
Se tu
p Pl
ay in
g Cr
ea tin
g an
d St
or in
g Ef
fe ct
Ty pe
Pe da
ls ES
S x
MI DI
/D IG
ITA L
Fa cto
ry se
tti ng
s Tr
ou bl
e- sh
oo tin
g Sp
ec .
Tu ne
r Ap
pe nd
ix
NAMING A PROGRAM (RENAME) Heres how you can name a program.
NOTE: The program name is saved as part of each program. If you switch to a dif- ferent program or turn off the power before you save, your settings will be lost.
1. Press the RENAME button.
2. Use the / buttons to move the cursor to the character you want to change (the selected character blinks), and use value knob 1 or the / buttons to change the character.
You can use the following characters.
3. Repeat step 2 to nish entering a name for your program.
4. When youve nished entering a name, press the EXIT button to return to the mode you were in.
STORING A PROGRAM When your tweaking has resulted in a sound youre happy with, store (write) it!
1. Press the WRITE button.
The name display shows *WRITE* and the bank display and program LEDs 14 will blink.
2. Use value knob 1 or the / buttons to select the bank you want to use, and use the / buttons to select the destination program 14.
For example if you want to store your program in 9-1 (bank 9, program 1), use value knob 1 or the / buttons to make the bank display show 9, and then use the / buttons to make the program 1 switch LED blink.
HINT: You can also select the store-destination program by using the BANK UP/ DOWN switches or the program 14 select switches.
3. Press the WRITE button once again. The program will be saved, the name display will indicate COMPLETE, and you will return to Program Select mode.
NOTE: The program writes over the previous contents of that bank/program. The program that previously occupied the number you selected in step 2 will be erased.
NOTE: If you decide not to store your new program, press the EXIT button to can- cel the procedure.
NOTE: If you switch to a different program or turn off the power without storing the program you edited, your changes will be lost.
RESTORING A SETTING TO ITS ORIGINAL VALUE (ORIGINAL VALUE) The Original Value icon in the value display gives you a way to find out the parameter values that are stored in a program. When you are using a knob or button to change the value of a parameter, the ORIG (original value) icon will appear when the value you are adjusting matches the original value stored in the program.
HINT: So, youre ipping through the programs on your new AX3000G, and you come across one you really like. Its easy to nd out exactly what settings are dialed in to get such an awesome tone just use this Original Value display fea- ture!
In tro
du cti
on Pa
ne l T
ou r
Se tu
p Pl
ay in
g Cr
ea tin
g an
d St
or in
g Ef
fe ct
Ty pe
Pe da
ls ES
S x
MI DI
/D IG
ITA L
Fa cto
ry se
tti ng
s Tr
ou bl
e- sh
oo tin
g Sp
ec .
Tu ne
r Ap
pe nd
ix
Tuner (Bypass, Mute) For your convenience, the AX3000G contains an Automatic Chromatic Tuner. The frequency of the middle A reference pitch can be adjusted (calibrated) over a range of 438 Hz445 Hz. The Bypass (all effects turned off, including noise reduction) and Mute functions are useful when you need to make settings on your guitar amp, tune your instru- ment, or swap guitars during a live performance. To activate Bypass or Mute, make sure youre in Program Select mode and proceed as follows.
To activate Bypass Press and hold down the program select switch of the currently selected program for about 0.5 seconds; all effects will be bypassed. The program LED will blink, and the name display will show BYPASS for one second.
To activate Mute Press and hold down the program select switch of the currently selected program for about 1.5 seconds; the output will be muted. The program LED will blink rapidly, and the name display will show MUTE for one second.
In either case, the Auto Chromatic Tuner will be activated. To defeat Bypass or Mute, press any desired program select switch and you will return to Program mode.
TUNING PROCEDURE 1. To activate the Auto Chromatic Tuner, you can either activate Bypass or Mute,
or press the EXIT/TUNE button while the display shows the program name. If the display does not show the program name, press the EXIT/TUNE button to make the program name appear, and then press the EXIT/TUNE button once again.
HINT: If you want to tune during a live performance, its a good idea to tune while Muted.
2. Play a string on your connected guitar, and the closest note name will appear in the bank display. Note names are shown as follows.
C C# D D# E F F# G G# A A# B
3. Tune your guitar while watching the tuner display or the meter in the name dis- play.
4. When youve nished tuning, press the EXIT/TUNE button once again or press any desired program select switch.
HINT: If you exit the Tuner by pressing a program select switch, this will also switch to the program you selected.
CALIBRATING THE TUNER When you switch the AX3000G on, the built-in tuner is automatically calibrated to A=440 Hz (a.k.a. concert pitch). If desired, you can recalibrate the tuner in the range of A = 438 Hz445 Hz.
While the tuner is active, the value display shows the frequency of the reference pitch. You can use the / buttons to calibrate this in the range of 438 Hz445 Hz.
HINT: If youve recalibrated the tuner, remember that the setting will be automati- cally reset to 440 Hz the next time you turn your AX3000G on.
The pitch is flat The pitch is correct The pitch is sharp
Tuner display Tuner display Tuner display
Name display Name display Name display
DR IV
E/ AM
P CA
BI NE
T PR
E EF
FE CT
MO DU
LA TIO
N DE
LA Y
RE VE
RB Ef
fe ct
Ty pe
Tu ne
r
Explanations of the Effect Types his section explains the AX3000Gs sixteen drive/amp models and eleven pre-effects, cabinet models, modulation, delay, and reverb effects.
A. DRIVE/AMP MODELS The drive/amp model you select here will change the character of the tone controls and their placement within the circuitry, producing the response thats unique to each model. This choice also selects an appropriate cabinet model.
* : This indicates a parameter that you can control from the expression pedal.
DRIVE MODELS
1. TUBE OD This models an overdrive pedal housed in a garish, seasick green box, that is considered an all-time classic due to the wonderfully warm tones it produces.
2. BOUTIQUE OD (BTQ OD) This models an overdrive unit named after a half-human half-horse creature appearing in Greek fables.
3. FAT DIST This models a pedal named after one of the most disliked rodents to ever walk the planet! The result is a smooth distortion rich in harmonics.
4. ORANGE DIST (OR DIST) This models a classic distortion unit manufactured in Japan and packaged in an orange box.
5. METAL DIST (METAL DS) This models a distortion unit thats ideal for metal.
6. SHRED DIST (SHRED DS) This distortion resembles the sound produced by a large amp stack.
7. FUZZ Retro, rude n raw … the name says it all.
8. OCTAFUZZ This models a legendary fuzz unit that adds a pitch one octave above the original. To get the best results, use your neck pickup and play above the 12th fret.
T
AMP MODELS
9. BOUTIQUE CL (BTQ CL) This models the Clean channel of a very expensive custom-order amp.
10. BLACK 2X12 (BLK 2X12) This models a dual channel black-faced 2×12 combo amp thats considered a must-have by country and blues players.
11. AC15 This is modelled from Channel 2 of an amazing sounding 1962 VOX AC15, which is part of our vast amp collection.
12. AC30TB This amp model produces clean sounds that are rich and jangly with a smooth yet detailed top end, and overdrives that have a glorious, throaty bark just like those classic, Class A tones that have made the original a must have in any serious players amp collection.
13. UK68P This models the High Treble channel of a 1968 UK-manufactured 50-watt amp with a plexiglass front and four inputs.
14. UK 80S This models a UK-made 100-watt single-channel head with master volume, manu- factured in 1983.
15. UK MODERN (UK MODRN) This models the high-gain channel of a modern 100-watt amp.
16. US MODERN (US MODRN) This models the high-gain channel of a 100-watt high-gain, metal-plated beast of an amp made in California.
NOTE: For the TUBE OD, BOUTIQUE OD, FAT DIST, ORANGE DIST, FUZZ, and OCTAFUZZ drive models, value knob 3 is shown in the LCD display as TONE. Also, MIDDLE (value knob 4) and BASS (value knob 5) are not used.
[1] GAIN 1.010.0 (Drive model) * Adjusts the gain. 0.010.0 (Amp model)
[2] VOLUME 0.010.0 * Adjusts the volume. [3] TREBLE 0.010.0 * Adjusts the high-frequency tone. [4] MIDDLE 0.010.0 Adjusts the mid-frequency tone. [5] BASS 0.010.0 Adjusts the low-frequency tone.
DR IV
E/ AM
P CA
BI NE
T PR
E EF
FE CT
MO DU
LA TIO
N DE
LA Y
RE VE
RB Ef
fe ct
Ty pe
Tu ne
r
B. CABINET MODELS The cabinet models are associated with the drive/amp models. They will have an effect only if the drive/amp model is turned on. When you change the type of drive/amp model, an appropriate cabinet model is selected automatically.
You can change the cabinet model by pressing the CABINET button and turning value knob 1. If you dont want to use a cabinet model (for example if youve con- nected the AX3000G to a guitar amp), press the CABINET button twice to turn it off. When you do so, the cabinet icon will disappear from the LCD display.
1. TWEED 1X8 (TWD 1X8) The 8-inch Alnico speaker in this cabinet model is built into an open-backed cabi- net featuring a simple amp with a single 6V6 output valve.
2. TWEED 1X12 (TWD 1X12) This model uses a single 12-inch speaker with an Alnico magnet in an open-backed cabinet, and is made in the USA by a revered name in vintage loudspeakers.
3. TWEED 4X10 (TWD 4X10) Originally designed for bass guitar, this is an open-backed speaker cabinet using Alnico speakers, and is suitable for many different styles of rock.
4. BLACK 2X10 (BLK 2X10) Two US-made ceramic-magnet speakers in an open-backed cabinet, a great choice for blues, jazz, or country.
5. BLACK 2X12 (BLK 2X12) This models an open-backed cabinet containing ceramic-magnetic speakers that accompanied the amp on which the BLACK 2×12 amp model is based, used widely for country or blues.
6. VOX AC15TBX (AC15TBX) This is an open-back combo cabinet containing one of the famed 12-inch VOX Blue Alnico speakers, manufactured by Celestion in Ipswich, England.
7. VOX AC30TBX (AC30TBX) This open-back cabinet contains two 12-inch VOX Blue Alnico speakers wired in series at 16 ohms for even more of that great VOX tone.
8. VOX AD120VTX (AD120VTX) This is a closed-back cabinet containing two 12-inch custom-designed Celestion speakers with Neodymium magnets.
9. UK H30 4X12 (UK H30) This models a heavy-duty closed-back cabinet containing 30-watt ceramic-magnet speakers, manufactured in the UK and dating from the late 60s.
10. UK T75 4X12 (UK T75) This 4×12 closed-back cabinet model is a famous UK-built black box loaded with four modern 75-watt ceramic-magnet speakers.
11. US V30 4X12 (US V30) This models a black beast of a closed-back cabinet with ceramic-magnet speakers that comes from the same home in California as our US MODERN amp model. Its particularly popular among acionados of metal.
NOTE: Product names appearing in this manual are trademarks of their respective owners, and are not afliated with Korg Corporation. Names and descriptions of these products are provided only for the purpose of identifying specic products that were studied in the course of developing this product, or in order to describe the sound models that can be simulated.
C. PRE EFFECT The pre-effect is located in front of the drive/amp model.
* :This symbol indicates a parameter that you can control from the expression pedal.
1. COMP This is the ideal choice when you want to play smooth, clean, and consistent phrases, or when you need a bit more sustain on a lead line. It models a compres- sor pedal that was popular for its percussive clean sound.
2. PICKUP This models the way in which a pickup affects the sound. It can transform a single- coil pickup into a humbucker, a humbucker into a single-coil, or create a model in which two phase-reversed pickups are combined. A compressor is built-in.
[1] SENS 1.010.0 * Adjusts the sensitivity. Turn the knob toward the right to increase the amount of compres- sion and sustain.
[5] LEVEL 0.010.0 * Adjusts the output level.
[1] SENS 0.010.0 * Adjusts the sensitivity of the compressor. [2] PHASE 1.010.0 * Adjusts the distance of the virtual pickup
thats mixed-in. [3] PHASEMIX-10.010.0 * Adjusts the mix amount of the virtual pickup.
Settings of -100 mix the sound in reverse- phase.
DR IV
E/ AM
P CA
BI NE
T PR
E EF
FE CT
MO DU
LA TIO
N DE
LA Y
RE VE
RB Ef
fe ct
Ty pe
Tu ne
r
3. ACOUSTIC This uses the acoustic guitar modeling technology of the ToneWorks AX10A, con- verting the sound of an electric guitar into the sound of an acoustic guitar.
HINT: Single-coil pickups are recommended for best results.
4. VOX WAH This is a detailed simulation of two legendary VOX wah pedals; the V847 and the V848. You can use the CLOSE and OPEN knobs to adjust the tone when the pedal is closed and open, giving you a wide range of tonal variation.
HINT: If you select VOX WAH, the expression pedal will automatically be assigned to the MANUAL knob.
[4] TYPE OFF, H-S, S-H Selects the pickup conversion model. OFF: Pickup conversion will not be per-
formed. H-S: Single-coil sound will be transformed
into humbucking sound. S-H: Humbucking sound will be transformed
into single-coil sound. [5] LEVEL 0.010.0 * Adjusts the output level.
[1] BODY 1.010.0 * Adjusts the low-frequency tone. [2] TOP 1.010.0 * Adjusts the high-frequency tone. [4] TYPE 1, 2, 3, 4 Selects the body type.
1: M-SMALL An old-style small body, suit- able for detailed arpeggios
2: G-SMALL A small-size body with a dis- tinctive mid-range, favored by country and blues players
3: T-LARGE A large body characterized by a rened sound, suitable for pop.
4: RESO The body of a resonator guitar, suitable for slide playing
[5] MIX 0.010.0 * Adjusts the mix amount of body resonance.
[1] CLOSE 1.010.0 Adjusts the tone when the wah pedal is closed (pedal back).
[2] OPEN 1.010.0 Adjusts the tone when the wah pedal is open (pedal forward).
[3] MANUAL 1.010.0 * Adjusts the openness (position) of the wah pedal.
[4] TYPE 847/848 Selects either V847 or V848 as the wah type.
[5] ORDER PrE(PRE)/ PoS(POST)
Selects the connection order. PRE/POST connects the wah before/after the Amp Model.
5. AUTO WAH This models an auto wah unit that automatically applies a wah effect according to your picking dynamics (i.e., the strength with which you pick the strings). As with the VOX WAH, you can select either V847 or V848 as the wah type.
6. U-VIBE/PHASE (VIB/PHAS) This lets you select one of three models; a famous phase/vibrato effect with a pedal, a wide-range four-stage phaser that was made in Denmark and packaged in a black box, and a popular four-stage phaser that came in a banana-colored box. Use the TYPE knob to select the model.
HINT: If you assign the Speed to be controlled by the expression pedal, youll be able to control the vibrato speed just as on the original phase/vibrato unit with pedal thats being modeled.
7. CHORUS/FLANGER (CHO/FLNG) This is a chorus/anger unit with a standard circuit structure.
[1] SENS/POL 0u10u, 0d10d Adjusts the sensitivity of the wah to the vol- ume of your guitar.
[2] ATTACK 1.010.0 * Adjusts the response speed. [4] TYPE 847/848 Selects either V847 or V848 as the wah
type. [5] ORDER PrE(PRE)/
PoS(POST) Selects the connection order. PRE/POST connects the wah before/after the Drive/ Amp Model.
[1] DEPTH 0.010.0 * Adjusts the vibrato/modulation depth. [2] SPEED 0.110.0 [Hz] * Adjusts the vibrato/modulation speed. [3] MANUAL 1.010.0 * Adjusts the center frequency of the sweep.
MANUAL has no effect if DEPTH is set to 10.0.
[4] TYPE U-1, U-2, Or, bL Selects the type. U-1: U-VIBE set to Vibrato mode. U-2: U-VIBE set to Chorus mode. Or: Models the popular four-stage phaser. bL: Models the Danish phaser.
[5] ORDER PrE(PRE)/ PoS(POST)
Selects the connection order. PRE/POST connects the effect before/after the Amp Model.
[1] DEPTH 0.010.0 * Adjusts the modulation depth. [2] SPEED 0.110.0 [Hz] * Adjusts the modulation speed. [3] MANUAL 1.010.0 * Adjusts the center frequency of the sweep.
MANUAL has no effect if DEPTH is set to 10.
[4] RESO 0.010.0 * Adjusts the amount of resonance.
DR IV
E/ AM
P CA
BI NE
T PR
E EF
FE CT
MO DU
LA TIO
N DE
LA Y
RE VE
RB Ef
fe ct
Ty pe
Tu ne
r
8. OCTAVE This models a pedal that generates a pitch one octave below the original input, mixing it with the original sound to add thickness.
HINT: This type of effect only works with single notes; chords will confuse it.
9. RING MOD This is a ring modulator; an effect that uses an oscillator to generate a sine wave which is then multiplied with the signal from your guitar to produce new harmonics. If you assign the OSCFREQ to the expression pedal, youll be able to control the sound in unique ways while you perform.
10. DRONE This models the sympathetic strings (drone) of a sitar. Set the Key to match the song youre playing.
11. SYNTH This models a guitar synth. By combining this with an effect such as Filtron from the Modulation category, you can simulate the sound of an analog synthesizer.
[4] DIRECT 0.010.0 * Adjusts the mix level of the original sound. [5] EFFECT 0.010.0 * Adjusts the mix level of the note one octave
below.
[2] FILTER 1.010.0 * Adjusts the lter cutoff frequency. [3] OSCFREQ 0.010.0 * Adjusts the oscillator frequency. [4] DIRECT 0.010.0 * Adjusts the mix level of the original sound. [5] EFFECT 0.010.0 * Adjusts the mix level of the effect sound.
[3] KEY AG’ Species the key of the drone. [4] RESO 1.010.0 * Adjusts the amount of resonance. [5] MIX 0.010.0 * Adjusts the mix level of the drone.
[1] SENS 1.010.0 * Adjusts the sensitivity relative to the volume of the guitar.
[2] ATCK/REL 0.010.0 * Adjusts the attack/release time. [3] OCT/WAVE -2A2C Selects the waveform and octave.
-2A2A: Square wave -2 oct. +2 oct. -2b2b: Sawtooth wave -2 oct. +2 oct. -2C2C: Sine wave -2 oct. +2 oct.
[4] PORTAMNT 0.010.0 * Adjusts the length of portamento. [5] MIX 0.010.0 * Adjusts the mix level of the synth sound.
D. MOD (MODULATION) EFFECTS Here you can select one of 11 modulation-type effects.
*: This indicates a parameter that you can control from the expression pedal.
1. CLASSIC CHORUS (CL CHORS) This models a chorus unit that has two modes (chorus and vibrato), and is best- known for being built into a guitar amp.
2. MULTI TAP CHORUS (MT CHORS) This is a chorus with independent taps for left/center/right, adding depth and spa- ciousness to your sound.
3. CLASSIC FLANGER (CL FLANG) A model of a truly classic analogue anger that unchained a highly inuential modern guitarist who many hail as the godfather of two handed tapping.
[1] DEPTH 0.010.0 * Adjusts the modulation depth. [2] SPEED 0.110.0[Hz] * Adjusts the modulation speed. [3] MANUAL 1.010.0 * Adjusts the center frequency of the sweep.
If DEPTH is set to 10, MANUAL will not func- tion.
[5] MODE 1, 2, 3 Selects the output mode. 1: Mono output. 2: Stereo mode in which the effect is panned
right, and the dry sound panned left. 3: Vibrato mode, in which only the effected
sound is output. Setting MANUAL to 10 will minimize the delay of the output.
[1] DEPTH 0.010.0 * Adjusts the modulation depth. [2] SPEED 0.110.0[Hz] * Adjusts the modulation speed. [3] TIME 0.010.0 Adjusts the delay time. [5] MIX 0.010.0 * Adjusts the mix level of the effect.
[1] DEPTH 0.010.0 * Adjusts the modulation depth. [2] SPEED 0.110.0[Hz] * Adjusts the modulation speed. [3] MANUAL 1.010.0 * Adjusts the center frequency of the sweep. If
DEPTH is set to 10, MANUAL will not func- tion.
[4] RESO 0.010.0 * Adjusts the amount of resonance. [5] MIX 0.010.0 * Adjusts the mix amount of the effect. CONTROL switch FLN TRIG If you set the FLN TRIG: CONTROL switch
setting to FLN TRIG, the LFO will be reset to the position specied by OFFSET when- ever you operate the switch. (p.43 Control switch settings)
DR IV
E/ AM
P CA
BI NE
T PR
E EF
FE CT
MO DU
LA TIO
N DE
LA Y
RE VE
RB Ef
fe ct
Ty pe
Tu ne
r
4. BI CHORUS (BI CHORS) This is a chorus model unique to the AX3000G. It provides two chorus units, CHO- RUS 1 and CHORUS 2, and lets you connect the two units not only in series or in parallel, but also to synchronize or de-synchronize the two LFOs. It produces a variety of tones that cover a range from wonderfully spacious sounds to bizarre anger-like sounds with complex modulation.
NOTE: This will not function if MODE is set to P2 or P3.
NOTE: If P2 or P3 is selected, the speed is adjusted by the SPEED 1 (value knob 2).
5. DUO PHASE (DUO PHAS) This is an amazing phaser that provides two six-stage phasers; PHASER 1 and PHASER 2. They can be connected in series (to make a pseudo-twelve-stage phaser!) or in parallel, and you can also synchronize or de-synchronize the two LFOs.
NOTE: This will not function if MODE is set to S2, P2, or P3.
[1] DEPTH 0.010.0 * Adjusts the modulation depth of CHORUS 1/2. [2] SPEED 1 0.110.0[Hz] * Adjusts the modulation speed of CHORUS 1. [3] SPEED 2 0.110.0[Hz] * Adjusts the modulation speed of CHORUS 2.
[4] RESO 0.010.0 * Adjusts the amount of resonance for CHO- RUS 1/2.
[5] MODE S/P1/P2/P3 Species the connection and LFO for CHO- RUS 1/2. S: CHORUS 1/2 are connected in series. P1: CHORUS 1/2 are connected in parallel. P2: CHORUS 1/2 are connected in parallel,
and their LFOs are synchronized. P3: CHORUS 1/2 are connected in parallel,
and their LFOs are synchronized in opposite phase (Stereo mode).
[1] DEPTH 0.010.0 * Adjusts the modulation depth of PHASER 1/2. [2] SPEED 1 0.110.0[Hz] * Adjusts the modulation speed of PHASER 1. [3] SPEED 2 0.110.0[Hz] * Adjusts the modulation speed of PHASER 2.
[4] RESO 0.010.0 * Adjusts the amount of resonance for PHASER 1/2.
[5] MODE S1, S2, P1, P2, P3 Species the connection and LFO for PHASER 1/2. S1: PHASER 1/2 are connected in series. S2: PHASER 1/2 are connected in series and
their LFOs are synchronized to create a pseudo-twelve-stage phaser.
P1: PHASER 1/2 are connected in parallel.
NOTE: If P2 or P3 is selected, the speed is adjusted by the SPEED 1 (value knob 2).
6. TEXTREM This models the popular tremolo circuit thats built into the BLACK 2×12 model. The SPREAD setting lets you produce a panning effect that spreads to left and right.
7. ROTARY This models a stereo rotary speaker. When you adjust the speed, it will take a cer- tain amount of time for the specied speed to be reached just like on an actual rotary speaker. This is because it takes several seconds for the motor that creates the rotation to accelerate or decelerate.
P2: PHASER 1/2 are connected in parallel, and their LFOs are synchronized (Stereo mode).
P3: PHASER 1/2 are connected in parallel, and their LFOs are synchronized in oppo- site phase (Stereo mode).
[1] DEPTH 0.010.0 * Adjusts the tremolo depth. [2] SPEED 1.010.0[Hz] * Adjusts the tremolo speed. [4] SPREAD 0.010.0 Adjusts the left/right spaciousness. [5] LEVEL 1.010.0 * Compensates the output level.
[1] DEPTH 0.010.0 * Adjusts the modulation depth. [2] SPEED 1 0.110.0[Hz] * Adjusts the rotational speed of the speaker. If
you assign ROT SPD to the CONTROL switch, this will be the SLOW speed. This knob is effective even if youre not using the CONTROL switch. (p.43 Control switch set- tings)
[4] SPEED 2 0.110.0[Hz] * Adjusts the rotational speed of the speaker. If you assign ROT SPD to the CONTROL switch, this will be the FAST speed. This knob will not function if youre not using the CONTROL switch. (p.43 Control switch set- tings)
[5] ACCEL 1.010.0 * Adjusts the time it takes for the rotational speed to change. With higher settings, the change will take more time.
CONTROL switch ROT SPD If you select ROT SPD as the CONTROL switch setting, the rotation speed will alter- nate between SLOW/FAST (SPEED 1/ SPEED 2) each time you press the CON- TROL switch. This lets you control the effect just as on an actual rotary speaker. (p.43 Control switch settings)
DR IV
E/ AM
P CA
BI NE
T PR
E EF
FE CT
MO DU
LA TIO
N DE
LA Y
RE VE
RB Ef
fe ct
Ty pe
Tu ne
r
8. PITCH SHIFTER (PITCH) This is a pitch shifter with a range of two octaves up or down, rivaling sophisticated rack-mounted signal processors.
NOTE: If you assign the PITCH knob to the expression pedal, you can use the pedal to control the pitch change. (p.40 Using the expression pedal to control param- eters)
9. RANDOM STEP FILTER (RND FILT) This lter randomly changes the peak frequency.
10. FILTRON This is an envelope controlled lter a lter that opens and closes according to the guitar input. By assigning the MANUAL knob to the expression pedal you can simulate Korgs TRAVELER pedal.
NOTE: If you assign the expression pedal to the MANUAL knob, the DEPTH (value knob 1) will have no effect.
[1] PITCH 24+24 * Adjusts the pitch in semitone steps. [2] FINE 50+50 * Adjusts the pitch in one-cent units. [3] TRACKING10150 [ms] Adjusts the tracking of the pitch shifter (i.e.,
how closely it will follow). Shorter settings are effective if the PITCH setting is close to 0, and longer settings are effective if the PITCH setting is close to +/24. While listening to the pitch-shifted sound, adjust this so that playing is easier.
[4] DIRECT 0.010.0 * Adjusts the level of the direct sound. [5] EFFECT 0.010.0 * Adjusts the level of the effect.
[1] DEPTH 0.010.0 * Adjusts the modulation depth. [2] SPEED 0.110.0[Hz] * Adjusts the modulation speed. [3] MANUAL 1.010.0 * Adjusts the center frequency. [4] RESO 0.010.0 * Adjusts the amount of resonance. [5] MIX 0.010.0 * Adjusts the mix level of the effect.
[1] DEPTH 0.010.0 * Adjusts the depth of the effect. [2] ATTACK 1.010.0 * Adjusts the speed of response. [3] MANUAL 1.010.0 * Sets the cutoff frequency. If DEPTH is set to
10, MANUAL will not function. [4] RESO 0.010.0 * Adjusts the amount of resonance. [5] SENS/POL 0u10u, 0d10d * Adjusts the sensitivity of response to the gui-
tar volume.
11. TALK MOD This is an envelope controlled talking modulator. The vocal character will change according to the input from your guitar.
HINT: If you assign the MANUAL knob to the expression pedal, youll be able to control the vowel sound from the pedal. In this case, DEPTH (value knob 1) will have no effect.
E. DELAY EFFECTS Here you can select one of 11 delay-type effects.
*: This indicates a parameter that you can control from the expression pedal.
1. ECHO PLUS This models one of the most respected analogue tape echo machines ever made. In the original, the echo is produced by a playback head and the exact delay time is set by varying the motor speed. Many professionals prefer these lo- units because of the warm, dark echoes they produce.
2. MULTI HEAD (MULTI HD) This is a model of a tape echo unit boasting three playback heads. The echo from each head (A, B, C) has its own feedback loop, letting you create warm and com- plex multitap echo effects.
[1] DEPTH 0.010.0 * Adjusts the depth of operation. [2] ATTACK 1.010.0 * Adjusts the speed of response. [3] MANUAL 1.010.0 * Adjusts the vocal character. If DEPTH is set
to 10, MANUAL will not function. [4] TYPE A-EO-U Selects one of the following transitions
between vowels. A-E, A-I, A-O, A-U, E-I, E-O, E- U, I-O, I-U, O-U
[5] SENS/POL 0u10u, 0d10d Adjusts the sensitivity of response to the gui- tar volume, and the direction of movement.
[1] TIME 262700[ms] * Sets the delay time. [2] FEEDBACK 0.010.0 * Adjusts the amount of feedback. [3] TONE 1.010.0 * Adjusts the tone of the delay. [4] LODAMP 0.010.0 * Adjusts the amount of low-frequency attenu-
ation. [5] MIX 0.010.0 * Adjusts the mix amount of the delay.
[1] TIME 12700[ms] Sets the delay time. [2] FEEDBACK 0.010.0 * Adjusts the amount of feedback. [3] TONE 1.010.0 * Adjusts the tone of the delay.
DR IV
E/ AM
P CA
BI NE
T PR
E EF
FE CT
MO DU
LA TIO
N DE
LA Y
RE VE
RB Ef
fe ct
Ty pe
Tu ne
r
3. ANALOG DELAY (ANLG DL) This models an analog delay that used a bucket-brigade device (BBD) instead of a tape mechanism and was known for its compactness and reliability. It is character- ized by a warmly distorted sound.
4. MOD DELAY (MOD DLY) This models Korgs rst digital delay, the SDD-3000. You can also use this to produce chorus or anger-like effects by setting a short TIME and using the LFO to modulate it.
5. SWEEP DELAY (SWEEP DL) This also models the SDD-3000. Here you can use the envelope of your guitar sig- nal to control the DELAY TIME, and by setting a short TIME and raising the FEED- BACK you can produce a distinctive anger effect. Even with conventional settings of TIME, you can produce unique effects that would not be possible with an LFO.
[4] MODE Species the combination of heads that will be used. 1: Use one head (C). 2: Use two heads (A, B). 3: Use two heads (B, C). 4: Use two heads (A, C). 5: Use three heads (A, B, C).
[5] MIX 0.010.0 * Adjusts the mix amount of the delay.
[1] TIME 12700[ms] * Sets the delay time. [2] FEEDBACK 0.010.0 * Adjusts the amount of feedback. [3] TONE 1.010.0 * Adjusts the tone of the delay. [5] MIX 0.010.0 * Adjusts the mix amount of the delay.
[1] TIME 32700[ms] * Sets the delay time. [2] FEEDBACK 0.010.0 * Adjusts the amount of feedback. [3] TONE 1.010.0 * Adjusts the tone of the delay. [4] SPEED 0.110[Hz] * Adjusts the modulation speed. [5] MIX 0.010.0 * Adjusts the mix amount of the delay.
[1] TIME 262700[ms] * Sets the delay time. [2] FEEDBACK 0.010.0 * Adjusts the amount of feedback. [3] TONE 1.010.0 * Adjusts the tone of the delay. [4] SENS 0.010.0 * Adjusts the sensitivity at which the effect
responds to the volume of your guitar. [5] MIX 0.010.0 * Adjusts the mix amount of the delay.
6. 2TAP DELAY (2TAP DLY) This is a multi-tap delay that models the Korg DL8000R digital multi-tap delay unit. Two delays with differing delay times are assigned to L and R, turning a mono input into stereo. This can also be used as a ping-pong delay.
7. CROSS DELAY (CROSS DL) This models a Korg DL8000R delay unit set to cross-feedback between LR and RL.
HINT: Ducking is an effect that automatically lowers the volume of the delay sound when you play your guitar loudly; this lets the phrase you play come through more clearly.
8. RHYTHM DELAY (RHYTM DL) This provides a DL8000R function in which the TIME of two DELAY taps is auto- matically set according to the RHYTHM you specify.
[1] TIME 12700[ms] Sets the delay time. [2] FEEDBACK 0.010.0 * Adjusts the amount of feedback. [3] TONE 1.010.0 * Adjusts the tone of the delay. [4] TAP TIME 0.010.0 Species the right delay time as a proportion of
the left delay time. [5] MIX 0.010.0 * Adjusts the mix amount of the delay.
[1] TIME 11350[ms] Species the delay time. [2] FEEDBACK 0.010.0 * Adjusts the amount of feedback. [3] TONE 1.010.0 * Adjusts the tone of the feedback. [4] DUCKING 0.010.0 * Adjusts the sensitivity of ducking relative to the
volume of the guitar.
[5] MIX 0.010.0 * Adjusts the mix level of the delay.
[1] TIME 12700[ms] Sets the delay time. [2] FEEDBACK 0.010.0 * Adjusts the amount of feedback. [3] TONE 1.010.0 * Adjusts the tone of the delay. [4] RHYTHM 1, 2, 11 Species the two-tap rhythm delay when the
delay time is set to quarter-note timing. For some settings, only one tap is used.
[5] MIX 0.010.0 * Adjusts the mix amount of the delay.
DR IV
E/ AM
P CA
BI NE
T PR
E EF
FE CT
MO DU
LA TIO
N DE
LA Y
RE VE
RB Ef
fe ct
Ty pe
Tu ne
r
9. HOLD DELAY (HOLD DLY) If you assign HOLD DLY to the CONTROL switch, youll be able to hold the delay delayed sound.
10. REVERSE DELAY (REVRS DL) This is a DIGITAL DELAY that plays the delayed sound backwards. You can get some really cool results by playing long notes in a legato fashion.
11. FREEZ This effect assigns FREEZ to the CONTROL switch. When you press the CON- TROL switch, the sound you had been playing just before that moment will be held. While this sound is being held, the direct sound will not be output. Press the CONTROL switch once again to release the effect.
[1] TIME 12700[ms] Sets the delay time. [2] FEEDBACK 0.010.0 * Adjusts the amount of feedback. [3] TONE 1.010.0 * Adjusts the tone of the delay. [5] MIX 0.010.0 * Adjusts the mix amount of the delay sound. CONTROL switchHOLD DLY If you select HOLD DLY for the CONTROL
switch, the delay sound will be held when you turn on the switch.
[1] TIME 262700[ms] Sets the delay time. [2] FEEDBACK 0.010.0 * Adjusts the amount of feedback. [3] TONE 1.010.0 * Adjusts the tone of the delay. [5] MIX 0.010.0 * Adjusts the mix balance between the delay
sound and direct sound. With a setting of 10 you will hear only the delay effect.
[1] TIME 12700[ms] Species the freeze length. [5] MIX 0.010.0 * Adjusts the mix level of the freeze effect. CONTROL switchFREEZ If you select FREEZ for the CONTROL switch,
the FREEZ function will be turned on when you turn on the switch.
F. REVERB EFFECTS Here you can select one of 11 reverb-type effects.
*: This indicates a parameter that you can control from the expression pedal.
NOTE: This table applies to the following 11 reverb effects.
1. SLAP This models the reverb of a very small space with short reverberation.
2. SPRING A model of the spring reverb system used in guitar amps ideal for surf music!
3. BOUNCE This models a spring reverb that produces a higher-density reverberation.
4. PLATE This models a type of reverb unit that works by vibrating a metal plate instead of a spring. It is adjusted to a fairly short reverb time. This reverberation is character- ized by a rapid attack, and is suitable for percussive playing.
5. GARAGE This reverb models the dense reverberation typical of a garage.
6. CHAMBER This reverb model was captured by placing a speaker and mic in an echo chamber (a specially-designed room used in the past by recording studios). This model reproduces the reverberation of a mild-sounding echo chamber.
7. CANYON This reverb model produces the type of reverberation that is characteristic of a canyon.
[1] TIME 1.010.0 * Sets the reverb time. The relation between this setting and the actual length of reverberation will differ depending on the reverb type.
[2] LO DAMP 0.010.0 * Adjusts the attenuation of the low-frequency range.
[3] HI DAMP 0.010.0 * Adjusts the attenuation of the high-frequency range.
[4] PRE DLY 070[ms] Sets the initial delay before the reverberation begins. By adjusting this setting you can clarify the denition of the original sound.
[6] MIX 0.010.0 * Adjusts the mix amount of the reverb.
DR IV
E/ AM
P CA
BI NE
T PR
E EF
FE CT
MO DU
LA TIO
N DE
LA Y
RE VE
RB Ef
fe ct
Ty pe
Tu ne
r
8. ROOM This models the reverberation of a typical room, with numerous early reections.
9. STUDIO This models the reverberation of a large room.
10. HALL This models the reverberation of a concert hall with numerous echoes.
11. ARENA This models a concert hall with smooth and dense reverberation.
Using the expression pedal to control parameters
EXPRESSION PEDAL SETTINGS The AX3000G provides a built-in expression pedal that you can use to control not only wah or volume, but a wide variety of effect parameters. For each program, you can specify which effect will be controlled, and how. The effect to which the expression pedal is assigned can be switched on/off by advancing the expression pedal all the way forward to operate the switch located under the pedal. The expression pedal LED will be lit or dark to indicate the on/off status of the effect.
NOTE: If youre using the expression pedal as a volume pedal, the LED will light amber. In this case, the switch located under the pedal has no effect. If youre using the expression pedal to control another parameter, the LED will light green.
HINT: If youve assigned a parameter to the expression pedal, operating the pedal has the same result as using the knob to edit the program. This means that when you operate the pedal, the EDIT icon will light. When you write the program, it will be written with the sound as currently specied by the position of the pedal. How- ever if the expression target is —OFF—, VOLUME, M/PITCH, D/INPUT, or R/ INPUT, the program will not be edited by the pedal.
EXPRESSION TARGET QUICK ASSIGN
Heres a very easy and convenient way to set the expression target.
As an example, use the MODULATION selector to choose PITCH SHIFTER. So that the effect will be easy to hear, well initialize the PITCH SHIFTER. If PITCH SHIFTER is already selected, turn the selector to choose a different effect, and then re-select PITCH SHIFTER.
When youre editing PITCH SHIFTER, turn value knob 1 or use the / buttons to make the name display show PITCH; the icon will appear. If in this state you press and hold (for one second) the EXP/CTL button, the name display will indicate COMPLETE. The PITCH parameter has now been assigned to the expression pedal, letting you control the amount of PITCH SHIFT. At this time, the
icon will appear in the LCD display. If you want to make more detailed set- tings, you can press the EXP/CTL button and set the minimum value (EXP MIN, value knob 2) and maximum value (EXP MAX, value knob 3) of the target range.
NOTE: If you change the effect type of a parameter that is assigned to the expres- sion target (i.e., to be controlled by the expression pedal), the target will be initial- ized to a setting of —OFF—. (However, D/INPUT, R/INPUT are exceptions.)
HINT: If youve selected VOX WAH as the pre-effect type, P/MANUAL (wah posi- tion) is automatically assigned to the expression pedal. In this case if you change the pre-effect back to another type without performing any other operation, the Tar- get, Min, and Max settings will automatically revert to their previous state. However if a pre-effect parameter was the target, it will be set to —OFF— rather than revert to its previous state.
In tro
du cti
on Pa
ne l T
ou r
Se tu
p Pl
ay in
g Cr
ea tin
g an
d St
or in
g Ef
fe ct
Ty pe
Pe da
ls ES
S x
MI DI
/D IG
ITA L
Fa cto
ry se
tti ng
s Tr
ou bl
e- sh
oo tin
g Sp
ec .
Tu ne
r Ap
pe nd
ix
NOTE: When you change the expression target, the MIN and MAX values will be initialized.
SETTING THE EXPRESSION TARGET
Here are the items you can set.
When youve pressed the EXP/CTL button to make it blink, youll be able to set the following items by turning value knobs 13.
NOTE: You can set the above items individually for each program. If you switch to a different program or turn off the power without saving, any changes youve made will be lost.
Using the same example we described earlier when explaining Quick Assign, heres how to assign the expression pedal to control the PITCH parameter of the PITCH SHIFTER modulation effect.
1. Use the MODULATION selector to select PITCH SHIFTER. So that the effect will be easy to hear, well initialize the PITCH SHIFTER. If PITCH SHIFTER is already selected, turn the selector to choose a different effect, and then re- select PITCH SHIFTER.
NOTE: If you change the effect type of a parameter that is assigned to the expres- sion target, the target will be initialized to a setting of —OFF—. (However, D/ INPUT, R/INPUT are exceptions.)
HINT: If youve set the Pre-effect type to VOX WAH, the P/MANUAL (wah posi- tion) will automatically be assigned to expression. If you then set the Pre-effect to a different type without making any further settings, the target setting will also auto- matically return to the former setting.
2. Press the EXP/CTL button and the Modulation LED will stop blinking.
3. Use the / buttons or turn value knob 1 to make the name display read M/ PITCH. The PITCH parameter of the PITCH SHIFTER effect has now been assigned to the expression pedal. Also, the icon will appear in the LCD display.
NOTE: Unlike other parameters, PITCH is not edited when you control it from the expression pedal. This is so that the pitch will change smoothly even when MIN and MAX are set to values that are close to each other (i.e., when youve made set- tings so that the pedal produces only a small amount of pitch change).
NOTE: Nothing will be controlled if the target effect is —OFF—.
*/######: EXP expression target (value display indicates EP) Value knob 1 EXP MIN: EXP (expression pedal) target range (minimum value) Value knob 2 EXP MAX: EXP (expression pedal) target range (maximum value) Value knob 3
The expression pedal target is indicated as follows.
*/######
*: Target category
######: Target parameter
Examples
In addition to the examples weve shown here, a wide variety of expression tar- gets provided for each effect model can be freely assigned to the expression pedals.
If desired, you can make more detailed settings.
NOTE: For —OFF—, VOLUME, M/PITCH, D/INPUT, and R/INPUT, operat- ing the expression pedal does not edit the parameter.
4. Turn value knob 2 to make the name display read EXP MIN. Here you can specify the PITCH value for when the pedal is at the minimum position (pedal back). Use value knob 2 or the / buttons to adjust the setting.
5. Turn value knob 3 to make the name display read EXP MAX. Here you can specify the PITCH value for when the pedal is at the maximum position (pedal forward). Use value knob 3 or the / buttons to adjust the setting.
When you operate the expression pedal, the target parameter will change within the range you specied here.
NOTE: When you change the expression target, the MIN and MAX values will be initialized.
6. Press the EXIT switch to return to the mode you were in.
NOTE: The changes you make will not be preserved in the internal memory unless you store the program.
—OFF— — OFF (controls nothing) VOLUME — Volume pedal P/DIRECT — DIRECT (mix amount of original sound)
for a pre-effect (e.g., OCTAVE) M/SPEED — (*: M (modulation)) SPEED of a modulation effect D/INPUT — (*: D (delay)) Input level of a delay effect R/MIX — (*: R (reverb)) MIX (mix amount of reverb sound) of a
reverb effect A/GAIN — (*: A (drive/amp)) GAIN of drive/amp model
In tro
du cti
on Pa
ne l T
ou r
Se tu
p Pl
ay in
g Cr
ea tin
g an
d St
or in
g Ef
fe ct
Ty pe
Pe da
ls ES
S x
MI DI
/D IG
ITA L
Fa cto
ry se
tti ng
s Tr
ou bl
e- sh
oo tin
g Sp
ec .
Tu ne
r Ap
pe nd
ix
CONTROL SWITCH SETTINGS You can make the following control switch settings independently for each program. Press the EXP/CTL button and use value knob 5 to select the effect you want to control.
SWITCHING EACH EFFECT ON/OFF
NOTE: The CONTROL switch LEDs indicate the on/off status.
USING TAP TEMPO TO SET A PARAMETER
NOTE: The CONTROL switch LED will blink at the tempo you specify.
NOTE: The maximum tap interval is 10 seconds.
EFFECT CONTROL
NOTE: If you havent selected an applicable effect, nothing will be controlled.
CONTROLLING ESS
NOTE: ESS TAP1, ESS TAP2, and ESS TRIG will do nothing if the SPEED of the step effect is set to PEdL.
I/ON OFF External effect insertion on/off P/ON OFF Pre-effect on/off A/ON OFF Drive/Amp model on/off M/ON OFF Modulation effect on/off D/ON OFF Delay effect on/off R/ON OFF Reverb effect on/off
MOD TAP Use TAP TEMPO to set the SPEED parameter of the modulation effect
DLY TAP Use TAP TEMPO to set the TIME parameter of the delay effect
FLN TRIG LFO START TRIGGER of the CLASSIC FLANGER effect ROT SPD SPEED SW of the ROTARY effect HOLD DLY HOLD of the HOLD DELAY effect FREEZ ON of the FREEZ effect
ESS CTL1 Turn ESS on/off ESS CTL2 Turn the effect being controlled by ESS on/off ESS TAP1 Use tap tempo to specify the duration until the next step ESS TAP2 Use tap tempo to specify the length from step 1 until the
last step (if in Alternate mode, the length of one cycle back to step 1)
ESS TRIG The sequence will begin from step 1
NOTE: ESS CTL2, ESS TAP1, ESS TAP2, and ESS TRIG will do nothing if ESS is turned off.
NOTE: For ESS TAP1 and ESS TAP2, the CONTROL switch LED will blink at the specied tempo.
NOTE: The maximum tap interval is 10 seconds.
ADJUSTING THE SENSITIVITY OF THE PEDAL If you notice that advancing the AX3000Gs expression pedal does not reach the full effect or volume even when the Min and Max parameters are set to the minimum and maximum settings, or that returning the expression pedal does not reach the minimum effect or volume, you will need to perform the following adjustment so that the AX3000Gs expression pedal will be able to reach its full range of operation.
NOTE: When adjusting the sensitivity, you should use your hand to operate the pedal. Accurate adjustment may not be possible if you use your foot.
1. Turn the power OFF.
2. While holding down the EXP/CTL button and the button, turn the power on. The name display indicates EXP MAX.
3. Slowly return the expression pedal toward yourself (pedal back), and take your hand off the pedal when it stops.
NOTE: If you decide to cancel the calibration procedure, press the EXIT button.
4. Press the WRITE button. The name display indicates EXP MIN.
5. Slowly advance the expression pedal away from yourself (pedal forward), and take your hand off the pedal when it stops.
6. Press the WRITE button. The name display will indicate COMPLETE for one second, and then the AX3000G will return to normal operation. If the sensitivity could not be adjusted correctly, the name display will indicate ERROR, and will then continuously indicate EXP MAX. Repeat the procedure from step 3.
NOTE: If you are still unable to adjust the sensitivity after repeated attempts, it is possible that the AX3000G has malfunctioned. Please contact a nearby dealer.
Press slowly
Name display
Name display
Returns slowly
In tro
du cti
on Pa
ne l T
ou r
Se tu
p Pl
ay in
g Cr
ea tin
g an
d St
or in
g Ef
fe ct
Ty pe
Pe da
ls ES
S x
MI DI
/D IG
ITA L
Fa cto
ry se
tti ng
s Tr
ou bl
e- sh
oo tin
g Sp
ec .
Tu ne
r Ap
pe nd
ix
Using ESS to control a parameter SS (Expression Step Sequencer) controls a variety of effect parameters in a stepwise fashion, letting you control your sound in completely new ways. For example, you can use the step sequencer to control the SPEED
parameter of a modulation effect to create complex modulation that would not have been possible until now. You can control the MANUAL parameter of the VOX WAH or FILTRON effects to produce stepped-wah sounds, or control the PITCH of the PITCH SHIFTER effect to create arpeggio-like effects.
The AX3000Gs ESS function operates between the expression pedal and the tar- get parameter you specify. When you activate ESS, the sequencer will control the target parameter that you specied for the expression pedal, and the expression pedal will control the ESS.
ESS PARAMETERS
[1] SPEED PEdL, 0.5100 Adjusts the speed of the sequencer. Higher values produce faster speeds. If you select PEdL, youll be able to use the pedal position to switch steps.
[2] SMOOTH 0.010.0 Species the smoothness of the steps. Lower val- ues will cause the parameter to change abruptly, and higher values will make the parameter change smoothly.
[3] STEPMODE 2-F, 3-F,,,2-A,,,2-A.,,,2-r,,,2-F1,,,2-A1,,,2-A.1,,,8-A.1 (LAST STEP-MODE) Indicates the number of steps and what will hap-
pen after the last step. The STEPMODE indication in the format *-#(1) has the following signi- cance: * means the number of the last step, # indicates the mode, and 1 indicates one-shot. 4-F (4 step forward) Repeatedly advance from step 1 to step 4 .
(12341234 … etc.) 4-A (4 step alternate) Repeatedly advance from step 1 to step 4 and
then back to step 1. (1234321234321 … etc.) 4-A. (4 step alternate 2) Repeatedly advance from step 1 to step 4 and
then back to step 1. (123443211234 … etc.) 4-r (4 step random) Randomly select a step 1 through 4.
(241324122 … etc.) 4-F1 (4 step forward,1-shot) Advance from step 1 to step 4, and then stop.
(1234)
E
ESS
Expression pedal Target parameter
HINT: In the ESS display, a corresponding number of LEDs 18 will light green to indicate the last step you specify here.
NOTE: If you selected a 1 shot mode (*-#1), the parameter will return to the value specied by the setting of the effect when the steps have been completed.
HINT: When setting the STEP, you can use the / buttons to move through steps 18, and the / buttons to edit the value at each step.
SPECIFYING THE TARGET PARAMETER CONTROLLED BY ESS Specify the target parameter controlled by ESS in the same way that you specify the target parameter controlled by the expression pedal.
HINT: For details, refer to Expression pedal settings on p.40.
If a target parameter is already assigned to the expression pedal, that target parameter will be controlled (by the sequencer).
EXAMPLE ESS SETTINGS
In this example, well assume that youve made expression pedal settings to assign the PITCH parameter of the PITCH SHIFTER as the target parameter. Before you continue, assign the PITCH parameter of the PITCH SHIFTER as the target parameter for the expression pedal (see p.40).
1. Press the EXP STEP SEQ button to activate ESS.
2. Set value knob 1 SPEED to PEdL; this will stop the sequencer.
3. Use value knob 3 to specify how the sequencer will operate. For this example, choose 8-A. so that the sequencer will cycle through steps 18 and then 81.
4. Specify the value for each step. First use value knob 4 to set STEP to 1, and then use value knob 5 to specify a VALUE of 0.
5. Repeat the above action for each step 2 through 8, and set these steps to val- ues of 2, 4, 5, 7, 9, 11, and 12 respectively.
6. When youve nished making settings, try turning value knob 4. Relative to the pitch of your guitar sound, the pitch will change in a sequence of C, D, E, F, G, A, B, and C.
7. Use value knob 1 to adjust the SPEED; the sequencer will run. The eight ESS display LEDs located at the left of the pedal will light red in synchronization with the sequencer.
4-A1 (4 step alternate, 1-shot)
Advance from step 1 to step 4, then back to step 1 and stop. (1234321)
4-A.1 (4 step alternate 2, 1-shot)
Advance from step 1 to step 4, then back to step 1 and stop. (12344321)
[4], [5] STEP 18 Use value knob 4 to specify the step that you want to edit, and use value knob 5 to specify the value at that step.
In tro
du cti
on Pa
ne l T
ou r
Se tu
p Pl
ay in
g Cr
ea tin
g an
d St
or in
g Ef
fe ct
Ty pe
Pe da
ls ES
S x
MI DI
/D IG
ITA L
Fa cto
ry se
tti ng
s Tr
ou bl
e- sh
oo tin
g Sp
ec .
Tu ne
r Ap
pe nd
ix
8. As appropriate for the SPEED setting, adjust the SMOOTH setting (value knob 2) to specify how smoothly the steps change.
HINT: Use the expression pedal to control the speed of the sequencer. If the SPEED parameter is set to PEdL, you can use the expression pedal to control the step.
HINT: If you advance the expression pedal all the way forward to press the switch located underneath the pedal, the effect assigned to the target parameter will be switched on/off.
When youve nished making settings, save (write) the program. To specify the MIN and MAX settings of the sequence speed controlled by the expression pedal, activate ESS and press the EXP/CTL button; then use MIN- SPEED (value knob 2) and MAX SPEED (value knob 3) to specify the minimum and maximum settings.
USING THE CONTROL SWITCH TO OPERATE ESS You can use the control switch to control ESS operations such as start and stop. To do so, press the EXP/CTL button, and use value knob 5 to select one of the fol- lowing ways in which the control switch will control the ESS.
NOTE: ESS TAP1, ESS TAP2, and ESS TRIG will have no effect if the ESS SPEED parameter is set to PEdL.
NOTE: ESS CTL, ESS TAP1, ESS TAP2, and ESS TRIG will have no effect if ESS is turned off.
NOTE: For ESS TAP1 and ESS TAP2, the CONTROL switch LED will blink at the specied tempo.
NOTE: The maximum tap interval is 10 seconds.
NOTE: If youve selected ESS CTL1 (or CTL2), and LAST STEP-MODE is 1-shot (*-#1), the sequence will begin from step 1 each time you press the control switch, and ESS (or the corresponding effect) will automatically turn off when the last step is completed. If you press the control switch while the steps are still pro- ceeding, the sequence will re-start from step 1.
NOTE: If youve selected ESS TAP1 or ESS TAP2, and LAST STEP-MODE is 1- shot, the sequence will begin from step 1 each time you press the control switch.
ESS CTL1 Turn ESS on/off ESS CTL2 Turn the effect being controlled on/off ESS TAP1 Use tap tempo to specify the time to the next step ESS TAP2 Use tap tempo to specify the time from step 1 to the last
step ESS TRIG Start the sequence from step 1
Control via MIDI IDI stands for Musical Instrument Digital Interface, and is a world-wide standard for exchanging various types of musical data between electronic musical instruments and computers. When MIDI cables are used to con-
nect two or more MIDI devices, performance data can be exchanged between the devices, even if they were made by different manufacturers.
The AX3000G can use MIDI to communicate in the following ways with another MIDI device. You can:
Operate the AX3000G to switch programs on an external MIDI device, or switch the AX3000Gs programs from an external MIDI device. Program change
Operate a connected optional foot controller to control an external MIDI device, or use an external MIDI device to control the AX3000Gs volume or effects. Control change
Use the Sound Editor to edit parameters. Parameter change Backup (save) and restore (load) the AX3000G program data. Backing up
and restoring program data
NOTE: In order to do the above things, you need to use a MIDI cable to connect the AX3000G and your external MIDI device, and set the MIDI channels appropri- ately. Connecting a MIDI device or computer, Setting the MIDI channel
NOTE: If your external MIDI device does not recognize certain types of MIDI mes- sages, those messages cannot be used for control. Check the MIDI implementa- tion chart of the AX3000G and of your external MIDI device.
CONNECTING A MIDI DEVICE OR COMPUTER If you want to control an external MIDI device from the AX3000G, connect a MIDI cable from the AX3000Gs MIDI OUT jack to the MIDI IN jack of your external MIDI device. If you want to control the AX3000G from a MIDI sequencer or other external MIDI device, connect a MIDI cable from your external MIDI devices MIDI OUT jack to the AX3000Gs MIDI IN jack. When you connect the AX3000G to a MIDI sequencer or sound editor, data will normally be sent in both directions, so you will need to connect MIDI cables from the AX3000Gs MIDI OUT jack to the external MIDI devices MIDI IN jack and then from the devices MIDI OUT jack to AX3000Gs MIDI IN jack.
M
AX3000G
MIDI IN MIDI OUT MIDI IN
MIDI OUT
To a MIDI sequencer/computer MIDI interface NOTE: You will need a MIDI inter-
face in order to connect your com- puter with AX3000G. Some MIDI interfaces are not able to transmit or receive MIDI exclu- sive messages correctly.
In tro
du cti
on Pa
ne l T
ou r
Se tu
p Pl
ay in
g Cr
ea tin
g an
d St
or in
g Ef
fe ct
Ty pe
Pe da
ls ES
S x
MI DI
/D IG
ITA L
Fa cto
ry se
tti ng
s Tr
ou bl
e- sh
oo tin
g Sp
ec .
Tu ne
r Ap
pe nd
ix
SETTING THE MIDI CHANNEL (GLOBAL MIDI CH) In order to exchange data with an external MIDI device, your AX3000Gs MIDI channel must match the MIDI channel of your external MIDI device. Heres how to set the MIDI channel.
1. Press the GLOBAL button.
2. The name display will show MIDI CH. If a different parameter is selected, press the / buttons to change the display.
3. Use the value knob 1 or the / buttons to set your AX3000Gs MIDI channel.
4. Set the MIDI channel of your connected external MIDI device.
HINT: For details on how to set the MIDI channel of your external MIDI device, refer to its owners manual.
PROGRAM CHANGE (GLOBAL PCHG OUT) When you switch programs on the AX3000G, a program change message is trans- mitted from the MIDI OUT jack, causing an external MIDI device to switch pro- grams. Similarly, when the AX3000G receives a program change message, its program will switch automatically. Heres how you can specify whether a program change message will be transmit- ted from the MIDI OUT jack when you switch programs on your AX3000G.
NOTE: Program change numbers not used by the AX3000G will be ignored. For details on the range of program change numbers used by the AX3000G, refer to End of this manual.
1. Press the GLOBAL button.
2. Press the / buttons to make the name display show PCHG OUT.
3. Specify whether program change messages will be transmitted. Use value knob 1 or the / buttons to make the desired setting.
OFF: Program change messages will not be transmitted. On: Program change messages will be transmitted.
CONTROL CHANGE (GLOBAL CCHG I/O) When you operate the EXPRESSION pedal, Control switch or program switches of the AX3000G, control change messages will be transmitted. This means that func- tions for the corresponding control change numbers on an external MIDI device can be controlled in realtime. Similarly, when the AX3000G receives control change messages from an external MIDI device, it will be controlled in the same way as if its own foot controller were operated. For a list of the functions that can be controlled from an external MIDI device, refer to step 4. Here you can specify whether the AX3000G will transmit and receive control change messages.
1. Press the GLOBAL button.
2. Press the / buttons to make the name display read CCHG I/O.
3. Specify whether all control change messages will be transmitted or received. Use value knob 1 or the / buttons to make your choice. On allows transmitting and receiving. OFF disables transmitting and receiv- ing.
NOTE: If this setting is OFF, no control change messages will be transmitted or received even if you specify individual control change numbers in step 4.
4. Simultaneously press both / buttons to access the screen where you can set control numbers individually. Use the / buttons to select each control- ler.
The controllers will be selected in the following order.
5. For each controller, specify whether the AX3000G will transmit and receive con- trol change messages. If you want the AX3000G to transmit and receive mes- sages for a controller, specify the control change number. Select a controller, and use value knob 1 or the / buttons to make the desired setting.
OFF: Control change messages will not be transmitted or received.
CC00CC95: When you operate a controller, messages of the specied control change number 0095 will be transmitted. Similarly, the AX3000G will be controlled when it receives messages of the same control change number from an external MIDI device.
6. To return to the screen where you specify transmit or receive for all control change messages, press both / buttons simultaneously.
PARAMETER CHANGE (GLOBAL SYEX OUT) When you operate the AX3000Gs knobs or buttons to edit the value of a parame- ter, system exclusive such as parameter changes are transmitted. If you want the AX3000Gs parameters to be transmitted to an external device, turn the SYEX OUT setting On. Normally, you will turn SYEX OUT on when using the Sound Editor. This setting species whether the AX3000G will transmit parameter changes.
1. Press the GLOBAL button.
2. Press the / buttons to make the name display read SYEX OUT.
EXP PDL Expression pedal control CTL PDL Control switch (pedal) on/off PRE FX PRE FX effect on/off D/AMP FX DRIVE/AMP effect on/off MOD FX MODULATION effect on/off DELAY FX DELAY effect on/off REVRB FX REVERB effect on/off
In tro
du cti
on Pa
ne l T
ou r
Se tu
p Pl
ay in
g Cr
ea tin
g an
d St
or in
g Ef
fe ct
Ty pe
Pe da
ls ES
S x
MI DI
/D IG
ITA L
Fa cto
ry se
tti ng
s Tr
ou bl
e- sh
oo tin
g Sp
ec .
Tu ne
r Ap
pe nd
ix
3. Specify whether parameter change messages will be transmitted. Use value knob 1 or the / buttons to make your choice.
NOTE: When the AX3000G receives parameter changes or other system exclusive messages, its parameters, modes, or program numbers will change regardless of the SYEX OUT setting.
BACKING UP AND RESTORING PROGRAM DATA (GLOBAL DUMP CUR, DUMP ALL) All of the AX3000Gs data (including its programs) can be transmitted and received in the form of system exclusive messages. Exchanging this type of data with an external device via system exclusive messages is known as a data dump. By per- forming a data dump, the AX3000G programs you created can be backed up (saved) on an external device such as a MIDI data ler or a sequencer that is able to transmit and receive system exclusive messages. Then when necessary, you can re-transmit that data back to the AX3000G to restore it. This provides a way for you to organize large numbers of programs. You can also use this method to copy program data between two connected AX3000Gs. You can transfer program data in one of two ways; one program at a time, or all pro- grams at once. When you transmit all programs at once, all of the AX3000Gs data will also be transmitted, including Dump settings and MIDI settings.
NOTE: You can transmit data dumps regardless of the SYEX OUT setting. In fact, if you want to transfer program data between two AX3000Gs, we recommend that you turn the SYEX OUT setting OFF. If SYEX OUT is On, operating the knobs or other controls may change the parameters of the other AX3000G in unintended ways.
BACKING UP
1. Connect the AX3000Gs MIDI OUT to the MIDI IN of the device that will receive the data dump.
2. If you want to transmit only one program, use Program Select Mode to select the program you want to transmit.
3. Press the GLOBAL button.
4. Press the / buttons to make the name display read DUMP CUR or DUMP ALL. DUMP CUR (Dump current program data): The data of the currently selected program will be dumped. If you are editing the program (and have not yet saved it), the current settings will be transmitted. DUMP ALL (Dump all data): All of the AX3000Gs data will be dumped.
5. Put the receiving device in a mode in which it can record the data dump.
NOTE: For details, refer to the owners manual of the device that will receive the data dump.
OFF: Parameter change messages will not be transmitted. On: Parameter change messages will be transmitted.
6. Press the AX3000Gs WRITE button to begin transmitting. When transmitting is completed, the display will indicate COMPLETE, and you will return to the screen of step 4. (While DUMP ALL is being transmitted, the display will indi- cate SEND.)
NOTE: While data is being transmitted, do not touch the buttons or knobs of the AX3000G or its foot controller, and never turn off the power.
RESTORING
1. Connect the transmitting devices MIDI OUT to the AX3000Gs MIDI IN.
2. Set the transmitting MIDI device and the AX3000G to the same MIDI channel. If the AX3000G will be receiving data that was previously transmitted to the external MIDI device, select the same MIDI channel as was used when trans- mitting.
3. Transmit the data dump from the external device. While the AX3000G is receiving all data, its display will indicate RECEIVE. When reception has been successfully completed, it will indicate COM- PLETE. If an error occurs, the display will indicate ERROR; in this case, try transmitting the data again.
NOTE: For details, refer to the owners manual of the device that will be transmit- ting the data dump.
NOTE: While data is being transmitted, dont touch the AX3000Gs buttons, pedals, or knobs, and never turn off the power.
4. If you received data for a single program, select the save-destination bank and program, and save the data. (p.19)
NOTE: The program data will not be written into the AX3000Gs program memory unless you store it.
HINT: If the AX3000G receives all data, all of its data will be overwritten automati- cally. However, the data currently being edited (i.e., the edit buffer) will not be affected.
In tro
du cti
on Pa
ne l T
ou r
Se tu
p Pl
ay in
g Cr
ea tin
g an
d St
or in
g Ef
fe ct
Ty pe
Pe da
ls ES
S x
MI DI
/D IG
ITA L
Fa cto
ry se
tti ng
s Tr
ou bl
e- sh
oo tin
g Sp
ec .
Tu ne
r Ap
pe nd
ix
Restoring the Factory Preset Programs
eres how you can restore the AX3000Gs programs and settings to the state in which it was shipped from the factory.
NOTE: Executing this procedure will erase all the programs you created and saved in the AX3000G, and will load the factory-set programs. MIDI settings will also be initialized. If there are any settings you want to keep, you should rst use the data dump function to back them up, or use the Program sheet (the fold-out inside the back cover of this manual) to write down your settings.
1. While holding down the three buttons /, and EXIT switch, turn on the power. The display will read P and the LED 14 buttons will blink, and the name dis- play will ask RELOAD? Release the three buttons you were holding down.
2. If at this point you decide that you really dont want to execute this operation, you can press the EXIT switch.
3. Press the WRITE button. The name display will show LOADING, and the fac- tory-set data will begin being reloaded. When reloading has been completed, the name display will indicate COM- PLETE, and the AX3000G will automatically switch to Program Select Mode.
NOTE: Never turn off the power while this reload operation is occurring.
H
Troubleshooting f you suspect a malfunction, please check the following points rst. If this does not resolve the problem, please contact your dealer or Korg authorized service center.
1. Power does not turn on Is the AC adapter connected to the rear panel DC9V jack? Is the AC adapter plugged into an AC outlet? Could the AC adapter be damaged?
2. Theres no sound Is your guitar turned up? Are both ends of your guitar cable plugged into the correct jacks? Is your guitar cable working? Could the rear panel OUTPUT LEVEL knob be turned down? Check the GAIN, VOLUME, TREBLE, MIDDLE, BASS, and PROG LVL settings.
For some amp types, you might not hear any sound if the TREBLE, MIDDLE, and BASS settings are turned down just like the circuitry on the original amp!
Are there any effects turned down in volume? Could an expression pedal be at the minimum position with a parameter such
as DRIVE, LEVEL assigned to it? Could you have activated the Mute function? Defeat the Mute function as
explained in Tuner (Bypass, Mute) on p.21.
3. You cant hear any effects even though theyre dialed in… Are the effect LEDs lit?
If an LED is dark, the corresponding effect is off. Press the category select button to turn on the effect.
Could the modulation DEPTH or the delay/reverb MIX be set to a low value? Use the category select switch to select the effect, and turn the appropriate value knobs to adjust the parameters.
Could the effect be bypassed? Defeat the Bypass function as explained in Tuner (Bypass, Mute) on p.21.
4. Youre using the ACOUSTIC pedal effect and getting high frequency distortion.
Could the Drive setting be excessively high? Are you using a very high output humbucking pickup?
Either turn down the volume of your guitar, the Amp GAIN or Treble setting for the pedal.
I
In tro
du cti
on Pa
ne l T
ou r
Se tu
p Pl
ay in
g Cr
ea tin
g an
d St
or in
g Ef
fe ct
Ty pe
Pe da
ls ES
S x
MI DI
/D IG
ITA L
Fa cto
ry se
tti ng
s Tr
ou bl
e- sh
oo tin
g Sp
ec .
Tu ne
r Ap
pe nd
ix
5. The sound connected to your guitar amp is distorted, or sounds wrong.
Could AMP/LINE switch be set to Ln (LINE)? Could LEVEL be raised excessively? Make the appropriate settings as explained in Basic connections on p.12.
Specications NUMBER OF AMP TYPES: 11
NUMBER OF CABINET TYPES: 16
NUMBER OF EFFECTS
PEDAL TYPES: 11
MODULATION TYPES: 11
DELAY TYPES: 11
REVERB TYPES: 11
NOISE REDUCTION: 1
NUMBER OF PROGRAMS: 96 (24 BANKS x 4 CHANNELS)
AUDIO INPUTS
INPUT (Monaural phone jack)
INSERT RETURN (Monaural phone jack)
AUX IN (STEREO MINI)
AUDIO OUTPUTS
OUTPUT x 2 (Monaural phone jack)
INSERT SEND (Monaural phone jack)
PHONES (STEREO MINI)
LEVEL knob (adjusts OUTPUT and PHONES)
S/P DIF OUT (16-bit/44.1 kHz optical connector (IEC60958, EIJA CP-1201))
SIGNAL PROCESSING
A/D conversion: 20bit
D/A conversion: 20bit
Sampling frequency: 44.1kHz
TUNER
TUNING RANGE: A0C7 (27.5 Hz2093 Hz)
TUNER CALIBRATION: A = 438 Hz445 Hz
OTHER
MIDI IN x 1, MIDI OUT x 1, DC9V x 1
Power supply: DC 9 V (included AC adapter )
Dimensions (W x D x H): 500 mm x 241 mm x 72 mm (pedal lowered) / 100 mm (pedal raised) 19.69 x 9.49 x 2.83 (pedal lowered) / 3.94 (pedal raised)
WEIGHT: 3.6 kg/7.94 lbs.
INCLUDED ITEMS: Owners manual, AC adapter
* Appearance and specications of this product are subject to change without notice.
57
In tro
du cti
on Pa
ne l T
ou r
Se tu
p Pl
ay in
g Cr
ea tin
g an
d St
or in
g Ef
fe ct
Ty pe
Pe da
ls ES
S In
de x
MI DI
/D IG
ITA L
Fa cto
ry se
tti ng
s Tr
ou bl
e- sh
oo tin
g Sp
ec .
Tu ne
r Ap
pe nd
ix
Appendix
E
FFECT
PARAMETERS
*: These parameters can be controlled by the expression pedal
PRE FX
SENS / DEPTH ATTACK / SPEED MANUAL TYPE / RESONANCE LEVEL / ORDER
COMP SENS
*
— — — LEVEL
*
PICKUP SENS
*
PHASE
*
PHASEMIX
*
TYPE LEVEL
*
ACOUSTIC BODY
*
TOP
*
— TYPE MIX
*
VOX WAH CLOSE OPEN MANUAL
*
TYPE ORDER
AUTO WAH SENS / POL ATTACK * — TYPE ORDER
U-VIBE / PHASE DEPTH
*
SPEED
*
MANUAL * TYPE ORDER
CHORUS / FLANGER
DEPTH
*
SPEED
*
MANUAL
*
RESO * —
OCTAVE — — — DIRECT * EFFECT
*
RING MOD — FILTER
*
OSCFREQ
*
DIRECT * EFFECT
*
DRONE — — KEY RESO * MIX
*
SYNTH SENS
*
ATCK / REL
* OCT/ WAVE PORTAMNT * MIX *
DRIVE / AMP
GAIN VOLUME TREBLE MIDDLE BASS
TUBE OD GAIN
*
VOLUME
*
TONE
* — —
BOUTIQUE OD GAIN
*
VOLUME
*
TONE
*
— —
FAT DIST GAIN
*
VOLUME
*
TONE
*
— —
ORANGE DIST GAIN
*
VOLUME
*
TONE
*
— —
METAL DIST GAIN
*
VOLUME
*
TREBLE
*
MIDDLE BASS
SHRED DIST GAIN
*
VOLUME
*
TREBLE
*
MIDDLE BASS
FUZZ GAIN
*
VOLUME
* TONE
*
— —
OCTAFUZZ GAIN
*
VOLUME
*
TONE
*
— —
BOUTIQUE CL GAIN
*
VOLUME
*
TREBLE
*
MIDDLE BASS
BLACK 2×12 GAIN
*
VOLUME
*
TREBLE
*
MIDDLE BASS
AC15 GAIN
*
VOLUME
*
TREBLE
*
MIDDLE BASS
AC30TB GAIN
*
VOLUME
*
TREBLE
*
MIDDLE BASS
UK 68P GAIN
*
VOLUME
*
TREBLE
*
MIDDLE BASS
UK 80S GAIN
*
VOLUME
*
TREBLE
*
MIDDLE BASS
UK MODERN GAIN
*
VOLUME
*
TREBLE
*
MIDDLE BASS
US MODERN GAIN
*
VOLUME
*
TREBLE
*
MIDDLE BASS
CABINET
TYPE NR / PROG LVL NR PROG LVL
TYPE NR PROG LVL
MODULATION
DEPTH / PITCH SPEED / FINE MANUAL / SPEED 2 RESONANCE MIX / MODE
CLASSIC CHORUS DEPTH
*
SPEED
*
MANUAL
*
— MODE
MULTI TAP CHORUS DEPTH
*
SPEED
*
TIME — MIX
*
CLASSIC FLANGER DEPTH
*
SPEED
*
MANUAL
*
RESO
*
MIX
*
BI CHORUS DEPTH
*
SPEED1
*
SPEED2
*
RESO
*
MODE
DUO PHASE DEPTH
*
SPEED1
*
SPEED2
*
RESO
*
MODE
TEXTREM DEPTH
*
SPEED
*
— SPREAD LEVEL
*
ROTARY DEPTH
*
SPEED1
*
SPEED2
*
— ACCEL
*
PITCH SHIFTER DEPTH
*
FINE
*
TRACKING DIRECT
*
EFFECT
*
RANDOM FILTER DEPTH
*
SPEED
*
MANUAL
*
RESO
*
MIX
*
FILTRON DEPTH
*
ATTACK
*
MANUAL
*
RESO
*
SENS / POL
TALK MOD DEPTH
*
ATTACK
*
MANUAL
*
TYPE SENS / POL
58
DELAY
TIME FEEDBACK TONE OPTION MIX
ECHO PLUS TIME
*
FEEDBACK
*
TONE
*
LO DAMP
*
MIX
*
MULTI HEAD TIME FEEDBACK
*
TONE
*
MODE MIX * ANALOG DELAY TIME * FEEDBACK * TONE * — MIX * MOD DELAY TIME * FEEDBACK * TONE * SPEED * MIX * SWEEP DELAY TIME * FEEDBACK * TONE * SENS * MIX * 2 TAP DELAY TIME FEEDBACK * TONE * TAP TIME MIX * CROSS DELAY TIME FEEDBACK * TONE * DUCKING * MIX * RHYTHM DELAY TIME FEEDBACK * TONE * RHYTHM MIX * HOLD DELAY TIME FEEDBACK * TONE * — MIX * REVERSE DELAY TIME FEEDBACK * TONE * — MIX
FREEZ TIME — — — MIX *
REVERB TIME LO DAMP HI DAMP PRE DELAY MIX
SLAP TIME * LO DAMP * HI DAMP * PRE DLY MIX * SPRING TIME * LO DAMP * HI DAMP * PRE DLY MIX * BOUNCE TIME * LO DAMP * HI DAMP * PRE DLY MIX * PLATE TIME * LO DAMP * HI DAMP * PRE DLY MIX * GARAGE TIME * LO DAMP * HI DAMP * PRE DLY MIX * CHAMBER TIME * LO DAMP * HI DAMP * PRE DLY MIX * CANYON TIME * LO DAMP * HI DAMP * PRE DLY MIX * ROOM TIME * LO DAMP * HI DAMP * PRE DLY MIX * STUDIO TIME * LO DAMP * HI DAMP * PRE DLY MIX * HALL TIME * LO DAMP * HI DAMP * PRE DLY MIX * ARENA TIME * LO DAMP * HI DAMP * PRE DLY MIX *
In tro
du cti
on Pa
ne l T
ou r
Se tu
p Pl
ay in
g Cr
ea tin
g an
d St
or in
g Ef
fe ct
Ty pe
Pe da
ls ES
S x
MI DI
/D IG
ITA L
Fa cto
ry se
tti ng
s Tr
ou bl
e- sh
oo tin
g Sp
ec .
Tu ne
r Ap
pe nd
ix
Index Numerics 2TAP DELAY (2TAP DLY) 36
A AC15 24 AC30TB 24 ACOUSTIC 27 ANALOG DELAY (ANLG DL) 35 ARENA 39 AUTO WAH 28 Automatic Chromatic Tuner 21
B Backing Up 51 BI CHORUS (BI CHORS) 31 BLACK 2×10 (BLK 2×10) 25 BLACK 2×12 (BLK 2×12) 24, 25 BOUNCE 38 BOUTIQUE CL (BTQ CL) 24 BOUTIQUE OD (BTQ OD) 23
C CABINET Models 25 Calibrating 22 CANYON 38 CC 50 CCHG I/O 49 CHAMBER 38 CHORUS/FLANGER (CHO/FLNG) 28 CLASSIC CHORUS (CL CHORS) 30 CLASSIC FLANGER (CL FLANG) 30 COMP 26 Connection 12, 48 Control Change 49 Creating Program 17 CROSS DELAY (CROSS DL) 36
D DELAY 34 DELAY EFFECTS 34 DELAY FX 50 DRIVE/AMP Models 23 DRONE 29 DUMP ALL 51 DUMP CUR 51 DUO PHASE (DUO PHAS) 31
E ECHO PLUS 34 Effect On/Off mode 15 ESS (Expression Step Sequencer) 45 EXP PDL 50
F FAT DIST 23 FILTRON 33 FREEZ 37 FUZZ 23
G GARAGE 38
H HALL 39 HOLD DELAY (HOLD DLY) 37
M METAL DIST (METAL DS) 23 MIDI 48 MIDI CH 49 MIDI Channel 49 MOD DELAY (MOD DLY) 35 MOD EFFECTS 30 MOD FX 50 MULTI HEAD (MULTI HD) 34 MULTI TAP CHORUS (MT CHORS) 30
N Naming 19
O OCTAFUZZ 23 OCTAVE 29 ORANGE DIST (OR DIST) 23 Original Value 20
P Parameter Change 50 PCHG OUT 49 PEDAL FX 50 PICKUP 26 PITCH SHIFTER (PITCH) 33 PLATE 38 PRE EFFECTS 26 Program Change 49 Program Select mode 15
R RANDOM STEP FILTER (RND FILT) 33 RELOAD? 53 RENAME 19 Restoring 52 Restoring the Factory Preset 53 REVERB EFFECTS 38 REVERSE DELAY (REVRS DL) 37 REVRB FX 50
RHYTHM DELAY (RHYTM DL) 36 RING MOD 29 ROOM 39 ROTARY 32
S SHRED DIST (SHRED DS) 23 SLAP 38 Sound Editor 50 SPRING 38 Storing 19 STUDIO 39 SWEEP DELAY (SWEEP DL) 35 SYEX OUT 50 SYNTH 29
T TALK MOD 34 TEXTREM 32 TUBE OD 23 Tuner 21, 40 TWEED 1×12 (TWD 1×12) 25 TWEED 1×8 (TWD 1×8) 25 TWEED 4×10 (TWD 4×10) 25
U UK 80S 24 UK H30 4×12 (UK H30) 26 UK MODERN (UK MODRN) 24 UK T75 4×12 (UK T75) 26 UK68P 24 US MODERN (US MODRN) 24 US V30 4×12 (US V30) 26 U-VIBE/PHASE (VIB/PHAS) 28
V VOX AC15TBX (AC15TBX) 25 VOX AC30TBX (AC30TBX) 25 VOX AD120VTX (AD120VTX) 25 VOX WAH 27
W WRITE 19
2 E
4015-2 Yanokuchi, Inagi-city, Tokyo 206-0812 Japan
IMPORTANT NOTICE TO CONSUMERS This product has been manufactured according to strict specifications and voltage requirements that are applicable in the country in which it is intended that this product should be used. If you have purchased this product via the internet, through mail order, and/or via a telephone sale, you must verify that this product is intended to be used in the country in which you reside. WARNING: Use of this product in any country other
Manualsnet FAQs
If you want to find out how the AX3000G KORG works, you can view and download the KORG AX3000G Owner’s Manual on the Manualsnet website.
Yes, we have the Owner’s Manual for KORG AX3000G as well as other KORG manuals. All you need to do is to use our search bar and find the user manual that you are looking for.
The Owner’s Manual should include all the details that are needed to use a KORG AX3000G. Full manuals and user guide PDFs can be downloaded from Manualsnet.com.
The best way to navigate the KORG AX3000G Owner’s Manual is by checking the Table of Contents at the top of the page where available. This allows you to navigate a manual by jumping to the section you are looking for.
This KORG AX3000G Owner’s Manual consists of sections like Table of Contents, to name a few. For easier navigation, use the Table of Contents in the upper left corner.
You can download KORG AX3000G Owner’s Manual free of charge simply by clicking the “download” button in the upper right corner of any manuals page. This feature allows you to download any manual in a couple of seconds and is generally in PDF format. You can also save a manual for later by adding it to your saved documents in the user profile.
To be able to print KORG AX3000G Owner’s Manual, simply download the document to your computer. Once downloaded, open the PDF file and print the KORG AX3000G Owner’s Manual as you would any other document. This can usually be achieved by clicking on “File” and then “Print” from the menu bar.
 19:12
19:12
Korg AX3000G. Гитарный процессор (несерьёзный обзор)
 11:55
11:55
KORG ToneWorks AX3000G demo (HQ audio)
 15:21
15:21
Korg AX3000G demo and tour — some great features
 09:37
09:37
How did I miss this!? Korg AX3000G Multi effect for guitar
 07:27
07:27
GUITAR PROCESSOR KORG AX3000G
 03:51
03:51
AX3000G Guitar Pedal — Rhythm Delay — capability demo by Dave Monk
G. Руководство пользователя…
Korg ax3000g руководство пользователя, Гарантийное обслуживание, Гитарный процессор эффектов
- Изображение
- Текст
Korg AX3000G. Руководство пользователя
1
О
Оф
фи
иц
ци
иа
ал
лььн
ны
ый
й и
и ээк
ксск
кл
лю
юззи
иввн
ны
ый
й д
ди
исст
тр
ри
иб
бьью
ют
то
ор
р к
ко
ом
мп
па
ан
ни
ии
и K
Ko
orrg
g н
на
а т
теер
рр
ри
ит
то
ор
ри
ии
и Р
Ро
осссси
ии
и,, сст
тр
ра
ан
н
Б
Ба
ал
лт
ти
ии
и и
и С
СН
НГ
Г —
— к
ко
ом
мп
па
ан
ни
ия
я A
A&
&T
T T
Trra
ad
dee..
Д
Да
ан
нн
но
оее р
руук
ко
овво
од
дсст
твво
о п
пр
реед
до
осст
та
аввл
ля
яеет
тсся
я б
беессп
пл
ла
ат
тн
но
о..Е
Ессл
ли
и ввы
ы п
пр
ри
ио
об
бр
реел
ли
и д
да
ан
нн
ны
ый
й п
пр
ри
иб
бо
ор
р н
нее уу
о
оф
фи
иц
ци
иа
ал
лььн
но
огго
о д
ди
исст
тр
ри
иб
бьью
ют
то
ор
ра
а ф
фи
ир
рм
мы
ы K
Ko
orrg
g и
ил
ли
и а
аввт
то
ор
ри
иззо
овва
ан
нн
но
огго
о д
ди
ил
леер
ра
а к
ко
ом
мп
па
ан
ни
ии
и A
A&
&T
T T
Trra
ad
dee,,
к
ко
ом
мп
па
ан
ни
ия
я A
A&
&T
T T
Trra
ad
dee н
нее н
неессеет
т о
от
тввеет
тсст
тввеен
нн
но
осст
ти
и зза
а п
пр
реед
до
осст
та
аввл
леен
ни
иее б
беессп
пл
ла
ат
тн
но
огго
о п
пеер
реевво
од
да
а н
на
а
р
руусссск
ки
ий
й я
яззы
ык
к р
руук
ко
овво
од
дсст
твва
а п
по
ол
лььззо
овва
ат
теел
ля
я,, а
а т
та
ак
кж
жее зза
а о
оссуущ
щеесст
тввл
леен
ни
иее гга
ар
ра
ан
нт
ти
ий
йн
но
огго
о ссеер
рвви
иссн
но
огго
о
о
об
бссл
лууж
жи
ивва
ан
ни
ия
я..
©
© ®
® A
A&
&T
T T
Trra
ad
dee,, IIn
ncc..
Гарантийное обслуживание
По всем вопросам, связанным с ремонтом или сервисным обслуживанием гитарного процессора эффектов
AX3000G, обращайтесь к представителям фирмы Korg — компании A&T Trade.
Телефон для справок (095) 796-9262; e-mail: synth@attrade.ru
Korg AX3000G
Руководство пользователя
Гитарный процессор эффектов

Правила эксплуатации
Расположение
Для предотвращения выхода из строя инструмента не эксплуатируйте и не храните его в местах, где он может
быть подвергнут:
• прямому действию солнечных лучей;
• экстремальным температурам или влажности;
• попаданию пыли или грязи;
• интенсивной вибрации;
• сильным магнитным полям.
Питание
Запрещается использовать сетевой адаптер в сетях с напряжением, отличным от указанного в спецификациях.
Интерференция
Для того, чтобы избежать наводок, располагайте теле- и радиоприемники на возможно большем расстоянии от
прибора.
Эксплуатация
Не прикладывайте чрезмерных усилий при манипуляциях с регуляторами прибора. Это может вывести их из
строя.
Уход
Внешние поверхностей инструмента протирайте чистой сухой тряпкой. Запрещается использование
растворителей и полиролей.
Хранение руководства
После прочтения данного руководства, пожалуйста сохраняйте его для дальнейшего использования.
Попадание инородных тел внутрь корпуса прибора
Не оставляйте рядом с инструментом емкости с жидкостью. Попадание влаги внутрь прибора может привести
к поломке, возгоранию или поражению электрическим током.
Не допускайте попадания металлических предметов внутрь корпуса инструмента. Если это все же произошло,
немедленно отключите питание инструмента, отсоединив от сети блок питания. Затем обратитесь за помощью
к ближайшему дилеру компании Korg или в магазин, в котором был приобретен инструмент.
Радиомагнитное излучение
Оборудование прошло тестовые испытания и соответствует требованиям, накладываемым на цифровые
приборы класса “B” согласно части 15 правил FCC. Эти ограничения разработаны для обеспечения надежной
защиты от интерференции при инсталляции оборудования в жилых помещениях. Прибор генерирует,
использует и способен излучать электромагнитные волны и, если установлен и эксплуатируется без
соблюдения приведенных рекомендаций, может вызвать помехи в работе радиосистем. Тем не менее нет
полной гарантии, что при отдельных инсталляциях прибор не будет генерировать радиочастотные помехи.
Если прибор влияет на работу радио- или телевизионных систем (это проверяется включением и отключением
прибора), то рекомендуется предпринять следующие меры:
• Переориентируйте или расположите в другом месте принимающую антенну.
• Разнесите на возможно большее расстояние прибор и приемник.
• Включите прибор в розетку, которая находится в цепи, отличной от цепи розетки приемника.
• Проконсультируйтесь с дилером или квалифицированным телевизионным мастером.
Несанкционированная модификация оборудования пользователем может привести к лишению права на
гарантийное обслуживание данного оборудования.
2
Korg AX3000G. Руководство пользователя

Декларация соответствия европейским стандартам CE Маркировка…
Страница 3
- Изображение
- Текст
Декларация соответствия европейским стандартам CE
Маркировка CE на приборах компании Korg, работающих от сети и выпущенных до 31 декабря 1996 года
означает, что они удовлетворяют требованиям стандартов EMC Directive (89/336/EEC) è CE mark Directive
(93/68/EEC). Приборы с этой маркировкой, выпущенные после 1 января 1997 года, кроме перечисленных
стандартов удовлетворяют еще и требованиям стандарта Low Voltage Directive (73/23/EEC).
Маркировка CE на приборах компании Korg, работающих от батарей, означает, что они удовлетворяют
требованиям стандартов EMC Directive (89/336/EEC) è CE mark Directive (93/68/EEC).
*Названия компаний, продукции, форматов и т.д. являются торговыми марками соответствующих
собственников.
Важное замечание для потребителей
Изделия KORG разработана согласно точным спецификациям и требованиям по напряжению для каждой
страны. Эти изделия имеют гарантию дистрибьютера KORG только в стране покупки. Все изделия KORG, не
имеющие гарантийной квитанции или серийного номера, освобождаются от гарантийных обязательств и
технического обслуживания со стороны производителя / дистрибьютера. Это требование необходимо для
защиты прав потребителя и его безопасности.
Содержание
Введение . . . . . . . . . . . . . . . . . . . . . . . . . . . . . . . . . . . 5
Основные возможности . . . . . . . . . . . . . . . . . . . . . . . . . . . . . . . . . . . . . . . . . . . . . . . . 5
Внешний вид прибора . . . . . . . . . . . . . . . . . . . . . . . . . 6
Лицевая панель . . . . . . . . . . . . . . . . . . . . . . . . . . . . . . . . . . . . . . . . . . . . . . . . . . . . . . . 6
Тыльная панель . . . . . . . . . . . . . . . . . . . . . . . . . . . . . . . . . . . . . . . . . . . . . . . . . . . . . 10
Настройки. . . . . . . . . . . . . . . . . . . . . . . . . . . . . . . . . . 11
Установка выхода . . . . . . . . . . . . . . . . . . . . . . . . . . . . . . . . . . . . . . . . . . . . . . . . . . . . 11
Коммутация . . . . . . . . . . . . . . . . . . . . . . . . . . . . . . . . . . . . . . . . . . . . . . . . . . . . . . . . . 11
Использование AX3000G с MIDI устройством или компьютером . . . . . . . . . . . . . . . . 13
Работа с AX3000G . . . . . . . . . . . . . . . . . . . . . . . . . . . 13
Режим Program Select . . . . . . . . . . . . . . . . . . . . . . . . . . . . . . . . . . . . . . . . . . . . . . . . . 13
Режим Individual . . . . . . . . . . . . . . . . . . . . . . . . . . . . . . . . . . . . . . . . . . . . . . . . . . . . . 14
Включение и отключение функции KeyLock . . . . . . . . . . . . . . . . . . . . . . . . . . . . . . . . 14
Создание и сохранение собственных программ . . . . . 14
Маршрутизация сигнала . . . . . . . . . . . . . . . . . . . . . . . . . . . . . . . . . . . . . . . . . . . . . . . 14
Создание программы . . . . . . . . . . . . . . . . . . . . . . . . . . . . . . . . . . . . . . . . . . . . . . . . . . 14
Наименование программы. . . . . . . . . . . . . . . . . . . . . . . . . . . . . . . . . . . . . . . . . . . . . . 15
Сохранение программы . . . . . . . . . . . . . . . . . . . . . . . . . . . . . . . . . . . . . . . . . . . . . . . . 16
Восстановление установки параметра по умолчанию (Original Value) . . . . . . . . . . . . 16
Тюнер (Обход, Мьют) . . . . . . . . . . . . . . . . . . . . . . . . . 16
Процедура настройки . . . . . . . . . . . . . . . . . . . . . . . . . . . . . . . . . . . . . . . . . . . . . . . . . 16
Калибровка тюнера . . . . . . . . . . . . . . . . . . . . . . . . . . . . . . . . . . . . . . . . . . . . . . . . . . . 17
Типы эффектов . . . . . . . . . . . . . . . . . . . . . . . . . . . . . 17
Модели DRIVE/AMP . . . . . . . . . . . . . . . . . . . . . . . . . . . . . . . . . . . . . . . . . . . . . . . . . . . 17
Модели CABINET . . . . . . . . . . . . . . . . . . . . . . . . . . . . . . . . . . . . . . . . . . . . . . . . . . . . . 19
Эффект PRE . . . . . . . . . . . . . . . . . . . . . . . . . . . . . . . . . . . . . . . . . . . . . . . . . . . . . . . . . 20
Korg AX3000G. Руководство пользователя
3

Эффекты MOD . . . . . . . . . . . . . . . . . . . . . . . . . . . . . . . . . . . . . . . . . . . . . . . . . . . . . . . 22
Эффекты DELAY . . . . . . . . . . . . . . . . . . . . . . . . . . . . . . . . . . . . . . . . . . . . . . . . . . . . . 25
Эффекты REVERB . . . . . . . . . . . . . . . . . . . . . . . . . . . . . . . . . . . . . . . . . . . . . . . . . . . . 27
Использование педалей экспрессии . . . . . . . . . . . . . . 28
Установки педали экспрессии . . . . . . . . . . . . . . . . . . . . . . . . . . . . . . . . . . . . . . . . . . . 28
Установки переключателя CONTROL . . . . . . . . . . . . . . . . . . . . . . . . . . . . . . . . . . . . . . 30
Настройка чувствительности педали . . . . . . . . . . . . . . . . . . . . . . . . . . . . . . . . . . . . . . 31
Использование ESS для управления параметром. . . . 32
Управление по MIDI . . . . . . . . . . . . . . . . . . . . . . . . . . 34
Подключение к MIDI устройству или компьютеру . . . . . . . . . . . . . . . . . . . . . . . . . . . 34
Установка MIDI канала (“MIDI CH”) . . . . . . . . . . . . . . . . . . . . . . . . . . . . . . . . . . . . . . . 34
Сообщения Program Change (“PCHG OUT”) . . . . . . . . . . . . . . . . . . . . . . . . . . . . . . . . . . 35
Сообщения Control Change (“CCHG I/O”) . . . . . . . . . . . . . . . . . . . . . . . . . . . . . . . . . . . . 35
Смена параметров (”SYEX OUT”) . . . . . . . . . . . . . . . . . . . . . . . . . . . . . . . . . . . . . . . . . 36
Сохранение и восстановление данных программ (“DUMP CUR”, “DUMP ALL”) . . . . . . 36
Восстановление заводских пресетных программ. . . . 37
Неисправности . . . . . . . . . . . . . . . . . . . . . . . . . . . . . . 37
Технические характеристики . . . . . . . . . . . . . . . . . . . 38
Параметры эффектов . . . . . . . . . . . . . . . . . . . . . . . . . 39
4
Korg AX3000G. Руководство пользователя

Введение
Благодарим за приобретение моделирующего сигнал-процессора TONEWORKS AX3000G, прекрасно
подходящего для работы как на концертах, так и в студии!
Для максимального использования потенциала AX3000G и поддержания бесперебойной службы прибора
внимательно прочтите данное руководство. После прочтения руководства, храните его для дальнейших
ссылок.
Основные возможности
• Использование технологии звукового моделирования REMS.
Относительно REMS
REMS (Резонансная структура и электронно-схемотехническая система моделирования) является
разработкой фирмы KORG для прецизионного воспроизведения всех характеристик и природы
акустических и электрических инструментов с помощью компонентов электронных схем: призвуки
корпусов инструментов, громкоговорители и колонки, акустические пространства, микрофоны, лампы,
транзисторы и т. д.
• 72 типа встроенных эффектов моделирования с возможностью одновременного использования 7 эффектов
(включая шумопонижение). Параллельно доступно подключение эффектов в разрыв.
• Использование регуляторов выбора блоков эффектов для моментального выбора необходимого эффекта из
5 групп (Pre-Effect, Drive/Amp, Modulation, Delay, Reverb).
• Возможно подключение внешних эффект-процессоров в разрыв.
• Отредактированные установки усилительной и эффекторной секций (включая состояние вкл./выкл.
внешнего эффекта) можно сохранять в виде пользовательских программ в одну из 96 ячеек памяти.
Изначально AX3000G поставляется с 32 пресетными программами.
• Возможно использование ножных переключателей в индивидуальном режиме для независимого
включения/отключения каждого эффекта.
• Возможно использование педали экспрессии для управления параметрами эффектов в реальном времени, а
также громкости и вау.
• Функция Quick Assign позволяет быстро назначать параметры на педаль экспрессии.
• AX3000G оборудован пошаговым секвенсером экспрессии (в руководстве имеющим аббревиатуру ESS),
обеспечивающим пошаговое управление различными параметрами эффектов.
• Возможно поддержание неизменным типа и времени задержки, а также типа реверберации при
переключении программ (назначенные на переключатель CONTROL функция HOLD эффекта HOLD
DELAY или функция FREEZ эффекта FREEZ при этом отключаются).
• AX3000G содержит переключатель CONTROL, позволяющий устанавливать время задержки функцией TAP
TEMPO, включать/отключать внешний эффект, изменять скорость эффекта вращающегося динамика и так
далее.
• Для удобства настройки предусмотрен автоматический хроматический тюнер.
• Входы AUX IN позволяют играть на гитаре под фонограмму, подающуюся с внешнего аудиоустройства.
• Цифровой выход S/P DIF и разъемы MIDI IN/OUT обеспечивают простоту интеграции AX3000G в
аудиокомплекты различных конфигураций.
• Программное обеспечение “AX3000G Sound Editor” упрощает процедуры редактирования различных
параметров AX3000G, а также сохранения программ и управления ими. По вопросам получения “AX3000G
Sound Editor” обращайтесь к дистрибьютору компании Korg, находящемуся на территории страны, где был
приобретен прибор. Кроме того, это программное обеспечение можно скачать с сайта http://www.korg.co.jp.
Korg AX3000G. Руководство пользователя
5

Внешний вид прибора
Лицевая панель
1. Секция редакции эффектов
1.1 Кнопки групп эффектов
Используйте данные кнопки для выбора группы эффектов, редактируемой регуляторами 1 — 5, или для
независимого включения/отключения каждого эффекта. Индикатор эффекта горит при включенном эффекте,
мигает при редакции эффекта и не горит при отключенном эффекте.
При нажатии кнопки, ее индикатор мигает; далее регуляторами 1 — 5 можно редактировать параметры
эффектов данной группы. Для отключения эффекта нажмите кнопку его группы (индикатор замигает) и
повторно нажмите ее для отключения эффекта (индикатор погаснет); дисплей отобразит “—-OFF—”..
1.2 Селекторы моделей эффектов
Используются для выбора модели эффекта в каждой группе эффектов. Возможен выбор 11 типов пре-
эффектов, 16 типов моделей драйва/усиления и 11 типов эффектов модуляции, задержки и реверберации. При
манипуляциях с селектором, индикатор группы эффектов горит, и возможно использование регуляторов 1 — 5
для редакции параметров.
З
За
ам
мееч
ча
ан
ни
иее: При смене типа эффекта параметры инициализируются.
З
За
ам
мееч
ча
ан
ни
иее: При смене типа модели драйва/усиления, модель кабинета автоматически меняется на наиболее
подходящую.
1.3 Кнопка INSERT
Включает/отключает эффект разрыва. При включении схемы посыла/возврата сигнала на внешний эффект-
процессор индикатор горит, при отключении — не горит.
1.4 Кнопка CABINET
Включает/отключает модель кабинета или, при необходимости, меняет тип модели кабинета, автоматически
выбираемого при смене модели драйва/усиления. Для отключения модели кабинета нажмите ее кнопку,
6
Korg AX3000G. Руководство пользователя
1
2
3
4
5
6
7
8
1.2
1.1
1.3
1.4 1.5 1.6 1.7

дисплей отобразит имя модели кабинета (это означает, что модель кабинета включена), а затем повторно
нажмите кнопку модели кабинета. Дисплей отобразит “—-OFF—”, и модель кабинета будет отключена.
З
За
ам
мееч
ча
ан
ни
иее: Если включены модели кабинета и драйва/усиления, дисплей отображает иконку кабинета
.
1.5 Кнопка NR/PROG LVL (Шумопонижение/Уровень программы)
Используйте данную кнопку для установки шумопонижения или уровня (громкости) каждой программы.
П
Пр
ри
им
мееч
ча
ан
ни
иее: Заводской уровень программы равен 5.0.
1.6 Кнопка назначения педали EXP/CTL (Экспрессия/Управление)
Данная кнопка изменяет назначение педали экспрессии или переключателя CONTROL.
1.7 Кнопка RENAME
Применяется для изменения имени программы.
Используйте кнопки
/
для смены позиции курсора на дисплее и регулятор 1 или кнопки
/
для смены
символа в позиции курсора.
2. Секция редакции параметров
2.1 Регуляторы параметров 1 — 5
Данные регуляторы применяются для настройки параметров эффектов. Изменения будут относиться к
эффекту, кнопка группы которого мигает, а также к установкам кабинета, шумопонижения, уровня
программы, педали экспрессии, ESS, и переключателя CONTROL. Подсветка регуляторов указывает на
доступные для редактирования в данный момент параметры.
Мигающий индикатор регулятора соответствует текущему редактируемому параметру. Однако, при наличии
только одного редактируемого параметра индикатор не мигает.
З
За
ам
мееч
ча
ан
ни
иее: При выполнении операций RENAME, WRITE или установках GLOBAL, для изменения значения вы
можете использовать регулятор 1.
2.2 Кнопка Delay Time Tap
Нажатиями данной кнопки с нужными интервалами можно установить время задержки.
2.3 Кнопка ESS
Данная кнопка используется для запуска или осуществления установок ESS (пошагового секвенсера
экспрессии).
3. Секция записи программ и других
установок
3.1 Кнопка AMP/LINE
Данная кнопка осуществляет установки AX3000G для прибора, к
которому он подключен, что отображается иконкой
на дисплее.
3.2 Кнопка GLOBAL
Нажмите кнопку GLOBAL и используйте кнопки
/
для
переключения между пунктами меню в указанном ниже порядке.
Korg AX3000G. Руководство пользователя
7
2.1
2.2
2.3
3.1
3.2
3.3
3.4

После того, как на дисплее отобразится требуемый пункт, наст…
Страница 8
- Изображение
- Текст
После того, как на дисплее отобразится требуемый пункт, настройте значение параметра регулятором 1 или
кнопками
/
.
MIDI CH:
Установка MIDI-канала
PCHG OUT:
Передача сообщений Program Change
CCHG I/O:
Передача сообщений Control Change
SYEX OUT:
Передача сообщений System Exclusive
DUMP CUR:
Дамп текущей программы через выход MIDI OUT
DUMP ALL:
Дамп памяти AX3000G через выход MIDI OUT
DOUT LVL:
Установка выходного уровня S/P DIF на одно из пяти значений: -12, -6, 0, +6, +12 [дБ]
3.3 Кнопка WRITE
Используется для сохранения созданной пользователем программы или установок.
3.4 Кнопка EXIT/TUNE
Используется для прерывания операции записи программы или установок. Если дисплей отображает имя
программы, нажатие данной кнопки переводит прибор в режим тюнера. Удерживая нажатой эту кнопку можно
включать/отключать функцию Key Lock, которая отключает функционирование всех кнопок, селекторов и
регуляторов.
4. Секция дисплея/курсора
В этой области отображается название программы, а
также имя и значение параметра, который редактируется
в текущий момент.
4.1 Кнопки
/
Используются для редактирования значения параметра.
4.2 Кнопки
/
Используются для выбора параметра для редактирования
или при редактировании имени программы.
4.3 Дисплей имени
Отображает имя программы, эффекта или название параметра.
4.4 Дисплей значений
Отображает значение редактируемого в настоящий момент параметра. Если отображаемое значение
совпадает со значением по умолчанию, высвечивается пиктограмма Original Value . Если дисплей имени
отображает имя программы, и оно или индикатор BANK не мигают, номера банка и программы отображаются
в виде “2-1” (то есть банк 2, программа 1).
4.5 Иконка OUTPUT
Отображает выходное назначение AX3000G (AMP/LINE).
4.6 Иконка CABINET
Отображается при включенном модуле кабинета.
4.7 Иконка EXP
Отображается при доступности педали экспрессии.
4.8 Иконка Quick Assign
Отображается при манипуляциях с параметром, который может быть назначен на педаль экспрессии,
индицируя доступность функции Quick Assign.
8
Korg AX3000G. Руководство пользователя
4.1
4.2
4.3
4.4
4.5
4.6
4.7
4.8

Дисплей банка Отображает номер банка. Если включен режим тю…
Страница 9
- Изображение
- Текст
5. Дисплей банка
5.1 Дисплей банка
Отображает номер банка. Если включен режим тюнера,
отображает название ноты.
6. Секция банка/выбора программы
6.1 Кнопки BANK UP/DOWN
В режиме Program Select кнопки Bank Up
èëè Bank Down используются для вызова
следующего или предыдущего банка
соответственно.
В режиме Program Select вы можете
нажать и удерживать кнопку Bank Up для
перехода в режим Individual (индикатор
вверху слева от кнопки будет гореть
зеленым цветом). В режиме Individual вы
можете использовать селекторы программ
для независимого включения/отключения
пре-эффектов, моделей Drive/Amp,
эффектов модуляции и задержки. Кнопкой Bank Down можно включать/отключать эффект реверберации.
6.2 Селекторы и индикаторы программ
Кнопки используются для выбора программ. Светодиод вверху слева от кнопки индицирует выбор красным
цветом. В режиме Individual вы можете использовать селекторы программ для независимого
включения/отключения пре-эффектов, моделей Drive/Amp, эффектов модуляции и задержки (зеленый цвет
светодиода).
7. Секция управления эффектами
7.1 Переключатель CONTROL
Данный переключатель управляет параметром эффекта, назначенным
на него в каждой программе.
7.2 Педаль EXP (Экспрессия)
Эта педаль управляет назначенными на нее для каждой программы
параметрами: громкостью, вау и параметрами эффекта. При работе с
ESS, на педаль назначаются скорость или шаг секвенции. Сильное
нажатие на педаль экспрессии активизирует находящуюся под ней
кнопку, тем самым позволяя отключить назначенный на педаль
эффект, кроме громкости.
8. ESS/Индикатор педали/Дисплей тюнера
8.1 ESS/Индикатор педали/Дисплей тюнера
При работе с ESS, индицирует общее количество шагов (зеленый цвет
светодиода) и текущий шаг (красный цвет светодиода). При работе с
педалью экспрессии, индицирует текущую позицию педали (красный
цвет светодиода). В режиме тюнера, индицирует настройку (красный
или зеленый цвет светодиода).
З
За
ам
мееч
ча
ан
ни
иее: Результат смены программы зависит от назначения
педали экспрессии следующим образом.
Если педаль экспрессии назначена на VOLUME, DELAY INPUT, REVERB
INPUT или аналогично предыдущей программе, позиция педали будет
принята моментально после смены программы, и индикатор педали
будет гореть.
Во всех остальных случаях, после смены программы будет моментально
принято определенное в ней значение, и индикатор педали не будет
гореть до момента перемещения педали.
Korg AX3000G. Руководство пользователя
9
5.1
6.1
6.2
7.1
7.2
8.1

Тыльная панель
9. Питание
9.1 Разъем DC9V
Служит для подключения прилагаемого сетевого адаптера.
10. Входы и выходы
10.1 Разъем INPUT
Служит для подключения гитары.
10.2 Разъем AUX IN (стерео миниджек).
Служит для подключения аналогового выхода внешнего аудиоустройства.
З
За
ам
мееч
ча
ан
ни
иее: Этот разъем позволяет подключать стандартный CD/MP3-плейер или другой прибор для
параллельного воспроизведения фонового музыкального сопровождения, под которое производится игра на
гитаре. Уровень воспроизведения фонограммы определяется выходными регулировками подключенного
устройства.
10.3 Разъемы INSERT (SEND, RETURN)
Служат для подключения внешних эффект-процессоров или педалей. Подключайте SEND ко входу внешних
эффект-процессоров. Подключайте RETURN к выходу внешних эффект-процессоров.
10.4 Разъемы OUTPUT (L/MONO, R).
Выходные аналоговые разъемы (симметричные/несимметричные TRS). Для моно-коммутации используйте
разъем L/MONO.
10.5 Регулятор LEVEL
Определяет уровни сигналов на выходах OUTPUT è PHONE.
10.6 Разъем PHONE (стерео миниджек).
Выход на наушники.
11. MIDI
11.1 Разъем MIDI OUT
Используется для передачи MIDI-данных во внешнее MIDI-оборудование.
10
Korg AX3000G. Руководство пользователя
9
10
11 12
10.1
10.2 10.3 10.4
10.5 10.6
11.1
11.2

Комментарии
19:12
Korg AX3000G. Гитарный процессор (несерьёзный обзор)
11:55
KORG ToneWorks AX3000G demo (HQ audio)
15:21
Korg AX3000G demo and tour — some great features
09:37
How did I miss this!? Korg AX3000G Multi effect for guitar
 08:49
08:49
???? ¿Cómo usar la pedalera Korg Ax3000g Modeling Signal Processor? ????Multiefectos #1- Carlitos Calice
07:27
GUITAR PROCESSOR KORG AX3000G
03:51
AX3000G Guitar Pedal — Rhythm Delay — capability demo by Dave Monk
G. Руководство пользователя…
Korg ax3000g руководство пользователя, Гарантийное обслуживание, Гитарный процессор эффектов
- Изображение
- Текст
Korg AX3000G. Руководство пользователя
1
О
Оф
фи
иц
ци
иа
ал
лььн
ны
ый
й и
и ээк
ксск
кл
лю
юззи
иввн
ны
ый
й д
ди
исст
тр
ри
иб
бьью
ют
то
ор
р к
ко
ом
мп
па
ан
ни
ии
и K
Ko
orrg
g н
на
а т
теер
рр
ри
ит
то
ор
ри
ии
и Р
Ро
осссси
ии
и,, сст
тр
ра
ан
н
Б
Ба
ал
лт
ти
ии
и и
и С
СН
НГ
Г —
— к
ко
ом
мп
па
ан
ни
ия
я A
A&
&T
T T
Trra
ad
dee..
Д
Да
ан
нн
но
оее р
руук
ко
овво
од
дсст
твво
о п
пр
реед
до
осст
та
аввл
ля
яеет
тсся
я б
беессп
пл
ла
ат
тн
но
о..Е
Ессл
ли
и ввы
ы п
пр
ри
ио
об
бр
реел
ли
и д
да
ан
нн
ны
ый
й п
пр
ри
иб
бо
ор
р н
нее уу
о
оф
фи
иц
ци
иа
ал
лььн
но
огго
о д
ди
исст
тр
ри
иб
бьью
ют
то
ор
ра
а ф
фи
ир
рм
мы
ы K
Ko
orrg
g и
ил
ли
и а
аввт
то
ор
ри
иззо
овва
ан
нн
но
огго
о д
ди
ил
леер
ра
а к
ко
ом
мп
па
ан
ни
ии
и A
A&
&T
T T
Trra
ad
dee,,
к
ко
ом
мп
па
ан
ни
ия
я A
A&
&T
T T
Trra
ad
dee н
нее н
неессеет
т о
от
тввеет
тсст
тввеен
нн
но
осст
ти
и зза
а п
пр
реед
до
осст
та
аввл
леен
ни
иее б
беессп
пл
ла
ат
тн
но
огго
о п
пеер
реевво
од
да
а н
на
а
р
руусссск
ки
ий
й я
яззы
ык
к р
руук
ко
овво
од
дсст
твва
а п
по
ол
лььззо
овва
ат
теел
ля
я,, а
а т
та
ак
кж
жее зза
а о
оссуущ
щеесст
тввл
леен
ни
иее гга
ар
ра
ан
нт
ти
ий
йн
но
огго
о ссеер
рвви
иссн
но
огго
о
о
об
бссл
лууж
жи
ивва
ан
ни
ия
я..
©
© ®
® A
A&
&T
T T
Trra
ad
dee,, IIn
ncc..
Гарантийное обслуживание
По всем вопросам, связанным с ремонтом или сервисным обслуживанием гитарного процессора эффектов
AX3000G, обращайтесь к представителям фирмы Korg — компании A&T Trade.
Телефон для справок (095) 796-9262; e-mail: synth@attrade.ru
Korg AX3000G
Руководство пользователя
Гитарный процессор эффектов
Правила эксплуатации
Расположение
Для предотвращения выхода из строя инструмента не эксплуатируйте и не храните его в местах, где он может
быть подвергнут:
• прямому действию солнечных лучей;
• экстремальным температурам или влажности;
• попаданию пыли или грязи;
• интенсивной вибрации;
• сильным магнитным полям.
Питание
Запрещается использовать сетевой адаптер в сетях с напряжением, отличным от указанного в спецификациях.
Интерференция
Для того, чтобы избежать наводок, располагайте теле- и радиоприемники на возможно большем расстоянии от
прибора.
Эксплуатация
Не прикладывайте чрезмерных усилий при манипуляциях с регуляторами прибора. Это может вывести их из
строя.
Уход
Внешние поверхностей инструмента протирайте чистой сухой тряпкой. Запрещается использование
растворителей и полиролей.
Хранение руководства
После прочтения данного руководства, пожалуйста сохраняйте его для дальнейшего использования.
Попадание инородных тел внутрь корпуса прибора
Не оставляйте рядом с инструментом емкости с жидкостью. Попадание влаги внутрь прибора может привести
к поломке, возгоранию или поражению электрическим током.
Не допускайте попадания металлических предметов внутрь корпуса инструмента. Если это все же произошло,
немедленно отключите питание инструмента, отсоединив от сети блок питания. Затем обратитесь за помощью
к ближайшему дилеру компании Korg или в магазин, в котором был приобретен инструмент.
Радиомагнитное излучение
Оборудование прошло тестовые испытания и соответствует требованиям, накладываемым на цифровые
приборы класса “B” согласно части 15 правил FCC. Эти ограничения разработаны для обеспечения надежной
защиты от интерференции при инсталляции оборудования в жилых помещениях. Прибор генерирует,
использует и способен излучать электромагнитные волны и, если установлен и эксплуатируется без
соблюдения приведенных рекомендаций, может вызвать помехи в работе радиосистем. Тем не менее нет
полной гарантии, что при отдельных инсталляциях прибор не будет генерировать радиочастотные помехи.
Если прибор влияет на работу радио- или телевизионных систем (это проверяется включением и отключением
прибора), то рекомендуется предпринять следующие меры:
• Переориентируйте или расположите в другом месте принимающую антенну.
• Разнесите на возможно большее расстояние прибор и приемник.
• Включите прибор в розетку, которая находится в цепи, отличной от цепи розетки приемника.
• Проконсультируйтесь с дилером или квалифицированным телевизионным мастером.
Несанкционированная модификация оборудования пользователем может привести к лишению права на
гарантийное обслуживание данного оборудования.
2
Korg AX3000G. Руководство пользователя
Декларация соответствия европейским стандартам CE Маркировка…
Страница 3
- Изображение
- Текст
Декларация соответствия европейским стандартам CE
Маркировка CE на приборах компании Korg, работающих от сети и выпущенных до 31 декабря 1996 года
означает, что они удовлетворяют требованиям стандартов EMC Directive (89/336/EEC) è CE mark Directive
(93/68/EEC). Приборы с этой маркировкой, выпущенные после 1 января 1997 года, кроме перечисленных
стандартов удовлетворяют еще и требованиям стандарта Low Voltage Directive (73/23/EEC).
Маркировка CE на приборах компании Korg, работающих от батарей, означает, что они удовлетворяют
требованиям стандартов EMC Directive (89/336/EEC) è CE mark Directive (93/68/EEC).
*Названия компаний, продукции, форматов и т.д. являются торговыми марками соответствующих
собственников.
Важное замечание для потребителей
Изделия KORG разработана согласно точным спецификациям и требованиям по напряжению для каждой
страны. Эти изделия имеют гарантию дистрибьютера KORG только в стране покупки. Все изделия KORG, не
имеющие гарантийной квитанции или серийного номера, освобождаются от гарантийных обязательств и
технического обслуживания со стороны производителя / дистрибьютера. Это требование необходимо для
защиты прав потребителя и его безопасности.
Содержание
Введение . . . . . . . . . . . . . . . . . . . . . . . . . . . . . . . . . . . 5
Основные возможности . . . . . . . . . . . . . . . . . . . . . . . . . . . . . . . . . . . . . . . . . . . . . . . . 5
Внешний вид прибора . . . . . . . . . . . . . . . . . . . . . . . . . 6
Лицевая панель . . . . . . . . . . . . . . . . . . . . . . . . . . . . . . . . . . . . . . . . . . . . . . . . . . . . . . . 6
Тыльная панель . . . . . . . . . . . . . . . . . . . . . . . . . . . . . . . . . . . . . . . . . . . . . . . . . . . . . 10
Настройки. . . . . . . . . . . . . . . . . . . . . . . . . . . . . . . . . . 11
Установка выхода . . . . . . . . . . . . . . . . . . . . . . . . . . . . . . . . . . . . . . . . . . . . . . . . . . . . 11
Коммутация . . . . . . . . . . . . . . . . . . . . . . . . . . . . . . . . . . . . . . . . . . . . . . . . . . . . . . . . . 11
Использование AX3000G с MIDI устройством или компьютером . . . . . . . . . . . . . . . . 13
Работа с AX3000G . . . . . . . . . . . . . . . . . . . . . . . . . . . 13
Режим Program Select . . . . . . . . . . . . . . . . . . . . . . . . . . . . . . . . . . . . . . . . . . . . . . . . . 13
Режим Individual . . . . . . . . . . . . . . . . . . . . . . . . . . . . . . . . . . . . . . . . . . . . . . . . . . . . . 14
Включение и отключение функции KeyLock . . . . . . . . . . . . . . . . . . . . . . . . . . . . . . . . 14
Создание и сохранение собственных программ . . . . . 14
Маршрутизация сигнала . . . . . . . . . . . . . . . . . . . . . . . . . . . . . . . . . . . . . . . . . . . . . . . 14
Создание программы . . . . . . . . . . . . . . . . . . . . . . . . . . . . . . . . . . . . . . . . . . . . . . . . . . 14
Наименование программы. . . . . . . . . . . . . . . . . . . . . . . . . . . . . . . . . . . . . . . . . . . . . . 15
Сохранение программы . . . . . . . . . . . . . . . . . . . . . . . . . . . . . . . . . . . . . . . . . . . . . . . . 16
Восстановление установки параметра по умолчанию (Original Value) . . . . . . . . . . . . 16
Тюнер (Обход, Мьют) . . . . . . . . . . . . . . . . . . . . . . . . . 16
Процедура настройки . . . . . . . . . . . . . . . . . . . . . . . . . . . . . . . . . . . . . . . . . . . . . . . . . 16
Калибровка тюнера . . . . . . . . . . . . . . . . . . . . . . . . . . . . . . . . . . . . . . . . . . . . . . . . . . . 17
Типы эффектов . . . . . . . . . . . . . . . . . . . . . . . . . . . . . 17
Модели DRIVE/AMP . . . . . . . . . . . . . . . . . . . . . . . . . . . . . . . . . . . . . . . . . . . . . . . . . . . 17
Модели CABINET . . . . . . . . . . . . . . . . . . . . . . . . . . . . . . . . . . . . . . . . . . . . . . . . . . . . . 19
Эффект PRE . . . . . . . . . . . . . . . . . . . . . . . . . . . . . . . . . . . . . . . . . . . . . . . . . . . . . . . . . 20
Korg AX3000G. Руководство пользователя
3
Эффекты MOD . . . . . . . . . . . . . . . . . . . . . . . . . . . . . . . . . . . . . . . . . . . . . . . . . . . . . . . 22
Эффекты DELAY . . . . . . . . . . . . . . . . . . . . . . . . . . . . . . . . . . . . . . . . . . . . . . . . . . . . . 25
Эффекты REVERB . . . . . . . . . . . . . . . . . . . . . . . . . . . . . . . . . . . . . . . . . . . . . . . . . . . . 27
Использование педалей экспрессии . . . . . . . . . . . . . . 28
Установки педали экспрессии . . . . . . . . . . . . . . . . . . . . . . . . . . . . . . . . . . . . . . . . . . . 28
Установки переключателя CONTROL . . . . . . . . . . . . . . . . . . . . . . . . . . . . . . . . . . . . . . 30
Настройка чувствительности педали . . . . . . . . . . . . . . . . . . . . . . . . . . . . . . . . . . . . . . 31
Использование ESS для управления параметром. . . . 32
Управление по MIDI . . . . . . . . . . . . . . . . . . . . . . . . . . 34
Подключение к MIDI устройству или компьютеру . . . . . . . . . . . . . . . . . . . . . . . . . . . 34
Установка MIDI канала (“MIDI CH”) . . . . . . . . . . . . . . . . . . . . . . . . . . . . . . . . . . . . . . . 34
Сообщения Program Change (“PCHG OUT”) . . . . . . . . . . . . . . . . . . . . . . . . . . . . . . . . . . 35
Сообщения Control Change (“CCHG I/O”) . . . . . . . . . . . . . . . . . . . . . . . . . . . . . . . . . . . . 35
Смена параметров (”SYEX OUT”) . . . . . . . . . . . . . . . . . . . . . . . . . . . . . . . . . . . . . . . . . 36
Сохранение и восстановление данных программ (“DUMP CUR”, “DUMP ALL”) . . . . . . 36
Восстановление заводских пресетных программ. . . . 37
Неисправности . . . . . . . . . . . . . . . . . . . . . . . . . . . . . . 37
Технические характеристики . . . . . . . . . . . . . . . . . . . 38
Параметры эффектов . . . . . . . . . . . . . . . . . . . . . . . . . 39
4
Korg AX3000G. Руководство пользователя
Введение
Благодарим за приобретение моделирующего сигнал-процессора TONEWORKS AX3000G, прекрасно
подходящего для работы как на концертах, так и в студии!
Для максимального использования потенциала AX3000G и поддержания бесперебойной службы прибора
внимательно прочтите данное руководство. После прочтения руководства, храните его для дальнейших
ссылок.
Основные возможности
• Использование технологии звукового моделирования REMS.
Относительно REMS
REMS (Резонансная структура и электронно-схемотехническая система моделирования) является
разработкой фирмы KORG для прецизионного воспроизведения всех характеристик и природы
акустических и электрических инструментов с помощью компонентов электронных схем: призвуки
корпусов инструментов, громкоговорители и колонки, акустические пространства, микрофоны, лампы,
транзисторы и т. д.
• 72 типа встроенных эффектов моделирования с возможностью одновременного использования 7 эффектов
(включая шумопонижение). Параллельно доступно подключение эффектов в разрыв.
• Использование регуляторов выбора блоков эффектов для моментального выбора необходимого эффекта из
5 групп (Pre-Effect, Drive/Amp, Modulation, Delay, Reverb).
• Возможно подключение внешних эффект-процессоров в разрыв.
• Отредактированные установки усилительной и эффекторной секций (включая состояние вкл./выкл.
внешнего эффекта) можно сохранять в виде пользовательских программ в одну из 96 ячеек памяти.
Изначально AX3000G поставляется с 32 пресетными программами.
• Возможно использование ножных переключателей в индивидуальном режиме для независимого
включения/отключения каждого эффекта.
• Возможно использование педали экспрессии для управления параметрами эффектов в реальном времени, а
также громкости и вау.
• Функция Quick Assign позволяет быстро назначать параметры на педаль экспрессии.
• AX3000G оборудован пошаговым секвенсером экспрессии (в руководстве имеющим аббревиатуру ESS),
обеспечивающим пошаговое управление различными параметрами эффектов.
• Возможно поддержание неизменным типа и времени задержки, а также типа реверберации при
переключении программ (назначенные на переключатель CONTROL функция HOLD эффекта HOLD
DELAY или функция FREEZ эффекта FREEZ при этом отключаются).
• AX3000G содержит переключатель CONTROL, позволяющий устанавливать время задержки функцией TAP
TEMPO, включать/отключать внешний эффект, изменять скорость эффекта вращающегося динамика и так
далее.
• Для удобства настройки предусмотрен автоматический хроматический тюнер.
• Входы AUX IN позволяют играть на гитаре под фонограмму, подающуюся с внешнего аудиоустройства.
• Цифровой выход S/P DIF и разъемы MIDI IN/OUT обеспечивают простоту интеграции AX3000G в
аудиокомплекты различных конфигураций.
• Программное обеспечение “AX3000G Sound Editor” упрощает процедуры редактирования различных
параметров AX3000G, а также сохранения программ и управления ими. По вопросам получения “AX3000G
Sound Editor” обращайтесь к дистрибьютору компании Korg, находящемуся на территории страны, где был
приобретен прибор. Кроме того, это программное обеспечение можно скачать с сайта http://www.korg.co.jp.
Korg AX3000G. Руководство пользователя
5
Внешний вид прибора
Лицевая панель
1. Секция редакции эффектов
1.1 Кнопки групп эффектов
Используйте данные кнопки для выбора группы эффектов, редактируемой регуляторами 1 — 5, или для
независимого включения/отключения каждого эффекта. Индикатор эффекта горит при включенном эффекте,
мигает при редакции эффекта и не горит при отключенном эффекте.
При нажатии кнопки, ее индикатор мигает; далее регуляторами 1 — 5 можно редактировать параметры
эффектов данной группы. Для отключения эффекта нажмите кнопку его группы (индикатор замигает) и
повторно нажмите ее для отключения эффекта (индикатор погаснет); дисплей отобразит “—-OFF—”..
1.2 Селекторы моделей эффектов
Используются для выбора модели эффекта в каждой группе эффектов. Возможен выбор 11 типов пре-
эффектов, 16 типов моделей драйва/усиления и 11 типов эффектов модуляции, задержки и реверберации. При
манипуляциях с селектором, индикатор группы эффектов горит, и возможно использование регуляторов 1 — 5
для редакции параметров.
З
За
ам
мееч
ча
ан
ни
иее: При смене типа эффекта параметры инициализируются.
З
За
ам
мееч
ча
ан
ни
иее: При смене типа модели драйва/усиления, модель кабинета автоматически меняется на наиболее
подходящую.
1.3 Кнопка INSERT
Включает/отключает эффект разрыва. При включении схемы посыла/возврата сигнала на внешний эффект-
процессор индикатор горит, при отключении — не горит.
1.4 Кнопка CABINET
Включает/отключает модель кабинета или, при необходимости, меняет тип модели кабинета, автоматически
выбираемого при смене модели драйва/усиления. Для отключения модели кабинета нажмите ее кнопку,
6
Korg AX3000G. Руководство пользователя
1
2
3
4
5
6
7
8
1.2
1.1
1.3
1.4 1.5 1.6 1.7
дисплей отобразит имя модели кабинета (это означает, что модель кабинета включена), а затем повторно
нажмите кнопку модели кабинета. Дисплей отобразит “—-OFF—”, и модель кабинета будет отключена.
З
За
ам
мееч
ча
ан
ни
иее: Если включены модели кабинета и драйва/усиления, дисплей отображает иконку кабинета
.
1.5 Кнопка NR/PROG LVL (Шумопонижение/Уровень программы)
Используйте данную кнопку для установки шумопонижения или уровня (громкости) каждой программы.
П
Пр
ри
им
мееч
ча
ан
ни
иее: Заводской уровень программы равен 5.0.
1.6 Кнопка назначения педали EXP/CTL (Экспрессия/Управление)
Данная кнопка изменяет назначение педали экспрессии или переключателя CONTROL.
1.7 Кнопка RENAME
Применяется для изменения имени программы.
Используйте кнопки
/
для смены позиции курсора на дисплее и регулятор 1 или кнопки
/
для смены
символа в позиции курсора.
2. Секция редакции параметров
2.1 Регуляторы параметров 1 — 5
Данные регуляторы применяются для настройки параметров эффектов. Изменения будут относиться к
эффекту, кнопка группы которого мигает, а также к установкам кабинета, шумопонижения, уровня
программы, педали экспрессии, ESS, и переключателя CONTROL. Подсветка регуляторов указывает на
доступные для редактирования в данный момент параметры.
Мигающий индикатор регулятора соответствует текущему редактируемому параметру. Однако, при наличии
только одного редактируемого параметра индикатор не мигает.
З
За
ам
мееч
ча
ан
ни
иее: При выполнении операций RENAME, WRITE или установках GLOBAL, для изменения значения вы
можете использовать регулятор 1.
2.2 Кнопка Delay Time Tap
Нажатиями данной кнопки с нужными интервалами можно установить время задержки.
2.3 Кнопка ESS
Данная кнопка используется для запуска или осуществления установок ESS (пошагового секвенсера
экспрессии).
3. Секция записи программ и других
установок
3.1 Кнопка AMP/LINE
Данная кнопка осуществляет установки AX3000G для прибора, к
которому он подключен, что отображается иконкой
на дисплее.
3.2 Кнопка GLOBAL
Нажмите кнопку GLOBAL и используйте кнопки
/
для
переключения между пунктами меню в указанном ниже порядке.
Korg AX3000G. Руководство пользователя
7
2.1
2.2
2.3
3.1
3.2
3.3
3.4
После того, как на дисплее отобразится требуемый пункт, наст…
Страница 8
- Изображение
- Текст
После того, как на дисплее отобразится требуемый пункт, настройте значение параметра регулятором 1 или
кнопками
/
.
MIDI CH:
Установка MIDI-канала
PCHG OUT:
Передача сообщений Program Change
CCHG I/O:
Передача сообщений Control Change
SYEX OUT:
Передача сообщений System Exclusive
DUMP CUR:
Дамп текущей программы через выход MIDI OUT
DUMP ALL:
Дамп памяти AX3000G через выход MIDI OUT
DOUT LVL:
Установка выходного уровня S/P DIF на одно из пяти значений: -12, -6, 0, +6, +12 [дБ]
3.3 Кнопка WRITE
Используется для сохранения созданной пользователем программы или установок.
3.4 Кнопка EXIT/TUNE
Используется для прерывания операции записи программы или установок. Если дисплей отображает имя
программы, нажатие данной кнопки переводит прибор в режим тюнера. Удерживая нажатой эту кнопку можно
включать/отключать функцию Key Lock, которая отключает функционирование всех кнопок, селекторов и
регуляторов.
4. Секция дисплея/курсора
В этой области отображается название программы, а
также имя и значение параметра, который редактируется
в текущий момент.
4.1 Кнопки
/
Используются для редактирования значения параметра.
4.2 Кнопки
/
Используются для выбора параметра для редактирования
или при редактировании имени программы.
4.3 Дисплей имени
Отображает имя программы, эффекта или название параметра.
4.4 Дисплей значений
Отображает значение редактируемого в настоящий момент параметра. Если отображаемое значение
совпадает со значением по умолчанию, высвечивается пиктограмма Original Value . Если дисплей имени
отображает имя программы, и оно или индикатор BANK не мигают, номера банка и программы отображаются
в виде “2-1” (то есть банк 2, программа 1).
4.5 Иконка OUTPUT
Отображает выходное назначение AX3000G (AMP/LINE).
4.6 Иконка CABINET
Отображается при включенном модуле кабинета.
4.7 Иконка EXP
Отображается при доступности педали экспрессии.
4.8 Иконка Quick Assign
Отображается при манипуляциях с параметром, который может быть назначен на педаль экспрессии,
индицируя доступность функции Quick Assign.
8
Korg AX3000G. Руководство пользователя
4.1
4.2
4.3
4.4
4.5
4.6
4.7
4.8
Дисплей банка Отображает номер банка. Если включен режим тю…
Страница 9
- Изображение
- Текст
5. Дисплей банка
5.1 Дисплей банка
Отображает номер банка. Если включен режим тюнера,
отображает название ноты.
6. Секция банка/выбора программы
6.1 Кнопки BANK UP/DOWN
В режиме Program Select кнопки Bank Up
èëè Bank Down используются для вызова
следующего или предыдущего банка
соответственно.
В режиме Program Select вы можете
нажать и удерживать кнопку Bank Up для
перехода в режим Individual (индикатор
вверху слева от кнопки будет гореть
зеленым цветом). В режиме Individual вы
можете использовать селекторы программ
для независимого включения/отключения
пре-эффектов, моделей Drive/Amp,
эффектов модуляции и задержки. Кнопкой Bank Down можно включать/отключать эффект реверберации.
6.2 Селекторы и индикаторы программ
Кнопки используются для выбора программ. Светодиод вверху слева от кнопки индицирует выбор красным
цветом. В режиме Individual вы можете использовать селекторы программ для независимого
включения/отключения пре-эффектов, моделей Drive/Amp, эффектов модуляции и задержки (зеленый цвет
светодиода).
7. Секция управления эффектами
7.1 Переключатель CONTROL
Данный переключатель управляет параметром эффекта, назначенным
на него в каждой программе.
7.2 Педаль EXP (Экспрессия)
Эта педаль управляет назначенными на нее для каждой программы
параметрами: громкостью, вау и параметрами эффекта. При работе с
ESS, на педаль назначаются скорость или шаг секвенции. Сильное
нажатие на педаль экспрессии активизирует находящуюся под ней
кнопку, тем самым позволяя отключить назначенный на педаль
эффект, кроме громкости.
8. ESS/Индикатор педали/Дисплей тюнера
8.1 ESS/Индикатор педали/Дисплей тюнера
При работе с ESS, индицирует общее количество шагов (зеленый цвет
светодиода) и текущий шаг (красный цвет светодиода). При работе с
педалью экспрессии, индицирует текущую позицию педали (красный
цвет светодиода). В режиме тюнера, индицирует настройку (красный
или зеленый цвет светодиода).
З
За
ам
мееч
ча
ан
ни
иее: Результат смены программы зависит от назначения
педали экспрессии следующим образом.
Если педаль экспрессии назначена на VOLUME, DELAY INPUT, REVERB
INPUT или аналогично предыдущей программе, позиция педали будет
принята моментально после смены программы, и индикатор педали
будет гореть.
Во всех остальных случаях, после смены программы будет моментально
принято определенное в ней значение, и индикатор педали не будет
гореть до момента перемещения педали.
Korg AX3000G. Руководство пользователя
9
5.1
6.1
6.2
7.1
7.2
8.1
Тыльная панель
9. Питание
9.1 Разъем DC9V
Служит для подключения прилагаемого сетевого адаптера.
10. Входы и выходы
10.1 Разъем INPUT
Служит для подключения гитары.
10.2 Разъем AUX IN (стерео миниджек).
Служит для подключения аналогового выхода внешнего аудиоустройства.
З
За
ам
мееч
ча
ан
ни
иее: Этот разъем позволяет подключать стандартный CD/MP3-плейер или другой прибор для
параллельного воспроизведения фонового музыкального сопровождения, под которое производится игра на
гитаре. Уровень воспроизведения фонограммы определяется выходными регулировками подключенного
устройства.
10.3 Разъемы INSERT (SEND, RETURN)
Служат для подключения внешних эффект-процессоров или педалей. Подключайте SEND ко входу внешних
эффект-процессоров. Подключайте RETURN к выходу внешних эффект-процессоров.
10.4 Разъемы OUTPUT (L/MONO, R).
Выходные аналоговые разъемы (симметричные/несимметричные TRS). Для моно-коммутации используйте
разъем L/MONO.
10.5 Регулятор LEVEL
Определяет уровни сигналов на выходах OUTPUT è PHONE.
10.6 Разъем PHONE (стерео миниджек).
Выход на наушники.
11. MIDI
11.1 Разъем MIDI OUT
Используется для передачи MIDI-данных во внешнее MIDI-оборудование.
10
Korg AX3000G. Руководство пользователя
9
10
11 12
10.1
10.2 10.3 10.4
10.5 10.6
11.1
11.2
Комментарии
Гитарный процессор эффектов BOSS Pocket GT

FX1/FX2
С FX1 и FX2 вы можете выбрать эффект, который будет использоваться, из следующих. Вы можете выбрать один и тот же эффект для FX1 и FX2.
| Параметр | Значение | объяснение |
| ON/OFF | ВЫКЛ, ВКЛ | Включает / выключает этот эффект. |
| ТИП | См. ТИП FX1/FX2. |
ТИП FX1/FX2
Это список эффектов, которые можно выбрать для FX1/FX2.
| Название эффекта | объяснение |
| КОМПРЕССОР | Это эффект, создающий длительный сустейн за счет выравнивания уровня громкости входного сигнала. Вы также можете использовать его в качестве ограничителя для подавления только звуковых пиков и предотвращения искажений. |
| Ограничитель | Лимитер ослабляет громкие входные уровни для предотвращения искажений. |
| СЕНСОРНЫЙ ВАХ | Вы можете создать эффект вау с изменением фильтра в зависимости от уровня гитары (баса). |
| ГРАФИЧЕСКИЙ ЭКВАЛАЙЗЕР | Этот эффект регулирует тональный характер. Можно настроить семь частотных диапазонов. |
| ПАРАМЕТРИЧЕСКИЙ ЭКВАЛАЙЗЕР | Этот эффект регулирует тональный характер. Можно настроить четыре полосы частот. |
| TONE ИЗМЕНИТЬ | Это изменяет тон подключенной гитары. |
| GUITAR SIM (СИМУЛЯТОР ГИТАРЫ) | Моделирование характеристик отдельных гитарных компонентов, таких как звукосниматели и различные корпуса гитар, позволяет переключаться между различными типами гитар при использовании одной гитары. |
| AC.GUITAR SIM (СИМУЛЯТОР AC.GUITAR) | Этот эффект имитирует тональный характер акустической гитары. |
| МЕДЛЕННАЯ ПЕРЕДАЧА | Это создает эффект увеличения громкости («скрипичный» звук). |
| Октава | Это добавляет ноту на одну октаву ниже и ноту на две октавы ниже, создавая более богатый звук. |
| ИЗМЕНЕНИЕ ПИТЧА | Этот эффект изменяет высоту исходного звука (вверх или вниз) в диапазоне двух октав. |
| ГАРМОНИСТА | Harmonist — это эффект, в котором величина смещения регулируется в соответствии с анализом гитарного входа, что позволяет создавать гармонию на основе диатонических гамм. |
| ОВЕРТОН | Этот эффект использует технологию MDP (Multi-Dimensional Processing) для добавления к звуку новых гармоник, создавая резонанс и богатство, которых не было в исходном звуке. |
| ОБРАТНАЯ СВЯЗЬ | Генерирует обратную связь. |
| AC.ПРОЦЕССОР | Этот процессор позволяет изменять звук звукоснимателя электроакустической гитары, создавая более насыщенный звук, аналогичный тому, который получается при близком расположении микрофона к гитаре. |
| ФАЗЕР | Добавляя к прямому звуку фрагменты с разной фазой, эффект фейзера придает звуку свистящий, завихряющийся характер. |
| ФЛАНЖЕР | Эффект фленджера придает звучанию закрученный характер реактивного самолета. |
| ТРЕМОЛО | Тремоло — это эффект, создающий циклическое изменение громкости. |
| ROTARY | Это создает эффект, подобный звуку вращающегося динамика. |
| УНИ-В | Это модели Uni-Vibe. Хотя это напоминает эффект фазера, он также обеспечивает уникальную волнистость, которую вы не можете получить с помощью обычного фазера. |
| ВИБРАТО | Этот эффект создает вибрато, слегка модулируя высоту тона. |
| CHORUS | В этом эффекте к исходному звуку добавляется слегка расстроенный звук, чтобы добавить глубины и широты. |
| ПОД ЗАДЕРЖКА | Это задержка с максимальным временем задержки 1,000 мс. Этот эффект полезен для того, чтобы сделать звук более насыщенным. |
КОМПРЕССОР
Это эффект, создающий длительный сустейн за счет выравнивания уровня громкости входного сигнала. Вы также можете использовать его в качестве ограничителя для подавления только звуковых пиков и предотвращения искажений.
| Параметр | Значение | объяснение |
| ТИП | Выбирает тип компрессора. | |
| Босс | Это модели BOSS CS-3. | |
| HI-BAND | Это компрессор, который добавляет еще более сильный эффект на высоких частотах. | |
| СВЕТ | Это компрессор со световым эффектом. | |
| D-COMP | Это модели MXR DynaComp. | |
| ORANGE | Это смоделировано по звучанию ORANGE SQUEEZER Дэна Армстронга. | |
| ЖИР | При интенсивном применении этот эффект компрессора обеспечивает жирный тон с усилением средних частот. | |
| МЯГКИЙ | При интенсивном применении этот эффект компрессора дает приятный тон с обрезанием высоких частот. | |
| СТЕРЕО | Выбирает стереокомпрессор. | |
| УСТОЙЧИВОСТЬ | 0-100 | Регулирует диапазон (время) усиления сигналов низкого уровня. Большие значения приведут к более длительному сустейну. |
| ATTACK | 0-100 | Регулирует время атаки. |
| УРОВЕНЬ | 0-100 | Регулирует громкость. |
| TONE | -50– + 50 | Регулирует тон. |
Ограничитель
Лимитер ослабляет громкие входные уровни для предотвращения искажений.
| Параметр | Значение | объяснение |
|
ТИП |
Выбор типа лимитера. | |
| Босс | Выбирает стерео лимитер. | |
| СТОЙКА 160D | Это модели dbx 160X. | |
| ВТГ СТОЙКА У | Это модели UREI 1178. | |
| ПОРОГ |
0-100 |
Отрегулируйте его в соответствии с входным сигналом вашей гитары. Когда уровень входного сигнала превышает этот пороговый уровень, применяется ограничение. |
| RATIO | 1:1–ИНФ:1 | Выбирает степень сжатия, используемую для сигналов, превышающих пороговый уровень. |
| УРОВЕНЬ | 0-100 | Регулирует громкость. |
| ATTACK | 0-100 | Регулирует время атаки. |
| РЕЛИЗ | 0-100 | Регулирует время выпуска. |
СЕНСОРНЫЙ ВАХ
Вы можете создать эффект вау с изменением фильтра в зависимости от уровня гитары.
| Параметр | Значение | объяснение |
|
РЕЖИМ |
Выбирает режим вау. | |
| LPF | Фильтр нижних частот. Это создает эффект вау в широком диапазоне частот. | |
| БНФ | Полосовой фильтр. Это создает эффект вау в узком диапазоне частот. | |
|
Полярность |
Выбирает направление, в котором фильтр будет изменяться в ответ на ввод. | |
| DOWN | Частота фильтра упадет. | |
| UP | Частота фильтра повысится. | |
|
SENS |
0-100 |
Регулирует чувствительность, при которой фильтр будет изменяться в направлении, определяемом настройкой полярности. Более высокие значения приведут к более сильному отклику. При значении 0 сила пикинга не будет иметь значения. |
| FREQ | 0-100 | Регулирует центральную частоту эффекта Wah. |
| PEAK | 0-100 | Регулирует способ применения эффекта вау к области вокруг центральной частоты. Более высокие значения дают более сильный тон, который больше подчеркивает эффект вау. При значении 50 будет воспроизводиться стандартный звук вау. |
| УРОВЕНЬ | 0-100 | Регулирует громкость звука эффекта. |
ГРАФИЧЕСКИЙ ЭКВАЛАЙЗЕР
Этот эффект регулирует тональный характер. Можно настроить семь частотных диапазонов.
| Параметр | Значение |
| 100Hz | -20–+20 дБ |
| 200Hz | |
| 400Hz | |
| 800Hz | |
| 1.6kHz | |
| 3.2kHz | |
| 6.4kHz | |
| УРОВЕНЬ | -20–+20 дБ |
ПАРАМЕТРИЧЕСКИЙ ЭКВАЛАЙЗЕР
Этот эффект регулирует тональный характер. Можно настроить четыре полосы частот.
| Параметр | Значение | объяснение |
| НИЗКИЙ ПРИБЫЛЬ | -20–+20 дБ | Регулирует тон для диапазона низких частот. |
| ВЫСОКИЙ ПРИБЫЛЬ | -20–+20 дБ | Регулирует тон для диапазона высоких частот. |
| УРОВЕНЬ | -20–+20 дБ | Регулирует общий уровень громкости эквалайзера. |
| LOW-MID FREQ (НИЗКО-СРЕДНЯЯ ЧАСТОТА) | 20 Гц–10.0
кГц |
Определяет центр частотного диапазона, который будет регулироваться параметром LOW-MID GAIN. |
|
НИЗКО-СРЕДНИЙ Q |
0.5-16 |
Регулирует ширину области, на которую воздействует эквалайзер, с центром в LOW-MID FREQ. Более высокие значения сужают область. |
| НИЗКОЕ СРЕДНЕЕ УСИЛЕНИЕ | -20–+20 дБ | Регулирует тон диапазона низких и средних частот. |
| ВЫСОКАЯ СРЕДНЯЯ ЧАСТОТА
(ВЫСКАЯ-СРЕДНЯЯ ЧАСТОТА) |
20 Гц–10.0
кГц |
Определяет центр частотного диапазона, который будет регулироваться с помощью HIGH-MID GAIN. |
|
ВЫСОКОСРЕДНИЙ Q |
0.5-16 |
Регулирует ширину области, на которую воздействует эквалайзер, с центром в HIGH-MID FREQ. Более высокие значения сужают область. |
| ВЫСОКОСРЕДНЕЕ УСИЛЕНИЕ | -20–+20 дБ | Регулирует тон диапазона низких и средних частот. |
ТОН ИЗМЕНИТЬ
Это изменяет тон подключенной гитары.
| Параметр | Значение | объяснение |
| ТИП | Выбирает тип модификации тона. | |
| ЖИР | Жирный тон с усиленным средним диапазоном. | |
| ПРИСУТСТВИЕ | Яркий тон с усиленным верхним и средним диапазоном. | |
| МЯГКИЙ | Мягкий тон с обрезанными верхними частотами. | |
| В ОБТЯЖКУ | Тон с обрезанными низкими частотами. | |
| УСИЛИТЬ | Тон с усилением высоких частот. | |
| РЕЗОНАТОР 1–3 | Это создает тембр с большей мощностью и панчом за счет добавления резонанса в низкочастотном и среднем диапазонах. | |
| LOW | -50– + 50 | Регулирует тон для диапазона низких частот. |
| ВЫСОКАЯ | -50– + 50 | Регулирует тон для диапазона высоких частот. |
| УРОВЕНЬ | 0-100 | Регулирует громкость звука эффекта. |
| РЕЗОНАНС | 0-100 | Регулирует силу резонанса низких и средних частот, когда для параметра TYPE установлено значение RESO 1, 2 или 3. |
СИМУЛЯТОР ГИТАРЫ
Моделирование характеристик отдельных гитарных компонентов, таких как звукосниматели и различные корпуса гитар, позволяет переключаться между различными типами гитар при использовании одной гитары.
| Параметр | Значение | объяснение |
| ТИП | Выбирает тип симулятора гитары. | |
| С→Ч | Меняет тон звукоснимателя с сингла на тон звукоснимателя хамбакера. | |
| Ч→С | Меняет тон звукоснимателя с хамбакера на тон звукоснимателя с одной катушкой. | |
| H→ПОЛУТОНА | Изменяет тон звукоснимателя хамбакера на полутон звукоснимателя с одной катушкой. | |
| S→ПОЛЫЙ | Изменяет тон звукоснимателя сингла на тон полого корпуса с добавлением резонанса корпуса. | |
| H→ПОЛЫЙ | Изменяет звук звукоснимателя хамбакера на звук полого тела с добавлением резонанса тела. | |
| S→AC | Изменяет тон звукоснимателя с одной катушкой на тон акустической гитары. | |
| H→AC | Изменяет звук звукоснимателя хамбакера на звук акустической гитары. | |
| ПЬЕЗО→AC | Изменяет звук пьезодатчика на звук акустической гитары. | |
| LOW | -50– + 50 | Регулирует тон для диапазона низких частот. |
| ВЫСОКАЯ | -50– + 50 | Регулирует тон для диапазона высоких частот. |
| УРОВЕНЬ | 0-100 | Регулирует громкость звука эффекта. |
AC.ГИТАРА СИМУЛЯТОР
Этот эффект имитирует тональный характер акустической гитары.
| Параметр | Значение | объяснение |
| BODY | 0-100 | Регулирует резонанс тела. |
| LOW | -50– + 50 | Определяет ощущение громкости для низкочастотного диапазона. |
| ВЫСОКАЯ | -50– + 50 | Определяет ощущение громкости для высокочастотного диапазона. |
| УРОВЕНЬ | 0-100 | Определяет громкость эффекта. |
МЕДЛЕННАЯ ПЕРЕДАЧА
Это создает эффект увеличения громкости («скрипичный» звук).
| Параметр | Значение | объяснение |
| SENS | 0-100 | Регулирует чувствительность медленной передачи. Когда он установлен на более низкое значение, эффект медленной передачи может быть получен только при более сильном ударе, в то время как при более слабом ударе эффект не достигается. При установке значения выше эффект получается даже при слабом пикинге. |
| ВРЕМЯ НАРАСТАНИЯ | 0-100 | Регулирует время, необходимое для достижения максимальной громкости с момента начала игры. |
| УРОВЕНЬ | 0-100 | Регулирует громкость звука эффекта. |
Октава
Это добавляет ноту на одну октаву ниже и ноту на две октавы ниже, создавая более богатый звук.
| Параметр | Значение | объяснение |
| -1 октября | 0-100 | Регулирует громкость звука на одну октаву ниже. |
| -2 октября | 0-100 | Регулирует громкость звука на две октавы ниже. |
| ПРЯМОЙ УРОВЕНЬ | 0-100 | Регулирует громкость прямого звука. |
ИЗМЕНЕНИЕ ПИТЧА
Этот эффект изменяет высоту исходного звука (вверх или вниз) в диапазоне двух октав.
| Параметр | Значение | объяснение |
| ПОДАЧА | -24– + 24 | Регулирует величину сдвига высоты тона (величину интервала) с шагом в полутон. |
| ПРЯМОЙ УРОВЕНЬ | 0-100 | Регулирует громкость прямого звука. |
| END | -50– + 50 | Сделайте точную настройку интервала. Сумма изменения в штрафе 100 эквивалентна сумме изменения шага 1. |
| ПРЕДВАРИТЕЛЬНАЯ ЗАДЕРЖКА *1 | 0 мс–300 мс, BPM ˜ – | Регулирует время от момента, когда слышен прямой звук, до момента, когда слышны звуки со сдвигом высоты тона. Обычно вы можете оставить этот набор равным 0 мс. |
| УРОВЕНЬ ЭФФЕКТА | 0-100 | Регулирует громкость переключателя высоты тона. |
| СВЯЗЬ | 0-100 | Регулирует величину обратной связи звука со сдвигом высоты тона. |
ГАРМОНИСТА
Harmonist — это эффект, в котором величина смещения регулируется в соответствии с анализом гитарного входа, что позволяет создавать гармонию на основе диатонических гамм.
| Параметр | Значение | объяснение |
| СВЯЗЬ | 0-100 | Регулирует количество обратной связи звука гармонии. |
| УРОВЕНЬ ЭФФЕКТА | 0-100 | Регулирует громкость звука гармонии. |
| ПРЯМОЙ УРОВЕНЬ | 0-100 | Регулирует громкость прямого звука. |
- Из-за необходимости анализировать высоту звука аккорды (два или более звука, воспроизводимые одновременно) не могут быть воспроизведены. Не забудьте заглушить все остальные струны и играть только по одной ноте за раз.
- Когда вам нужно сыграть на следующей струне, пока звучит определенный звук, приглушите предыдущий звук, а затем сыграйте следующую с четкой атакой. Если устройство не может обнаружить атаку, оно может звучать неправильно.
- Чувствительность может варьироваться в зависимости от ручки TONE гитары и типа звукоснимателя.
ОВЕРТОН
Этот эффект использует технологию MDP (Multi-Dimensional Processing) для добавления к звуку новых гармоник, создавая резонанс и богатство, которых не было в исходном звуке.
| Параметр | Значение | объяснение |
| НИЖНИЙ (НИЖНИЙ УРОВЕНЬ) | 0-100 | Регулирует громкость гармоники на одну октаву ниже. |
| ВЕРХНЯЯ
(ВЕРХНИЙ УРОВЕНЬ) |
0-100 | Регулирует громкость гармоники на одну октаву выше. |
| ПРЯМОЙ УРОВЕНЬ | 0-100 | Регулирует громкость прямого звука. |
| ДЕТУНА | 0-100 | Регулирует количество эффекта расстройки, добавляющего звуку глубины. |
| TONE | -50– + 50 | Регулирует тон. |
ОБРАТНАЯ СВЯЗЬ
Генерирует обратную связь.
| Параметр | Значение | объяснение |
| TRIGGER | ВЫКЛ, ВКЛ | Если TRIGGER включен, применяется эффект обратной связи. |
| ГЛУБИНА | 0-100 | Регулирует легкость возникновения обратной связи при включении FEEDBACKER. |
переменного тока. ПРОЦЕССОР
Этот процессор позволяет изменять звук звукоснимателя электроакустической гитары, создавая более насыщенный звук, аналогичный тому, который получается при близком расположении микрофона к гитаре.
| Параметр | Значение | объяснение |
| ТИП | Выбирает тип моделирования. | |
| МАЛЕНЬКИЙ | Это звук акустической гитары с малым корпусом. | |
| СРЕДНИЙ | Это стандартный звук акустической гитары без прикрас. | |
| BRIGHT | Это яркий звук акустической гитары. | |
| МОЩНОСТЬ | Это мощный звук акустической гитары. | |
| BASS | -50– + 50 | Регулирует тон для диапазона низких частот. |
| БЛИЖНИЙ | -50– + 50 | Регулирует тон для диапазона средних частот. |
| ВЫСОКИЕ | -50– + 50 | Регулирует тон для диапазона высоких частот. |
| ПРИСУТСТВИЕ | -50– + 50 | Регулирует тон для сверхвысокочастотного диапазона. |
| УРОВЕНЬ | 0-100 | Регулирует громкость. |
ФАЗЕР
Добавляя к прямому звуку фрагменты с разной фазой, эффект фейзера придает звуку свистящий, завихряющийся характер.
| Параметр | Значение | объяснение |
| ТИП | Выбирает количество stages, которые будет использовать эффект фазера. | |
| 4 STAGE | Это четырехфазный эффект. Получается легкий эффект фазера. | |
| 8 STAGE | Это восьмифазный эффект. Это популярный эффект фазера. | |
| 12 STAGE | Это двенадцатифазный эффект. Получается эффект глубокой фазы. | |
| ДВУХФАЗНЫЙ | Это фазер с двумя последовательно соединенными цепями фазовращателя. | |
| СТАВКА *1 | 0–100, ударов в минуту ª – ˜ | Это устанавливает скорость эффекта фазера. |
| ГЛУБИНА | 0-100 | Определяет глубину эффекта фазера. |
| РЕЗОНАНС | 0-100 | Определяет количество резонанса (обратной связи). Увеличение значения усилит эффект, создав более необычный звук. |
| РУКОВОДСТВО | 0-100 | Регулирует центральную частоту эффекта фазера. |
| УРОВЕНЬ | 0-100 | Регулирует громкость фазера. |
ФЛАНЖЕР
Эффект флэнджера придает звуку извилистый характер реактивного самолета.
| Параметр | Значение | объяснение |
| СТАВКА
*1 |
0-100,
ударов в минуту ª – ˜ |
Устанавливает скорость эффекта фленджера. |
| ГЛУБИНА | 0-100 | Определяет глубину эффекта фленджера. |
|
РЕЗОНАНС |
0-100 |
Определяет количество резонанса (обратной связи). Увеличение значения усилит эффект, создав более необычный звук. |
| РУКОВОДСТВО | 0-100 | Регулирует центральную частоту, при которой применяется эффект. |
|
LOW СМЕНА |
ПЛОСКИЙ, 55 Гц – 800 Гц |
Устанавливает частоту, при которой начинает действовать фильтр низких частот. При выборе FLAT фильтр низких частот не действует. |
| УРОВЕНЬ | 0-100 | Регулирует громкость фленджера. |
*1 См. «Об эффектах при выборе длительности ноты в качестве настройки».
ТРЕМОЛО
Тремоло — это эффект, создающий циклическое изменение громкости.
| Параметр | Значение | объяснение |
| ВОЛНА
(ФОРМА ВОЛНЫ) |
0-100 |
Регулирует изменения уровня громкости. Чем выше значение, тем круче форма волны. |
| СТАВКА
*1 |
0-100,
ударов в минуту ª – ˜ |
Регулирует частоту (скорость) изменения. |
| ГЛУБИНА | 0-100 | Регулирует глубину эффекта. |
| УРОВЕНЬ | 0-100 | Регулирует громкость. |
ROTARY
Это создает эффект, подобный звуку вращающегося динамика.
| Параметр | Значение | объяснение |
| СКОРОСТЬ (ВЫБОР СКОРОСТИ) | МЕДЛЕННО БЫСТРО | Этот параметр изменяет скорость вращения имитируемого динамика (SLOW или FAST). |
| СТАВИТЬ МЕДЛЕННО *1 | 0-100,
ударов в минуту ª – ˜ |
Этот параметр регулирует ВЫБОР СКОРОСТИ вращения, если установлено значение «SLOW». |
| СТАВКА БЫСТРО *1 | 0–100, ударов в минуту ª – ˜ | Этот параметр регулирует ВЫБОР СКОРОСТИ вращения, если установлено значение «FAST». |
| ПЕРЕХОД (ВРЕМЯ ПЕРЕХОДА) | 0-100 | Регулирует время, в течение которого скорость вращения изменяется при переключении ВЫБОР СКОРОСТИ. |
| БАЛАНС БАС/ВОРТ | 100: 0-0: 100 | Регулирует баланс громкости между ротором BASS и ротором HORN. |
| УРОВЕНЬ | 0-100 | Регулирует громкость. |
*1 См. «Об эффектах, когда значение ноты выбрано в качестве настройки».
УНИ-В
Это модели Uni-Vibe.
Хотя это напоминает эффект фазера, он также обеспечивает уникальную волнистость, которую вы не можете получить с помощью обычного фазера.
| Параметр | Значение | объяснение |
| СТАВКА *1 | 0–100, ударов в минуту ª – ˜ | Регулирует скорость эффекта UNI-V. |
| ГЛУБИНА | 0-100 | Регулирует глубину эффекта UNI-V. |
| УРОВЕНЬ | 0-100 | Регулирует громкость. |
*1 См. «Об эффектах, когда значение ноты выбрано в качестве настройки».
ВИБРАТО
Этот эффект создает вибрато, слегка модулируя высоту тона.
| Параметр | Значение | объяснение |
| СТАВКА *1 | 0–100, ударов в минуту ª – ˜ | Регулирует скорость вибрато. |
| ГЛУБИНА | 0-100 | Регулирует глубину вибрато. |
| TRIGGER | ВЫКЛ, ВКЛ | Включает/выключает вибрато. |
| ВРЕМЯ НАРАСТАНИЯ | 0-100 | Это устанавливает время, проходящее с момента включения триггера до получения установленного вибрато. * При вызове пользовательской памяти с включенным параметром TRIGGER получаемый эффект идентичен тому, что происходит, когда параметр TRIGGER переключается с Off на On. Если вы хотите, чтобы эффект вибрато воспроизводился сразу после переключения памяти пользователя, установите ВРЕМЯ ПОДЪЕМА на 0. |
| УРОВЕНЬ | 0-100 | Регулирует громкость. |
CHORUS
В этом эффекте к исходному звуку добавляется слегка расстроенный звук, чтобы добавить глубины и широты.
| Параметр | Значение | объяснение |
| РЕЖИМ | Выбор режима хоруса. | |
| MONO | Этот эффект хоруса выводит один и тот же звук как из левого, так и из правого каналов. | |
| СТЕРЕО1 | Это стереофонический эффект хоруса, добавляющий различные звуки хоруса к левому и правому каналам. | |
| СТЕРЕО2 | В этом стереофоническом хорусе используется пространственный синтез с прямым выводом звука в левый канал и звуковым эффектом в правый канал. | |
| СТАВКА *1 | 0–100, ударов в минуту ª – ˜ | Отрегулируйте скорость эффекта хоруса для диапазона высоких частот. |
| ГЛУБИНА | 0-100 | Регулирует глубину эффекта хоруса.* Чтобы использовать его для эффекта удвоения, установите значение 0. |
| УРОВЕНЬ ЭФФЕКТА | 0-100 | Регулирует громкость звука эффекта. |
| LOW СМЕНА | FLAT, 20–800 Гц | Устанавливает частоту, при которой начинает действовать фильтр низких частот. При выборе FLAT фильтр низких частот не действует. |
| ВЫСОКАЯ РЕЗКА | 630 Гц–12.5 кГц, ПЛОСКИЙ | Устанавливает частоту, при которой начинает действовать фильтр верхних частот. При выборе FLAT обрезной фильтр высоких частот не действует. |
ПОД ЗАДЕРЖКА
Это задержка с максимальным временем задержки 1,000 мс. Этот эффект полезен для того, чтобы сделать звук более насыщенным.
| Параметр | Значение | объяснение |
| ТИП | Используйте это, чтобы выбрать тип задержки. | |
| MONO | Используйте это, чтобы выбрать тип задержки. | |
| PAN | Обеспечивает эффект задержки касания, который делит время задержки между левым и правым каналами. | |
| ВРЕМЯ ЗАДЕРЖКИ *1 | 1 мс–1000 мс, BPM ˜ – ¸ | Регулирует время задержки. |
| СВЯЗЬ | 0-100 | Регулирует громкость, возвращаемую на вход. Более высокие значения приведут к большему количеству повторений задержки. |
| УРОВЕНЬ ЭФФЕКТА | 0-120 | Регулирует громкость звука задержки. |
| ВЫСОКАЯ РЕЗКА | 630 Гц–12.5 кГц, ПЛОСКИЙ | Устанавливает частоту, при которой начинает действовать фильтр верхних частот. При выборе FLAT обрезной фильтр высоких частот не действует. |
| Давл. ВРЕМЯ *2 | 0-100% | Регулирует время задержки задержки левого канала. Этот параметр регулирует время задержки левого канала относительно времени задержки правого канала (рассматривается как 100%). |
| ПРЯМОЙ УРОВЕНЬ | 0-100 | Регулирует громкость прямого звука. |
ПЕДАЛЬ ЭФФЕКТОВ
Это создает эффект педали вау или эффект изменения высоты тона.
| Параметр | Значение | объяснение |
| ТИП | Выбирает тип. | |
| КРАЙ ВАХ | Моделирует звук педали вау-вау CRY BABY, популярной в 70-х. | |
| ВО ВАХ | Моделирует звук VOX V846. | |
| жир вау | Это звук вау с ярким тоном. | |
| СВЕТ ВАХ | У этой вау изысканный звук без каких-либо необычных характеристик. | |
| 7-СТРУННАЯ ВАХ | Этот расширенный вау-вау имеет переменный диапазон, совместимый с семиструнными и баритоновыми гитарами. | |
| РЕСО ВАХ | Этот совершенно оригинальный эффект предлагает улучшения характерных резонансов, создаваемых аналоговыми синтезаторными фильтрами. | |
| ИЗГИБ ПЕДАЛИ | Это позволяет использовать педаль для получения эффекта изменения высоты тона.
* Из-за необходимости анализа высоты звука аккорды (два или более звука, воспроизводимые одновременно) не воспроизводятся. |
* Вы можете использовать EV-1-WL (беспроводную MIDI-педаль экспрессии, продается отдельно) для управления положением педали. Чтобы использовать EV-1-WL, вы должны обновить Pocket GT до Ver. 1.20 или выше. https://www.boss.info/support/
Общее для CRY WAH–RESO WAH
| Параметр | Значение | объяснение |
| ПОЛОЖЕНИЕ ПЕДАЛИ | 0-100 | Регулирует положение педали вау. |
| PEDAL MIN | 0-100 | Выбор тембра, воспроизводимого при нажатии пятки педали EXP. |
| ПЕДАЛЬ МАКС. | 0-100 | Выбор тембра, воспроизводимого при нажатии носка педали EXP. |
| УРОВЕНЬ ЭФФЕКТА | 0-100 | Регулирует громкость звука эффекта. |
ИЗГИБ ПЕДАЛИ
* Из-за необходимости анализа высоты звука аккорды (два или более звука, воспроизводимые одновременно) не воспроизводятся.
| Параметр | Значение | объяснение |
| ПОДАЧА | -24– + 24 | Это устанавливает высоту тона в точке, где педаль EXP полностью опущена. |
| ПДЛ POS
(ПОЛОЖЕНИЕ ПЕДАЛИ) |
0-100 | Регулирует положение педали для изгиба педали. |
| УРОВЕНЬ | 0-100 | Регулирует громкость звука изменения высоты тона. |
ШАНСЫ
Этот эффект искажает звук, создавая длительный сустейн.
| Параметр | Значение | объяснение |
| ON/OFF | ВЫКЛ, ВКЛ | Включает / выключает этот эффект. |
| ТИП | См. ТИП OD/DS | |
| ПРИВОД | 0-120 | Регулирует глубину искажения. |
| TONE | -50– + 50 | Регулирует тон. |
| УРОВЕНЬ ЭФФЕКТА | 0-100 | Регулирует громкость звука эффекта. |
| BOTTOM | -50– + 50 | Регулирует тон для диапазона низких частот. Поворот влево (против часовой стрелки) производит звук с обрезанием нижних частот; поворот вправо усиливает низкие частоты звука. |
| ПРЯМОЙ УРОВЕНЬ | 0-100 | Регулирует громкость прямого звука. |
ТИП ОД/ДС
Это список типов искажений, которые можно выбрать для OD/DS.
| Тип | объяснение |
| СРЕДНЕЕ УСИЛЕНИЕ | Это бустер с уникальными характеристиками в среднем диапазоне. |
| ЧИСТЫЙ УСИЛЕНИЕ | Он не только работает как усилитель, но и производит чистый тон, который имеет силу даже при использовании отдельно. |
| УСИЛЕНИЕ ВЧЕР | Это бустер, который имеет яркие характеристики. |
| CRUNCH | Блестящий хрустящий звук с добавлением элемента amp искажение. |
| NATURAL OD | Это звук овердрайва, который обеспечивает искажение с естественным ощущением. |
| ТЕПЛЫЙ ОД | Это теплый овердрайв. |
| ЖИР DS | Звук искажения с толстым искажением. |
| ВЕДУЩИЙ ДС | Производит звук искажения с плавностью овердрайва и глубоким искажением. |
| МЕТАЛЛ ДС | Это звук искажения, который идеально подходит для исполнения тяжелых риффов. |
| ОКТ ФУЗЗ | Фузз-звук с богатым гармоническим содержанием. |
| А-РАСП | Этот эффект использует технологию MDP (Multi-Dimensional Processing) для обеспечения идеального искажения во всех диапазонах высоты тона гитары, от низких до высоких. |
| БЛЮЗ ОД | Это хрустящий звук BOSS BD-2. Это создает искажение, которое точно воспроизводит нюансы игры. |
| ОД-1 | Моделирует звук BOSS OD-1. Это производит приятное, мягкое искажение. |
| Т-КРИМ | Это модели Ibanez TS-808. |
| ТУРБО ОД | Это звук овердрайва с высоким коэффициентом усиления BOSS OD-2. |
| ИСКАЖЕНИЕ | Это дает базовый, традиционный звук дисторшна. |
| RAT | Это модели Proco RAT. |
| ГУВ ДС | Это модели Marshall GUV’ NOR. |
| Летнее время+ | Модель MXR DISTORTION+. |
| METAL ZONE | Моделирует звук BOSS MT-2. Он производит широкий спектр металлических звуков, от старого стиля до слэш-метала. |
| ПУШКА 60-Х | Это моделирует FUZZFACE. Он производит жирный пушистый звук. |
| МАФФ ФУЗЗ | Модель модели Electro-Harmonix Big Muff π. |
PREAMP
Технология COSM имитирует различные предварительныеamp характеристики, размеры динамиков и формы корпуса.
| Параметр | Значение | объяснение |
| ON/OFF | ВЫКЛ, ВКЛ | Включает / выключает этот эффект. |
| ТИП | Обратитесь к ПРЕДAMP ТИП | |
| GAIN | 0-120 | Регулирует искажение amp. |
| УРОВЕНЬ | 0-100 | Регулирует громкость всего предусилителя.amp. * Будьте осторожны, чтобы не поднять значение уровня слишком высоко. |
| BASS | 0-100 | Регулирует тон для диапазона низких частот. |
| БЛИЖНИЙ | 0-100 | Регулирует тон для диапазона средних частот. |
| ВЫСОКИЕ | 0-100 | Регулирует тон для диапазона высоких частот. |
| ПРИСУТСТВИЕ | 0-100 | Регулирует тон для сверхвысокочастотного диапазона. * Параметр PRESENCE работает как фильтр верхних частот с некоторыми параметрами PRE.AMP ТИПЫ. |
| zЯРКИЙ | ВЫКЛ, ВКЛ | Включает/выключает настройку яркости. * Настройка параметра BRIGHT доступна только с некоторымиAMP ТИПЫ. |
| ТИП СП | Выберите тип динамика. | |
| OFF | Это выключает симулятор динамика. | |
| ОРИГИНАЛ | Это встроенный динамик amp вы выбрали с помощью PREAMP ТИП. | |
| 1 × 8” | Это компактный корпус с открытой задней стенкой и одним 8-дюймовым динамиком. | |
| 1 × 10” | Это компактный корпус с открытой задней стенкой и одним 10-дюймовым динамиком. | |
| 1 × 12” | Это компактный корпус с открытой задней стенкой и одним 12-дюймовым динамиком. | |
| 2 × 12” | Это обычный открытый кабинет с двумя 12-дюймовыми динамиками. | |
| 4 × 10” | Это оптимальный корпус динамика для большого закрытого помещения. amp с четырьмя 10-дюймовыми динамиками. | |
|
4 × 12” |
Это оптимальный корпус динамика для большого закрытого помещения. amp с четырьмя 12-дюймовыми динамиками. | |
| 8 × 12” | Это двойной стек из двух кабинетов, в каждом из которых по четыре 12-дюймовых динамика. |
PREAMP ТИП список
| Тип | объяснение |
| ЕСТЕСТВЕННАЯ ЧИСТОТА | Неприукрашенный, чистый звук, сводящий к минимуму ampособенности, такие как высокие частоты и гулкий низ. |
| ПОЛНЫЙ СПЕКТР | An amp с широким частотным диапазоном и чрезвычайно плоской характеристикой. Хорошо подходит для акустической гитары. |
| COMBO CRUNCH | Хрустящий звук, который позволяет передать нюансы вашего выбора еще более точно, чем в обычном комбо. amps. |
| СТЕК КРАНЧ | Великолепный хрустящий звук, который хорошо реагирует на динамику звукоизвлечения, сохраняя при этом все определяющие характеристики кабинета 4 x 12 дюймов. |
| СТЕК ХИГЕЙН | High-gain звук винаtage Marshall специально переделалamped таким образом, который возможен только с технологией моделирования COSM. |
| СИЛОВОЙ ПРИВОД | Звук прямого драйва, который хорошо работает в широком диапазоне ситуаций, от аккомпанемента до соло. Звук, подобный этому, не может быть получен ни от одного существующего комбо. amp или стек amp. |
| КРАЙНИЙ ВЫВОД | Новый тип звука, который сглаживает неравномерность частотной характеристики, типичную для существующего большого стека. amps. |
| ОСНОВНОЙ МЕТАЛЛ | Звук большого стека, который был тщательно изменен в поисках идеального металлического звука. |
| JC-120 | Моделирует звук Roland JC-120. |
| ЧИСТЫЙ БЛИЗНЕЦ | Моделирует реверберацию Fender Twin Reverb. |
| ПРОФЕССИОНАЛЬНЫЙ ХРУСТ | Это моделирует Fender Pro Reverb. |
| ТВИД | Это модель Fender Bassman 4 x 10” Combo. |
| ДЕЛЮКС ХРУСТ | Модель Fender Deluxe Reverb. |
| ВО ДРАЙВ | Моделирует звук привода VOX AC-30TB. Это звук, который подходил для британского рока в стиле шестидесятых. |
| В.О. ВЕДУЩИЙ | Моделирует лидовый звук VOX AC-30TB. |
| МАТЧ ДРАЙВ | Моделирует звуковой вход на левый вход на Matchless D/C-30. Моделирование последней трубки amp широко используется в стилях от блюза до рока. |
| БГ ВЕДУЩИЙ | Моделирует основной звук комбинации MESA/Boogie. amp. Звук трубки amp типичный для конца 70-х — 80-х годов. |
| БГ ДРАЙВ | Модель MESA/Boogie с включенным переключателем TREBLE SHIFT. |
| МС1959 я | Это моделирует вход звука на вход I на Marshall 1959. Это тройной звук, подходящий для хард-рока. |
| MS1959 I+II | Звук подключения входов I и II гитары amp параллельно, создавая звук с более сильным низом, чем у I. |
| R-FIER VINTAGE | Моделирует звук VIN канала 2TAGРежим E на выпрямителе MESA/Boogie DUAL. |
| R-FIER МОДЕРН | Моделирует звук режима MODERN канала 2 на выпрямителе MESA/Boogie DUAL. |
| T-AMP ВЕСТИ | Это модели Hughes & Kettner Triamp AMP3. |
| SLDN | Это модели Soldan SLO-100. Это типичный звук восьмидесятых. |
| 5150 ПРИВОД | Это моделирует ведущий канал Peavey EVH 5150. |
| БГНР УБ МЕТАЛЛ | Это звук тяжелого дисторшна, моделирующий канал с высоким коэффициентом усиления Bogner Uberschall. |
| ОРНГ РОК РЕВЕРБЕР | Это моделирует грязный канал ORANGE ROCKERVERB. |
ШУМОГЛУШИТЕЛЬ
Этот эффект уменьшает шум и гул, улавливаемый гитарными звукоснимателями. Поскольку он подавляет шум синхронно с огибающей гитарного звука (то, как звук гитары затухает со временем), он очень мало влияет на звук гитары и не вредит естественному характеру звука.
| Параметр | Значение | объяснение |
| ПОРОГ | Выкл., 1–100 | Отрегулируйте этот параметр в соответствии с громкостью шума. Если уровень шума высокий, подходит более высокое значение. Если уровень шума низкий, подходит более низкая настройка. Отрегулируйте это значение до тех пор, пока затухание звука гитары не станет как можно более естественным. * Высокие значения порогового значения могут привести к отсутствию звука при игре с пониженной громкостью гитары. * Если для этого параметра установлено значение «Выкл.», NS отключен (обойден). |
| РЕЛИЗ | 0-100 | Регулирует время с момента, когда шумоподавитель начинает работать, до момента, когда уровень шума достигает «0». |
| ОБНАРУЖЕНИЕ | Это управляет шумоподавителем на основе уровня громкости для точки, указанной в Detect. | |
| ВХОД | Входная громкость с входного разъема. * Обычно параметр DETECT должен быть установлен на «INPUT». |
|
| НС ВХОД | Громкость входного сигнала шумоподавителя. * При подключении, как показано ниже, и вы хотите, чтобы звук пространственных эффектов (например, звук задержки) не удалялся NS, вы должны установить DETECT на «NS INPUT». |
|
| FV ВЫХОД | Volume после прохождения Foot Volume. * Если вы хотите использовать FV (Foot Volume) вместо регулятора громкости гитары, вам нужно установить DETECT на «FV OUT». |
ОБЪЕМ НОГ
Это эффект управления громкостью.
| Параметр | Значение | объяснение |
| ОБЪЕМ МИН. | 0-100 | Устанавливает громкость при нажатии пятки педали. |
| ОБЪЕМ МАКС. | 0-100 | Выбирает громкость при нажатии носка педали. |
| УРОВЕНЬ | 0-100 | Регулирует громкость. |
* Вы можете управлять УРОВНЕМ с помощью EV-1-WL (продается отдельно). Чтобы использовать EV-1-WL, вы должны обновить Pocket GT до Ver. 1.20 или выше. https://www.boss.info/support/
DELAY
Этот эффект добавляет задержанный звук к прямому звуку, делая звук более объемным или создавая специальные эффекты.
| Параметр | Значение | объяснение |
| DELAY ON/OFF | ВЫКЛ, ВКЛ | Включает / выключает этот эффект. |
| ТИП | Это выбирает, какой тип задержки. * Стереоэффект отменяется, если используется монофонический эффект или COSM. amp подключается после эффекта стерео задержки. |
|
| СТАНДАРТ | Это простая монофоническая задержка. | |
| PAN | Эта задержка предназначена специально для стереовыхода. Это позволяет вам получить эффект отводной задержки, который делит время задержки, а затем доставляет их на левый и правый каналы. | |
| НАОБОРОТ | Это создает эффект, при котором звук воспроизводится в обратном направлении. | |
| ANALOG | Это дает мягкую аналоговую задержку звука. Время задержки может быть установлено в диапазоне от 1 до 2000 мс. | |
| ЛЕНТА | Эта настройка обеспечивает характерный колеблющийся звук эха ленты. Время задержки может быть установлено в диапазоне от 1 до 2000 мс. | |
| МОДУЛИРОВАТЬ | Эта задержка добавляет звуку приятный эффект колебания. | |
| ТЕРА ЭХО | Этот эффект использует технологию MDP (Multi-Dimensional Processing) для создания уникальной атмосферы и простора, которые меняются в зависимости от динамики вашего выбора. |
Общее для СТАНДАРТ-МОДУЛЯЦИЯ
| Параметр | Значение | объяснение |
| ВРЕМЯ ЗАДЕРЖКИ *1 | 1 мс–2000 мс, BPM ˜ – ¸ | Регулирует время задержки. |
| СВЯЗЬ | 0-100 | Устанавливает количество звука задержки, возвращаемого на вход. Более высокое значение увеличит количество повторов задержки. |
| ВЫСОКАЯ РЕЗКА | 630 Гц–12.5 кГц, ПЛОСКИЙ | Устанавливает частоту, при которой начинает действовать фильтр верхних частот. При выборе FLAT обрезной фильтр высоких частот не действует. |
| УРОВЕНЬ ЭФФЕКТА | 0-120 | Регулирует громкость звука задержки. |
*1 См. «Об эффектах, когда значение ноты выбрано в качестве настройки».
PAN
| Параметр | Значение | объяснение |
| НАЖМИТЕ ВРЕМЯ | 0-100% | Регулирует время задержки задержки левого канала. Этот параметр регулирует время задержки левого канала относительно времени задержки правого канала (рассматривается как 100%). |
МОДУЛИРОВАТЬ
| Параметр | Значение | объяснение |
| СКОРОСТЬ МОДУЛЯЦИИ | 0-100 | Регулирует скорость модуляции звука задержки. |
| МОДУЛЯЦИИ ГЛУБИНА | 0-100 | Регулирует глубину модуляции звука задержки. |
ТЕРА ЭХО
| Параметр | Значение | объяснение |
| ВРЕМЯ | 0-100 | Регулирует продолжительность звука эффекта. |
| СВЯЗЬ | 0-100 | Регулирует затухание звука эффекта. |
| УРОВЕНЬ ЭФФЕКТА | 0-100 | Регулирует громкость звука эффекта. |
| TONE | -50– + 50 | Регулирует тон. |
| ПРЯМОЙ УРОВЕНЬ | 0-100 | Регулирует громкость прямого звука. |
| ДЕРЖАТЬ | ВЫКЛ, ВКЛ | Звук эффекта удерживается, когда вы включаете это. * Память пользователя записывается, когда для параметра HOLD установлено значение Off. |
Реверберация
Этот эффект добавляет к звуку реверберацию.
| Параметр | Значение | объяснение |
| Реверберация ON/OFF | ВЫКЛ, ВКЛ | Включает / выключает этот эффект. |
| ТИП | Выбирает тип реверберации. Предлагаются различные симуляторы космоса. | |
| АМБИЕНТА | Имитирует внешний микрофон (вне микрофона, расположенный на расстоянии от источника звука), используемый при записи и других приложениях. Вместо того, чтобы подчеркивать реверберацию, эта реверберация используется для создания ощущения открытости и глубины. | |
| КОМНАТА | Имитирует реверберацию в небольшой комнате. Обеспечивает теплые реверберации. | |
| ЗАЛ 1 | Имитирует реверберацию концертного зала. Обеспечивает чистую и объемную реверберацию. | |
| ЗАЛ 2 | Имитирует реверберацию в концертном зале. Обеспечивает мягкую реверберацию. | |
| ПЛИТЫ | Имитирует пластинчатую реверберацию (блок реверберации, использующий вибрацию металлической пластины). Обеспечивает металлический звук с отчетливым верхним диапазоном. | |
| ВЕСНА | Имитирует звук гитары ampВстроенная пружинная реверберация. | |
| МОДУЛИРОВАТЬ | Эта реверберация добавляет колеблющийся звук, присутствующий в реверберации зала, чтобы обеспечить чрезвычайно приятный звук реверберации. | |
| DELAY | Этот эффект добавляет задержанный звук к прямому звуку, делая звук более объемным или создавая специальные эффекты. |
Общее для AMBIENCE–MODULATE
| Параметр | Значение | объяснение |
| ВРЕМЯ РЕВЕРБЕРАЦИИ | 0.1–10.0 с | Регулирует продолжительность (время) реверберации. |
| УРОВЕНЬ ЭФФЕКТА | 0-100 | Регулирует громкость звука реверберации. |
| LOW СМЕНА | FLAT, 20–800 Гц | Устанавливает частоту, при которой начинает действовать фильтр низких частот. При выборе FLAT фильтр низких частот не действует. |
| ВЫСОКАЯ РЕЗКА | 630 Гц–12.5 кГц, ПЛОСКИЙ | Устанавливает частоту, при которой начинает действовать фильтр верхних частот. При выборе FLAT обрезной фильтр высоких частот не действует. |
| ПРУЖИННЫЕ ЧУВСТВА *1 | 0-100 | Регулирует чувствительность пружинного эффекта. При установке значения выше эффект получается даже при слабом пикинге. |
DELAY
| Параметр | Значение | объяснение |
| ВРЕМЯ ЗАДЕРЖКИ *1 | 1 мс–650 мс, BPM ˜ – ¸ | Регулирует время задержки. |
| УРОВЕНЬ ЭФФЕКТА | 0-120 | Регулирует громкость звука задержки. |
| СВЯЗЬ | 0-100 | Устанавливает количество звука задержки, возвращаемого на вход. Более высокое значение увеличит количество повторов задержки. |
| ВЫСОКАЯ РЕЗКА | 630 Гц–12.5 кГц, ПЛОСКИЙ | Устанавливает частоту, при которой начинает действовать фильтр верхних частот. При выборе «Flat» фильтр высоких частот не действует. |
| ПРЯМОЙ УРОВЕНЬ | 0-100 | Регулирует громкость прямого звука. |
ГЛАВНАЯ НАСТРОЙКА
Эти настройки применяются ко всей пользовательской памяти.
Об эффектах при выборе длительности ноты в качестве настройки
- Когда вы указываете значение ноты в качестве настройки для параметра (например, параметра RATE и DELAY TIME), это определяет длину (время) одной ноты. Поскольку это время рассчитывается на основе «BPM» (темпа) ОСНОВНЫХ НАСТРОЕК, вы можете легко настроить звук в соответствии с темпом песни.
- Если длина ноты (время), указанная для параметра RATE или DELAY TIME, превышает допустимый диапазон настройки, назначается время, составляющее 1/2 или 1/4 указанного времени.
ОСНОВНОЙ ЭКВАЛАЙЗЕР
| Параметр | Значение | объяснение |
| НИЗКИЙ ПРИБЫЛЬ (МАСТЕР НИЗКИЙ УСИЛЕНИЕ) |
-20–+20 дБ | Регулирует тон для диапазона низких частот. |
| СРЕДНЕЕ УСИЛЕНИЕ (МАСТЕР СРЕДНЕЕ УСИЛЕНИЕ) |
-20–+20 дБ | Регулирует тон для диапазона средних частот. |
| HIGH GAIN (МАСТЕР HIGH GAIN) | -20–+20 дБ | Регулирует тон для диапазона высоких частот. |
| MID FREQ (МАСТЕР СРЕДНЯЯ ЧАСТОТА) | 20.0 Гц – 10.0 кГц | Укажите центр частотного диапазона, который будет регулироваться MASTER MID GAIN. |
| Середина Q (МАСТЕР СРЕДНИЙ Q) |
0.5-16 | Регулирует ширину области воздействия эквалайзера с центром на MASTER MID FREQ. Более высокие значения сузят область. |
Параметры, доступные при использовании BOSS TONE STUDIO
ТЮНЕР
| Параметр | Значение | объяснение |
| ПОДАЧА | 435 Гц – 445 Гц | Определяет эталонный шаг. |
| ВЫВОД | MUTE | Во время настройки звук не выводится. |
| BYPASS | Во время настройки звук гитары, подаваемой на Pocket GT, будет выводиться без изменений. Все эффекты будут отключены. | |
| THRU | Позволяет настраиваться, слушая текущий звуковой эффект. | |
| BASS РЕЖИМ | ВЫКЛ, ВКЛ | Выключите этот параметр, если подключена гитара, или включите, если подключен бас. |
ЛЮБИМОЕ ПАМЯТЬ
FAVORITE MEMORY — это функция, позволяющая назначать избранные пользовательские ячейки памяти кнопкам [x], кнопкам [r] и кнопкам [y]. Когда вы нажимаете кнопку, которой назначена пользовательская память, назначенный любимый звук вызывается мгновенно.
| Параметр | Значение | объяснение |
| ЛЮБИМОЕ ПАМЯТЬ | ВЫКЛ, ВКЛ | Включение этого параметра выбирает режим FAVORITE MEMORY. При выключении этого параметра выбирается нормальный режим (режим ПАМЯТИ). |
| ЛЮБИМЫЙ 1–
ЛЮБИМОЕ 3 |
Укажите пользовательские ячейки памяти, назначенные кнопке [x] (ИЗБРАННОЕ 1), кнопке [r] (ИЗБРАННОЕ 2) и кнопке [y] (ИЗБРАННОЕ 3). | |
| 01-99 | Назначьте пользовательскую память 01–99 каждой из кнопок. |
НАЗНАЧЕНИЕ КНОПКИ
Вы можете назначить параметры по вашему выбору на ручку [OD/DS], ручку [MOD] и ручку [DELAY] устройства Pocket GT.
С заводскими настройками для каждой ручки зарегистрированы значения ПО УМОЛЧАНИЮ. Каждому эффекту присваиваются Характерные параметры.
ПАРАМЕТРЫ, КОТОРЫЕ МОЖНО НАЗНАЧИТЬ РУЧКАМ
| Значение |
| OFF |
| ПО УМОЛЧАНИЮ: ОД/ДС |
| ПО УМОЛЧАНИЮ:МОД |
| ПО УМОЛЧАНИЮ: ЗАДЕРЖКА |
| FX1: КОМП ТИП |
| FX1: КОМП УСТОЙЧИВОСТЬ |
| FX1: КОМП ATTACK |
| FX1: ТОН КОМПЛЕКСА |
| FX1:УРОВЕНЬ КОМПЛЕКСА |
| FX1:ТИП ОГРАНИЧИТЕЛЯ |
| FX1: ОГРАНИЧИТЕЛЬ ATTACK |
| FX1:ПОРОГ ОГРАНИЧЕНИЯ |
| FX1:КОЭФФИЦИЕНТ ОГРАНИЧЕНИЯ |
| FX1: СБРОС ОГРАНИЧИТЕЛЯ |
| FX1:УРОВЕНЬ ОГРАНИЧЕНИЯ |
| FX1: РЕЖИМ T.WAH |
| FX1:T.WAH ПОЛЯРНОСТЬ |
| FX1:T.WAH ЧУВСТВ. |
| FX1:ЧАСТОТА T.WAH |
| FX1: ПИК T.WAH |
| FX1: Т.ВАХ УРОВЕНЬ |
| FX1: графический эквалайзер 100 Гц |
| FX1: графический эквалайзер 200 Гц |
| FX1: графический эквалайзер 400 Гц |
| FX1: графический эквалайзер 800 Гц |
| FX1:Графический эквалайзер 1.6 кГц |
| FX1:Графический эквалайзер 3.2 кГц |
| FX1:Графический эквалайзер 6.4 кГц |
| FX1:УРОВЕНЬ GEQ |
| FX1: PEQ LOW GAIN |
| FX1:PEQ LOW-MID FREQ |
| FX1:PEQ LOW-MID Q |
| FX1:PEQ LOW-MID GAIN |
| FX1:PEQ HIGH-MID FREQ |
| FX1:PEQ HIGH-MID Q |
| FX1:PEQ HIGH-MID GAIN |
| FX1:PEQ HIGH GAIN |
| FX1:УРОВЕНЬ ПЭК |
| FX1: ТИП ТОНАЛЬНОГО РЕЖИМА |
| FX1: ТОН РЕЗОНАНС |
| FX1: ТОН МОД НИЗКИЙ |
| FX1: ТОН ВЫСОКИЙ |
| FX1: УРОВЕНЬ ТОНАЛЬНОЙ МОД. |
| FX1: ТИП ГИТАРЫ SIM |
| FX1: СИМ ГИТАРЫ НИЗКИЙ |
| FX1: ВЫСОКАЯ СИМ ГИТАРЫ |
| FX1:УРОВЕНЬ ГИТАРЫ SIM |
| FX1:КОРПУС SIM-карты гитары |
| FX1:A.GUITAR SIM HIGH |
| FX1: КОРПУС SIM-карты A.GUITAR |
| FX1:A.GUITAR SIM LOW |
| FX1:A.УРОВЕНЬ СИМ ГИТАРЫ |
| FX1: ДАТЧИК МЕДЛЕННОЙ ПЕРЕДАЧИ |
| FX1: МЕДЛЕННОЕ ВРЕМЯ ПОДЪЕМА ПЕРЕДАЧИ |
| FX1:УРОВЕНЬ МЕДЛЕННОЙ ПЕРЕДАЧИ |
| FX1:ОКТАВА -2ОКТ |
| FX1:ОКТАВА -1ОКТ |
| Значение |
| FX1: ОКТАВА ПРЯМАЯ |
| FX1:ШАГ СДВИГ
FX1: ИЗМЕНЕНИЕ ШАГА ТОЧНО FX1:PITCH SHIFT ПРЕДВАРИТЕЛЬНАЯ ЗАДЕРЖКА FX1:PITCH SHIFT E.LEVEL FX1:ОБРАТНАЯ СВЯЗЬ С ИЗМЕНЕНИЕМ ШАГА FX1:D.LEVEL СМЕЩЕНИЯ ШАГА |
| FX1:ГАРМОНИСТА ГАРМОНИЯ |
| FX1:ГАРМОНИСТА ПРЕДВАРИТЕЛЬНАЯ ЗАДЕРЖКА |
| FX1:ГАРМОНИСТА E.LEVEL |
| FX1: ОБРАТНАЯ СВЯЗЬ ГАРМОНИСТА FX1:ГАРМОНИСТА D.LEVEL FX1: НАСТРОЙКА ОВЕРТОНА FX1: ОВЕРТОН ТОН FX1:ВЕРХНИЙ ОВЕРТОН FX1:НИЖНИЙ ОВЕРТОН |
| FX1:УРОВЕНЬ ОВЕРТОНА D.LEVEL |
| FX1:ГЛУБИНА ОБРАТНОЙ СВЯЗИ |
| FX1: ТРИГГЕР ОБРАТНОЙ СВЯЗИ |
| FX1:AC.ТИП ПРОЦЕССОРА FX1:AC.ПРОЦЕССОР БАС FX1:AC.ПРОЦЕССОР СРЕДНИЙ FX1:AC.PROCESSOR TREBLE FX1:НАЛИЧИЕ ПРОЦЕССОРА AC. |
| FX1:УРОВЕНЬ ПРОЦЕССОРА ПЕРЕМЕННОГО ТОКА |
| FX1: ТИП ФАЗЕРА |
| FX1:ФАЗЕРНАЯ СКОРОСТЬ |
| FX1: ГЛУБИНА ФАЗЕРА |
| FX1:РУЧНОЙ ФАЗЕР |
| FX1: ФАЗЕРНЫЙ РЕЗОНАНС |
| FX1:УРОВЕНЬ ФАЗЕРА |
| Значение |
| FX1:СКОРОСТЬ ФЛЭНЖЕРА |
| FX1: ГЛУБИНА ФЛАНЖЕРА |
| FX1: ФЛАНЖЕР РУЧНОЙ |
| FX1: РЕЗОНАНС ФЛЭНЖЕРА |
| FX1: FLANGER LOW CUT |
| FX1:УРОВЕНЬ ФЛАНЖЕРА |
| FX1: ВОЛНА ТРЕМОЛО |
| FX1: СКОРОСТЬ ТРЕМОЛО |
| FX1: ГЛУБИНА ТРЕМОЛО |
| FX1: УРОВЕНЬ ТРЕМОЛО |
| FX1: ВРАЩАЮЩИЙСЯ БАЛАНС |
| FX1: СКОРОСТЬ ВРАЩЕНИЯ |
| FX1: МЕДЛЕННАЯ СКОРОСТЬ ВРАЩЕНИЯ |
| FX1: БЫСТРАЯ СКОРОСТЬ ВРАЩЕНИЯ |
| FX1: ПОВОРОТНЫЙ ПЕРЕХОД |
| FX1: ВРАЩАЮЩИЙСЯ УРОВЕНЬ |
| FX1: СТАВКА UNI-V |
| FX1: ГЛУБИНА UNI-V |
| FX1: УРОВЕНЬ UNI-V |
| FX1:ЧАСТОТА ВИБРАТО |
| FX1: ГЛУБИНА ВИБРАЦИИ |
| FX1: ТРИГГЕР ВИБРАТО |
| FX1: ВРЕМЯ НАРАСТАНИЯ ВИБРАЦИИ |
| FX1:УРОВЕНЬ ВИБРАТО |
| FX1: РЕЖИМ ХОРУСА |
| FX1:ЧАСТОТА ХОРА |
| FX1: ГЛУБИНА ХОРУСА |
| FX1:ХОРУС НЧ |
| FX1: ОТРЕЗКА ВЫСОКИХ ХОРУСОВ |
| FX1:ХОР E.LEVEL |
| FX1: ВСПОМОГАТЕЛЬНЫЙ ТИП ЗАДЕРЖКИ |
| FX1: ВРЕМЯ ЗАДЕРЖКИ |
| Значение |
| FX2: ВЫСОКАЯ СИМ ГИТАРЫ FX2:УРОВЕНЬ ГИТАРЫ SIM FX2:КОРПУС SIM-карты гитары FX2:A.GUITAR SIM HIGH FX2: КОРПУС SIM-карты A.GUITAR FX2:A.GUITAR SIM LOW FX2:A.УРОВЕНЬ СИМ ГИТАРЫ FX2: ДАТЧИК МЕДЛЕННОЙ ПЕРЕДАЧИ FX2: МЕДЛЕННОЕ ВРЕМЯ ПОДЪЕМА ПЕРЕДАЧИ FX2:УРОВЕНЬ МЕДЛЕННОЙ ПЕРЕДАЧИ FX2:ОКТАВА -2ОКТ FX2:ОКТАВА -1ОКТ FX2: ОКТАВА ПРЯМАЯ FX2:ШАГ СДВИГ FX2: ИЗМЕНЕНИЕ ШАГА ТОЧНО FX2:PITCH SHIFT ПРЕДВАРИТЕЛЬНАЯ ЗАДЕРЖКА FX2:PITCH SHIFT E.LEVEL FX2: ОБРАТНАЯ СВЯЗЬ С ИЗМЕНЕНИЕМ ШАГА FX2:ПИТЧ СДВИГ D.LEVEL FX2:ГАРМОНИСТА ГАРМОНИЯ FX2:ГАРМОНИСТА ПРЕДВАРИТЕЛЬНАЯ ЗАДЕРЖКА FX2:ГАРМОНИСТА E.LEVEL FX2: ОБРАТНАЯ СВЯЗЬ ГАРМОНИСТА FX2:ГАРМОНИСТА D.LEVEL FX2: НАСТРОЙКА ОВЕРТОНА FX2: ОВЕРТОН ТОН FX2: ВЕРХНИЙ ОВЕРТОН FX2: ОВЕРТОН НИЖЕ FX2:УРОВЕНЬ ОВЕРТОНА D.LEVEL FX2:ГЛУБИНА ОБРАТНОЙ СВЯЗИ FX2: ТРИГГЕР ОБРАТНОЙ СВЯЗИ FX2:AC.ТИП ПРОЦЕССОРА FX2:AC.ПРОЦЕССОР БАС FX2:AC.ПРОЦЕССОР СРЕДНИЙ FX2:AC.PROCESSOR TREBLE FX2:AC.PROCESSOR TREBLE ПРИСУТСТВИЕ FX2:УРОВЕНЬ ПРОЦЕССОРА ПЕРЕМЕННОГО ТОКА |
| FX2: ТИП ФАЗЕРА |
| FX2:ФАЗЕРНАЯ СКОРОСТЬ |
| FX2: ГЛУБИНА ФАЗЕРА |
| FX2:РУЧНОЙ ФАЗЕР |
| FX2: ФАЗЕРНЫЙ РЕЗОНАНС |
| FX2:УРОВЕНЬ ФАЗЕРА |
| FX2:СКОРОСТЬ ФЛЭНЖЕРА |
| FX2: ГЛУБИНА ФЛАНЖЕРА |
| FX2: ФЛАНЖЕР РУЧНОЙ |
| FX2: РЕЗОНАНС ФЛЭНЖЕРА |
| FX2: FLANGER LOW CUT |
| FX2:УРОВЕНЬ ФЛАНЖЕРА
FX2: ВОЛНА ТРЕМОЛО |
| FX2: СКОРОСТЬ ТРЕМОЛО |
| FX2: ГЛУБИНА ТРЕМОЛО |
| FX2: УРОВЕНЬ ТРЕМОЛО |
| FX2: ВРАЩАЮЩИЙСЯ БАЛАНС |
| FX2: СКОРОСТЬ ВРАЩЕНИЯ |
| FX2: МЕДЛЕННАЯ СКОРОСТЬ ВРАЩЕНИЯ |
| FX2: БЫСТРАЯ СКОРОСТЬ ВРАЩЕНИЯ |
| FX2: ПОВОРОТНЫЙ ПЕРЕХОД |
| FX2: ВРАЩАЮЩИЙСЯ УРОВЕНЬ |
| FX2: СТАВКА UNI-V |
| FX2: ГЛУБИНА UNI-V |
| FX2: УРОВЕНЬ UNI-V |
| FX2:ЧАСТОТА ВИБРАТО
FX2: ГЛУБИНА ВИБРАЦИИ FX2: ТРИГГЕР ВИБРАТО FX2: ВРЕМЯ НАРАСТАНИЯ ВИБРАЦИИ FX2:УРОВЕНЬ ВИБРАТО FX2: РЕЖИМ ХОРУСА FX2:СКОРОСТЬ ХОРУСА FX2:ГЛУБИНА ХОРУСА |
| FX2:ХОРУС НЧ |
| FX2: ОТРЕЗКА ВЫСОКИХ ХОРУСОВ |
| FX2:ХОР E.LEVEL |
| FX2: ВСПОМОГАТЕЛЬНЫЙ ТИП ЗАДЕРЖКИ |
| FX2: ВРЕМЯ ЗАДЕРЖКИ |
| FX2:ЗАДЕРЖКА ОБРАТНОЙ СВЯЗИ |
| FX2: SUB DELAY HIGH CUT |
| FX2: SUB DELAY E.LEVEL |
| FX2: SUB DELAY D.LEVEL |
| FX2: SUB DELAY TAP TIME |
| ЗАДЕРЖКА: ТИП |
| ВРЕМЯ ЗАДЕРЖКИ |
| ЗАДЕРЖКА: ОБРАТНАЯ СВЯЗЬ |
| ЗАДЕРЖКА:ВЫСОКИЙ ВЫРЕЗ |
| ЗАДЕРЖКА:E.УРОВЕНЬ |
| ЗАДЕРЖКА:ВРЕМЯ НАЖАТЬ |
| ЗАДЕРЖКА: СКОРОСТЬ МОДУЛЯЦИИ |
| ЗАДЕРЖКА: ГЛУБИНА МОДУЛЯЦИИ |
| ТЕРА ЭХО:ВРЕМЯ |
| ТЕРА ЭХО: ОБРАТНАЯ СВЯЗЬ |
| ТЕРА ЭХО: ТОН |
| TERA ECHO:E.УРОВЕНЬ |
| ТЕРА ЭХО:D.УРОВЕНЬ |
| ТЕРА ЭХО:ДЕРЖАТЬ |
| РЕВЕРБЕР: ТИП |
| РЕВЕРБ: ВРЕМЯ |
| РЕВЕРБЕРАЦИЯ: LOW CUT |
| РЕВЕРБЕР: ВЫСОКИЙ ВЫРЕЗ |
| РЕВЕРБЕР:УРОВЕНЬ |
| РЕВЕРБЕР: ВЕСНА ЧУВСТВУЕТ |
| РЕВЕРБЕР: ВРЕМЯ ЗАДЕРЖКИ |
| РЕВЕРБЕР:ЗАДЕРЖКА ОБРАТНОЙ СВЯЗИ |
| REVERB: DELAY HIGH CUT |
| REVERB:DELAY E.LEVEL |
| REVERB:DELAY D.LEVEL |
| ОБЪЕМ НОЖКИ:УРОВЕНЬ |
| ПЕДАЛЬ ЭФФЕКТОВ: ТИП |
| PEDAL FX:WAH PEDAL POS |
| PEDAL FX:УРОВЕНЬ WAH |
| PEDAL FX:PEDAL BEND PITCH |
| PEDAL FX:PEDAL BEND PEDAL POS |
| PEDAL FX: PEDAL BEND LEVEL |
| МАСТЕР НИЗКИЙ УСИЛЕНИЕ |
| ГЛАВНАЯ СРЕДНЯЯ ЧАСТОТА |
| МАСТЕР СРЕДНИЙ Q |
| МАСТЕР СРЕДНИЙ УСИЛЕНИЕ |
| МАСТЕР ВЫСОКОГО УСИЛЕНИЯ |
| УРОВЕНЬ ПАТЧА |
| МАСТЕР BPM |
| ОТМЫЧКА |
| USB МИКС |
| FX1 |
ОБЪЕМ ПАМЯТИ
| Параметр | Значение | объяснение |
| MIN | 01-99 | Используйте параметры MIN–MAX, чтобы ограничить объем пользовательской памяти, которую можно выбрать, поворачивая ручку [VALUE] устройства Pocket GT. |
| MAX | 01-99 |
ПЕРЕМОТКА ВПЕРЕД ВРЕМЯ НАЗАД
| Параметр | Значение | объяснение |
| ПЕРЕМОТКА ВПЕРЕД ВРЕМЯ НАЗАД | 3, 5, 10, 15 (секунд) | Определяет время, на которое перемещается место воспроизведения при быстром двойном нажатии кнопки [x] или кнопки [y] на Pocket GT. |
НАСТРОЙКА USB
DRY
| Параметр | Значение | объяснение |
| ВНЕ | 0-200% | Звук гитары, подаваемый на Pocket GT, выводится без изменений (ЗВУК DRY); не обрабатывается эффектами. |
| К ЭФХ | 0-200% | Регулирует уровень входного сигнала с компьютера для эффектов Pocket GT. |

ГЛАВНАЯ
| Параметр | Значение | объяснение |
| УРОВЕНЬ СМЕШИВАНИЯ | 0-200% | Регулирует уровень аудиовхода с компьютера. В это время аудиовход с компьютера микшируется в финальных секундах.tagе карманного GT. |
| ВЫХОД ЭФФЕКТА | 0-200% | Регулирует уровень, на котором звук, обработанный эффектами Pocket GT, выводится на компьютер. |

Список пользовательской памяти (начальные настройки)
| Число | Имя пользовательской памяти | объяснение |
| 01 | HI GAIN STACK | Мощный звук хай-гейна amp куча. Идеально подходит для аккомпанемента или риффов. |
| 02 | ДЕЛЮКС ХРУСТ | Хрустящий звук на основе DELUXE CRUNCH. |
| 03 | ЕСТЕСТВЕННАЯ ЧИСТОТА | Универсальный чистый звук, который можно использовать для всего, от соло до ритма. |
| 04 | В.О. ХРУСТ | Хрустящий звук на основе VO DRIVE. |
| 05 | БЛЮЗИ-ЛИД | Солидный звук с использованием T-SCREAM в качестве бустера, подходит для звукоснимателей с одной катушкой. |
| 06 | Твид ЧИСТЫЙ | Хрустящий звук на основе TWEED. |
| 07 | СОВРЕМЕННЫЙ МЕТАЛЛ | Металлический звук, подходящий для ритма и соло. |
| 08 | 1959 ВЕДУЩИЙ | Ведущий звук на основе MS1959. |
| 09 | 60-е FUZZ LEAD | Психоделический рок конца 60-х. |
| 10 | ЛА БРАУН | Звук хард-рока конца 70-х. |
| 11 | Мягкий джаз | Мягкий джазовый тон. |
| 12 | SLAPBACK CRUNCH | Хруст и эхо в стиле 50-х. |
| 13 | БГ 70-х ВЕДУЩИЙ | Звук латинского рока 70-х. |
| 14 | P.SHIFT ВЕСТИ | Ведущий звук, добавляющий тон верхней октавы. |
| 15 | Р-ФИЕР METAL | Звук хэви-метала на основе R-FIER. |
| 16 | ЯРКИЙ ДВ ЧИСТЫЙ | Яркий чистый звук, подходящий для ритма. |
| 17 | TWIN CRUNCH | Хрустящий звук на основе CLEAN TWIN. |
| 18 | ВО ДРАЙВ | Полноценный звук VO DRIVE. |
| 19 | СРЕДНИЙ УСИЛИТЕЛЬ | Усиленный лид-звук, подходящий для хард-рока 80-х. |
| 20 | ФУЗИОН 335 | Ведущий тон фьюжн 70-х. |
| 21 | ПРОСТОРНЫЙ JAZZ | Современный джазовый тон с глубоким ревербератором. |
| 22 | 1959 ХРУСТ | Хрустящий звук на основе MS1959. |
| 23 | ЗАДЕРЖКА КОМПАКТНОГО ХРУСТАЯ | Хрустящий звук с задержкой, подходит для ритма. |
| 24 | ДЕЛЮКС СВИДЕТЕЛЬСТВО | Ведущий звук, основанный на DELUXE CRUNCH, с хорошим сустейном. |
| 25 | ГЛУБОКОЕ ЭХО ОТВЕДЕНИЕ | Ведущий звук с эффектами глубокой задержки и реверберации. |
| 26 | РЕТРО ТРЕМОЛО | Хрустящий звук с эффектом тремоло. |
| 27 | ЧИСТЫЙ СУСТЕЙН | Чистый звук с хорошим сустейном. |
| 28 | АКУСТИЧЕСКАЯ SIM | Изменяет звук электрогитары на звук акустической гитары. |
| 29 | ДИСТАНЦИОННОЕ ОБЪЕДИНЕНИЕ | Звук искажения, подходящий для джазового фьюжн. |
| 30 | ОКРУЖАЮЩИЙ ПРИВОД | Драйвовый звук с реверберацией. |
| 31 | СУПЕР ЧИСТЫЙ | Прозрачно чистый звук. Идеально подходит для арпеджио или аккордовых ритмов. |
| 32 | НАД+СТЕКЛА | Ведущий звук, ставящий OD-1 перед MS1959, подходящий для хард-рока. |
| 33 | СИЛОВЫЙ МЕТАЛЛ | Металлический звук с мощными низами. |
| 34 | КОРОЛЕВСКИЙ ВЕДУЩИЙ | Британский ведущий тон 70-х и 80-х годов. |
| 35 | COMP CRUNCH LEAD | Ведущий звук, подходящий для джазового фьюжн. |
| 36 | JC-120 ЧИСТЫЙ | Чистый звук на базе JC-120. |
| 37 | МЯГКИЙ ДЖАЗ | Чистый звук с меньшим количеством высоких частот, подходящий для джаза. |
| 38 | CHORUS 1959 | Драйвовый звук MS1959 с хорусом. |
| 39 | РУКОВОДСТВО ПО БГНР | Ведущий звук с использованием BGNR, подходит для хамбакеров. |
| 40 | СИЛОВОЙ ПРИВОД | Прямой и мощный драйвовый звук, в котором раскрывается характер гитары. |
| 41 | ДЖАЗ ПОЛЕ | Агрессивный современный джазовый тон. |
| 42 | ФАНКИ ВАХ ЧИСТЫЙ | Чистый звук с эффектом вау в зависимости от силы удара. |
| 43 | ХРУСТЯЩЕЕ КОМБО ВЕСТИ | Ведущий звук на основе PRO CRUNCH. |
| 44 | COMP+OD LEAD | Ведущий звук, сочетающий в себе компрессор и овердрайв. |
| 45 | ЛЕГАТО ВЕДУЩИЙ | Гладкий соло-звук, подходящий для игры в стиле легато. |
| 46 | ПРОСТО ЧИСТЫЙ | Простой чистый тон с меньшим количеством эффектов. |
| 47 | MUFF FUZZ LEAD | Ведите звук с помощью MUFF FUZZ. |
| 48 | P.SHIFT ЧИСТЫЙ | Чистый звук, добавляющий тон верхней октавы. |
| 49 | -1 ОКТЯБРЬ ДРАЙВ | Драйвовый звук, добавляющий тон более низкой октавы. |
| 50 | Пушистый орган | Звук органного типа с фуззом. |
| 51 | МНОГО ИЗМЕРЕНИЙ | Психоделический звук с использованием эффекта VERTONE. |
| 52 | ОЧИСТКА ЭТАПА КОМПРЕССОРА | Чистый звук с фазером, подходящий для аккордового ритма. |
| 53 | ОРГАНИЗАЦИЯ | Драйвовый звук на основе ORNG ROCK REVERB. |
| 54 | ВИНТ Р-ФИР | Драйвовый звук на основе R-FIER VINTAGE. |
| 55 | T-AMP ПРИВОД | Драйвовый звук на основе T-AMP ВЕСТИ. |
| 56 | ДЕЛЮКС ЧИСТЫЙ | Чистый звук на основе DELUXE CRUNCH. |
| 57 | СЛДН ПРИВОД | Драйв звука на основе SLDN. |
| 58 | 5150 ПРИВОД | Драйвовый звук на базе 5150 DRIVE. |
| 59 | МС с НИЗКИМ УСИЛЕНИЕМ | Чистый звук на основе MS1959, уменьшающий amp усиление. |
| 60 | БГНР МЕТАЛЛ | Звук хэви-метала на основе BGNR UB METAL. |
| 61 | МАТЧ ДРАЙВ | Драйвовый звук на основе MATCH DRIVE. |
| 62 | ЯРКИЙ В.О. ЧИСТЫЙ | Чистый звук на основе VO DRIVE. |
| 63 | ПРОФЕССИОНАЛЬНЫЙ ХРУСТ | Хрустящий звук на основе PRO CRUNCH. |
| 64 | КОМБО ХРУСТ | Хрустящий звук на основе COMBO CRUNCH. |
| 65 | JC-120 + РАССТОЯНИЕ | Драйвовый звук, созданный комбинацией JC-120 и педали дисторшн. |
| 66 | ПОЛНЫЙ ДИАПАЗОН ОЧИСТКИ | Чистый звук в диапазоне от высоких частот до низких частот. |
| 67 | НИЗКАЯ ОКТАВНАЯ ЧИСТКА | Чистый звук с добавлением тона более низкой октавы. |
| 68 | ФЛАНЕЦ ПРИВОД | Драйвовый звук с фленджером. |
| 69 | ГЛУБОКАЯ ФАЗА | Чистый звук с использованием эффекта BI PHASE, что приводит к уникальному тональному характеру. |
| 70 | для АКУСТИЧЕСКИХ ГТР | Акустический процессор полезен для электроакустических гитар. |
| 71 | [БАС]ЧИСТЫЙ | Чистый звук для бас-гитары. |
| 72 | [БАС]ЛИМИТЕР | Чистый звук с лимитером для бас-гитары. |
| 73 | [BASS]ХОР | Чистый звук с припевом для бас-гитары. |
| 74 | [БАС] ВИБРАТО | Чистый звук с вибрато для бас-гитары. |
| 75 | [БАС]Драйв | Драйвовый звук для бас-гитары. |
| 76 | [BASS] СОВОК ДРВ | Драйвовый звук для бас-гитары, черпая средние частоты. |
| 77 | [BASS]ФУЗЗ | Звук фузза для бас-гитары. |
| 78 | [BASS]ФАЗОВАЯ ФУЗЗ | Звук фузз с фазером для бас-гитары. |
| 79 | [BASS]ХОР+ОБРАТ | Чистый звук для бас-гитары с хорусом и реверберацией. |
| 80 | [BASS]Т.ВАХ | Чистый звук для бас-гитары с добавлением эффекта вау в зависимости от силы удара. |
| 81 | [БАС] ОВЕРТОН | Басовый звук органного типа. |
| 82 | [BASS]ПРОСТРАНСТВЕННЫЙ DLY | Басовый звук с задержкой, подходит для соло. |
| 83 | [BASS]ФЛЭНЖЕР | Чистый звук с фленджером для бас-гитары. |
| 84 | [BASS] ШЛОПОК | Басовый звук подходит для игры в стиле слэп. |
| 85 | [BASS] ГЛУБОКИЙ ОГРАНИЧЕНИЕ | Чистый басовый звук с хорошим сустейном. |
| 86 | [BASS] МЕДЛЕННАЯ ПЕРЕДАЧА | Басовый звук с эффектом увеличения громкости. |
| 87 | [BASS]МС ДРАЙВ | Драйв звука для бас-гитары с помощью MS1959. |
| 88 | [BASS]ТЕРА ЭХО | Басовый звук с уникальной реверберацией с использованием TERA ECHO. |
| 89 | [BASS]СИМ-карта переменного тока | Басовый звук, вдохновленный акустическим басом. |
| 90 | [БАС]БЕЗЛАДКОВЫЙ? | Басовый звук, вдохновленный безладовым электрическим басом. |
| 91 | EMPTY | Пустая память для создания звука. |
| 92 | EMPTY | |
| 93 | EMPTY | |
| 94 | EMPTY | |
| 95 | EMPTY | |
| 96 | EMPTY | |
| 97 | EMPTY | |
| 98 | EMPTY | |
| 99 | EMPTY |
Блок-схема

Документы / Ресурсы
Korg AX3000G. Руководство пользователя
1
О
Оф
фи
иц
ци
иа
ал
лььн
ны
ый
й и
и ээк
ксск
кл
лю
юззи
иввн
ны
ый
й д
ди
исст
тр
ри
иб
бьью
ют
то
ор
р к
ко
ом
мп
па
ан
ни
ии
и K
Ko
orrg
g н
на
а т
теер
рр
ри
ит
то
ор
ри
ии
и Р
Ро
осссси
ии
и,, сст
тр
ра
ан
н
Б
Ба
ал
лт
ти
ии
и и
и С
СН
НГ
Г —
— к
ко
ом
мп
па
ан
ни
ия
я A
A&
&T
T T
Trra
ad
dee..
Д
Да
ан
нн
но
оее р
руук
ко
овво
од
дсст
твво
о п
пр
реед
до
осст
та
аввл
ля
яеет
тсся
я б
беессп
пл
ла
ат
тн
но
о..Е
Ессл
ли
и ввы
ы п
пр
ри
ио
об
бр
реел
ли
и д
да
ан
нн
ны
ый
й п
пр
ри
иб
бо
ор
р н
нее уу
о
оф
фи
иц
ци
иа
ал
лььн
но
огго
о д
ди
исст
тр
ри
иб
бьью
ют
то
ор
ра
а ф
фи
ир
рм
мы
ы K
Ko
orrg
g и
ил
ли
и а
аввт
то
ор
ри
иззо
овва
ан
нн
но
огго
о д
ди
ил
леер
ра
а к
ко
ом
мп
па
ан
ни
ии
и A
A&
&T
T T
Trra
ad
dee,,
к
ко
ом
мп
па
ан
ни
ия
я A
A&
&T
T T
Trra
ad
dee н
нее н
неессеет
т о
от
тввеет
тсст
тввеен
нн
но
осст
ти
и зза
а п
пр
реед
до
осст
та
аввл
леен
ни
иее б
беессп
пл
ла
ат
тн
но
огго
о п
пеер
реевво
од
да
а н
на
а
р
руусссск
ки
ий
й я
яззы
ык
к р
руук
ко
овво
од
дсст
твва
а п
по
ол
лььззо
овва
ат
теел
ля
я,, а
а т
та
ак
кж
жее зза
а о
оссуущ
щеесст
тввл
леен
ни
иее гга
ар
ра
ан
нт
ти
ий
йн
но
огго
о ссеер
рвви
иссн
но
огго
о
о
об
бссл
лууж
жи
ивва
ан
ни
ия
я..
©
© ®
® A
A&
&T
T T
Trra
ad
dee,, IIn
ncc..
Гарантийное обслуживание
По всем вопросам, связанным с ремонтом или сервисным обслуживанием гитарного процессора эффектов
AX3000G, обращайтесь к представителям фирмы Korg — компании A&T Trade.
Телефон для справок (095) 796-9262; e-mail: synth@attrade.ru
Korg AX3000G
Руководство пользователя
Гитарный процессор эффектов
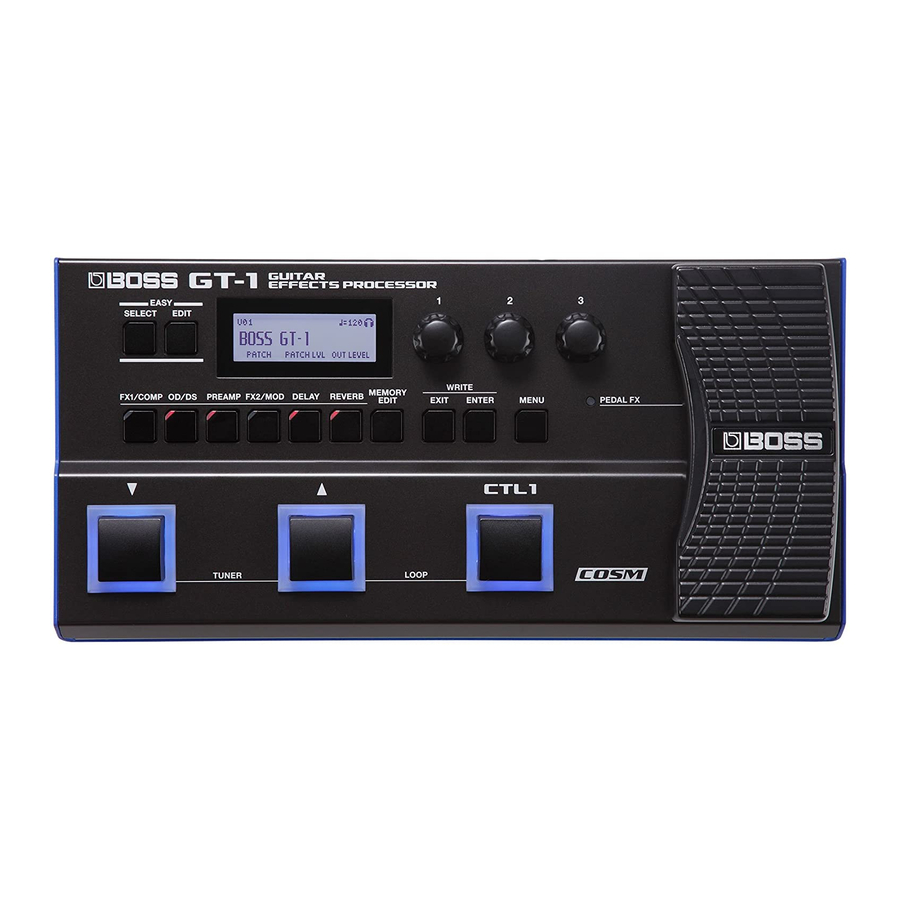
-
Contents
-
Table of Contents
-
Bookmarks
Quick Links
Parameter Guide / Sound List
01
Related Manuals for Boss GT-1
Summary of Contents for Boss GT-1
-
Page 1
Parameter Guide / Sound List… -
Page 2: Table Of Contents
Contents Basic Operation Controllers Basic Procedure for Effect Editing CTL 1, EXP SW, CTL 2, CTL 3 Changing the Effect Connection Order EXP 1, EXP 2 Editing from the Play Screen ASSIGN 1–6 EASY EDIT Virtual Expression Pedal System (Internal Pedal / Wave Pedal) EASY SELECT Basic MENU Operations…
-
Page 3: Basic Operation
Basic Operation Changing the Effect Connection Order Basic Procedure for Effect Editing Here’s how to move the position of a selected effect in the effect You can edit an effect by selecting it in the screen that shows the chain. placement of effects (the effect chain screen).
-
Page 4: Easy Edit
Basic Operation EASY EDIT SORT TYPE Search items JAZZ/FUSION BLUES You can use EASY EDIT to change the type of distortion (TONE) COUNTRY for the current sound, add or modify a modulation-type effect DISCO (VIBES), or change the reverberation (ECHO). SOUL/FUNK OLDIES With the play screen displayed, press the [EASY…
-
Page 5: Basic Menu Operations
Basic Operation Basic MENU Operations Here you can make settings that are common to the entire GT-1 (System parameters). Here you can make settings for output, USB, as well as assign the functions of the [1]–[3] knobs, etc. Press the [MENU] button.
-
Page 6: Effect
OFF, ON Turns this effect on/off. Selects the compressor type. TYPE Refer to FX1/FX2 TYPE BOSS This models a BOSS CS-3. This is a compressor that adds an even HI-BAND stronger effect in the high end. FX1/FX2 TYPE LIGHT This is a compressor with a light effect.
-
Page 7: Wah
EFFECT T. WAH Parameter Value Explanation Adjusts the width of the area affected by HM Q (HIGH-MID Q) 0.5–16 the EQ centered at the HIGH-MID FREQ. You can produce a wah effect with the filter changing in response Higher values will narrow the area. to the guitar level.
-
Page 8: Ac.guitar Simulator
EFFECT AC.GUITAR SIMULATOR PITCH SHIFTER This effect simulates the tonal character of an acoustic guitar. This effect changes the pitch of the original sound (up or down) within a range of two octaves. Parameter Value Explanation Parameter Value Explanation BODY 0–100 Adjusts the body resonance.
-
Page 9: Overtone
EFFECT Parameter Value Explanation Parameter Value Explanation Adjusts the time from when the direct sound Adjusts the tone for the ultra high frequency PRESENCE -50–+50 range. is heard until the harmonist sounds are heard. Normally you can leave this set at 0 ms. LEVEL 0–100 Adjusts the volume.
-
Page 10: Tremolo
EFFECT TREMOLO VIBRATO Tremolo is an effect that creates a cyclic change in volume. This effect creates vibrato by slightly modulating the pitch. Parameter Value Explanation Parameter Value Explanation WAVE Adjusts changes in volume level. A higher Adjusts the rate of the vibrato. 0–100 value will steepen wave’s shape.
-
Page 11: Sub Delay
EFFECT SUB DELAY PEDAL FX This is a delay with the maximum delay time of 1,000 ms. This You can control the wah effect or get a pitch bend effect in effect is useful for making the sound fatter. real time by adjusting the [EXP] pedal or the expression pedal connected to the CTL 2,3/EXP 2 jack.
-
Page 12: Od/Ds
This models an Ibanez TS-808. *1 This is enabled when the OUTPUT SELECT parameter is set to LINE/PHONE. TURBO OD This is the high-gain overdrive sound of the BOSS OD-2. DISTORTION This gives a basic, traditional distortion sound. This models a Proco RAT.
-
Page 13
EFFECT PREAMP TYPE list Type Explanation An unembellished, clean sound that minimizes the amp’s NATRL CLN idiosyncrasies, such as its trebly character and boomy (NATURAL CLEAN) low end. FUL RANGE An amp with a broad frequency range and an extremely (FULL RANGE) flat response. -
Page 14: Ns (Noise Suppressor)
EFFECT NS (NOISE SUPPRESSOR) DELAY This effect reduces the noise and hum picked up by guitar This effect adds delayed sound to the direct sound, giving more pickups. Since it suppresses the noise in synchronization with the body to the sound or creating special effects. envelope of the guitar sound (the way in which the guitar sound Parameter Value Explanation…
-
Page 15: Reverb
EFFECT MODULATE REVERB Parameter Value Explanation This effect adds reverberation to the sound. Adjusts the modulation rate of the delay MOD RATE 0–100 Parameter Value Explanation sound. REVERB ON/ Adjusts the modulation depth of the delay OFF, ON Turns this effect on/off. MOD DEPTH 0–100 sound.
-
Page 16: Master Setting
EFFECT DELAY MASTER SETTING Parameter Value Explanation These settings are applied to the overall patch. Adjusts the delay time. * When set to BPM, the value of each MASTER SETTING parameter will be set according to the value of the “MASTER BPM” specified for each patch.
-
Page 17: Controllers
Here’s how to assign the parameters that will be controlled by the operated. GT-1’s [EXP] pedal, and by an expression pedal (such as the EV-5; This is activated when an external expression sold separately) connected to the CTL 2, 3/EXP2 jack.
-
Page 18
Controllers Parameter Value Explanation 0–100, This determines the time spend for one cycle of BPM ª – ˜ the assumed EXP Pedal. When set to BPM, the value of each parameter will be set according to the value of the “MASTER BPM” specified for each WAVE RATE patch. -
Page 19
Controllers TARGET list CATEGORY TARGET CATEGORY TARGET CATEGORY TARGET CATEGORY TARGET ON/OFF PITCH TYPE TYPE TYPE FINE TIME RESONANCE 2 ToneMOD TYPE PRE DELAY FEEDBACK 1 P.SHIFT SUSTAIN E.LEVEL 1 SubDELAY HIGH CUT HIGH 1 COMP ATTACK FEEDBACK E.LEVEL LEVEL TONE D.LEVEL D.LEVEL… -
Page 20
Controllers CATEGORY TARGET CATEGORY TARGET WAVE ON/OFF RATE TYPE 2 TREMOLO DEPTH WAH LEVEL LEVEL WAHPDMIN SPEED PEDAL FX WAHPDMAX RATE SLOW WAHPDPOS RATE FAST PB LEVEL 2 ROTARY TRANSITION PB PITCH B/H BAL PB PD POS LEVEL PATCH LVL RATE LOW GAIN 2 UNI-V… -
Page 21: Virtual Expression Pedal System (Internal Pedal / Wave Pedal)
“MIN” and “MAX, ” as set on the By assigning a desired parameter to the virtual expression pedal, GT-1. you can produce an effect as though you were operating a When using an external footswitch, or other controller that physical expression pedal to change the volume or tone quality in acts as an on/off switch, “MIN”…
-
Page 22: Menu
Choose this setting if you’re using Specifies the function when the OFF, [ I ] and [ H ] switches are pressed LINE/PHONES headphones, or if the GT-1 is connected to a DWN+UP TUNER, keyboard amp, mixer, or digital recorder. simultaneously.
-
Page 23: Knob Setting
MENU KNOB SETTING Here you can assign the desired parameters to knobs [1]–[3] in the play screen. * The settings you make here are only for the knobs in the play screen. Parameter KNOB 1–KNOB 3 The parameter names displayed in the play screen are abbreviated. For details about the parameter names, refer to the chart shown below. Value Display Value…
-
Page 24
MENU Value Display Value Display Value Display FX2:T.WAH LEVEL 2TwhLVL FX2:PHASER TYPE 2PhTYP REVERB:SPRING SENS RV:SPRNG FX2:GEQ 100Hz 2GEq100 FX2:PHASER RATE 2PhRAT REVERB:DELAY TIME RV:DlTIM FX2:GEQ 200Hz 2GEq200 FX2:PHASER DEPTH 2PhDPT REVERB:DELAY FEEDBACK RV:DlFBK FX2:GEQ 400Hz 2GEq400 FX2:PHASER MANUAL 2PhMAN REVERB:DELAY HIGH CUT RV:DlHiC FX2:GEQ 800Hz… -
Page 25: Pref (Preference)
USB audio flow shared by all patches. Parameter Value Explanation GT-1 outputs the effect sound, and the return from the computer is mixed EXP 1 PATCH, SYSTEM with your guitar performance at the final stage. CTL 1 PATCH, SYSTEM If this is set to PATCH, different settings can be made independently for each patch.
-
Page 26: Other Settings
MUTE Sound will not be output while tuning. While tuning, the sound of the guitar being BYPASS input to the GT-1 will be output without OUTPUT change. All effects will be off. Allows you to tune while hearing the current THRU effect sound.
-
Page 27: Sound List
Sound List Preset Patch List Patch # Patch Name Explanation GENRE1 GENRE2 HI GAIN STACK The powerful and fat sound of a high-gain amp stack. Ideal for backing or riffs. HARD ROCK ROCK A sound that takes advantage of the TERA ECHO’s distinctive reverberation, and is perfect for TERA ECHO LEAD ROCK HARD ROCK…
-
Page 28
Sound List Patch # Patch Name Explanation GENRE1 GENRE2 An ideal sound for heavy metal riffing. Using the [CTL1] switch increases the volume and applies METAL CORN METAL/CORE HARD ROCK chorus. DRAGON METAL Ideal modern metal sound for humbucking pickups. METAL/CORE HARD ROCK BLADE METAL…
(скачивание инструкции бесплатно)
Формат файла: PDF
Доступность: Бесплатно как и все руководства на сайте. Без регистрации и SMS.
Дополнительно: Чтение инструкции онлайн

Подробное описание технологии Pocket POD. www.line6.com/manuals Rev A
® ®
Подробное руководство
по эксплуатации
Страница:
(1 из 16)
навигация

1

2

3

4

5

6

7

8

9

10

11

12

13

14

15

16
Оглавление инструкции
- Страница 1 из 17
Подробное руководство по эксплуатации Подробное описание технологии Pocket POD. www.line6.com/manuals Rev A ®® - Страница 2 из 17
Please Note: Line 6 и POD являются торговыми марками компании Line 6, Inc. Все наименования продуктов, торговые марки, имена артистов являются собственностью их многоуважаемых владельцев, ни коим образом не связанных с Line 6. Наименования продуктов, изображения и имена артистов используются - Страница 3 из 17
Содержание Управление и подключения………………………………………………………………………………………………………………………………1•1 Пресеты и - Страница 4 из 17
Управление и подключения 1•1 Управление и подключения 1 4-х сторонняя кнопка управления – Эта кнопка даст тебе доступ к великому множеству сказочных возможностей твоего Pocket POD. Нажав на верхнюю, нижнюю и боковые части кнопки ты сможешь двигаться вверх (Up), вниз(Down), влево(Left) и - Страница 5 из 17
ки будет мигать с такой же скоростью. Нажми и удерживай эту кнопку более 2 секунд, чтобы активировать функцию настроек. Нажми на нее снова чтобы выйти из операции. За подробностями обращайся к главе 2. 9 CD/MP3 In – В этот 1/8-дюймовый стерео вход ты можешь подключить CD или MP3 проигрыватель чтобы - Страница 6 из 17
Пресеты и тюнер Сохранение пресетов 2•1 Пресеты и тюнер Вызов пресетов Pocket POD включает в себя более 300 пресетов, покрывющих весь спектр звучания и стилей. Многие из пресетов были разработаны великими артистами современности! Эти пресеты содержат большой выбор усилителей и эффектов, и - Страница 7 из 17
Громкость тюнера Когда ты находишься в режиме тюнера, поверни регулятор Chan Vol, чтобы установить громкость проходящего сигнала. Это нужно для того, чтобы ты смог подстроить громкость звука во время настройки настолько, насколько тебе надо. Можно также повернуть регулятор Chan Vol до самого конца - Страница 8 из 17
низкий звук с богатыми тональными колебаниями. Выкрути регулятор драйва и тебе подчинится все! «Tube Preamp». Даже не приближаясь к настоящим гитарным усилителям, коль уж мы начали, остановиться не могли. Подумалось нам как-то: «Если люди приобретают Pocket POD, нужно сделать все, чтобы у них - Страница 9 из 17
всего тебе захочется добавить верха. Bassman®, как и большинство усилков, смоделированных для Pocket POD, не имел мастер громкости. Поэтому чтобы достичь максимального уровня звука, производящего этим ампом, приходилось задирать его настолько высоко, что это могло навредить тем, кто стоял рядом. А - Страница 10 из 17
и гитаристам понадобилось больше кристального и резкого звука. Тогда то компания Jennings Company, выпускающая усилители Vox®, решили добавить возможность управления высокими и низкими частотами (и особенно 12AX7, в том числе); эта дополнительная способность стала известна как Top Boost. AC 30 с - Страница 11 из 17
* Наименования продуктов, изображения и имена артистов используются исключительно для идентификации продуктов, свойства которых изучались в процессе развития производства компании Line 6. MARSHALL® является зарегистрированной торговой маркой Marshall Amplification Plc. Модели ампов и кабинетов 3•9 - Страница 12 из 17
Модель Основана на* 1×8 1960 Fender Tweed Champ 1x12s 1952 Fender® Tweed Deluxe Reverb® 1960Vox® AC-15 1964 Fender® Blackface Deluxe Reverb® Line 6 1×12 2x12s 1965 Fender® Blackface Twin Reverb® ® 1967 Vox® AC-30 1995 Matchless Chieftain ® Line 6 2×12 4x10s 1959 Fender® Bassman® Line 6 4×10 4x12s - Страница 13 из 17
Boutique #1 комнатный Line 6 Clean комнатный Boutique #2 комнатный Line 6 Twang пружинный Boutique #3 комнатный Line 6 Blues комнатный California Crunch #1 пружинный Line 6 Crunch пружинный California Crunch #2 пружинный Line 6 Crunch #2 комнатный Brit Class A комнатный Line 6 Drive комнатный Brit - Страница 14 из 17
Комбинированные эффекты Effects Остальные эффекты являются комбинациями делея и любого другого эффекта. Их сочетания говорят сами за себя. Tap устанавливает скорость делея во всех этих эффектах. «Delay Comp» – Delay/Compressor. Регулятор Effects контролирует соотношение компрессии. «Dly Tremolo» – - Страница 15 из 17
Twin Reverb® Boutique #1 1996 Marshall® with Vintage 30s Boutique #2 1996 Marshall® with Vintage 30s Boutique #3 1996 Marshall® with Vintage 30s California Crunch #1 1996 Marshall® with Vintage 30s California Crunch #2 1996 Marshall® with Vintage 30s Brit Class A 1967 Vox® AC-30 Brit Class A #2 - Страница 16 из 17
Приложение А: Модели усилителей и кабинетов Amp Model Name Default Cabinet Model Brit Hi Gain 1996 Marshall® with Vintage 30s Modern Class A 1995 Matchless Chieftain TreadPlate Line 6 4×12 TreadPlate #2 1996 Marshall® with Vintage 30s Modern Hi Gain Line 6 4×12 Modern Hi Gain #2 1996 Marshall® with - Страница 17 из 17