-
Contents
-
Table of Contents
-
Bookmarks
Quick Links
1236-X2
Silent, Discriminating Metal Detector
Operating Manual
F I S H E R
R E S E A R C H
L A B O R A T O R Y
Related Manuals for Fisher M-Scope 1236-X2
Summary of Contents for Fisher M-Scope 1236-X2
-
Page 1
1236-X2 Silent, Discriminating Metal Detector Operating Manual F I S H E R R E S E A R C H L A B O R A T O R Y… -
Page 2: Table Of Contents
CONTENTS About Your 1236-X2 …………… pg. 1 Condensed Operating Instructions ……..pg. 4 Setting Up…………….pg. 5 Body or Hipmounting …………pg. 7 Control Functions …………..pg. 8 Discrimination Points …………. pg. 10 Searching …………….pg. 12 Pinpointing …………….pg. 14 No-Motion Pinpoint Mode …………
-
Page 3: About Your 1236-X2
ABOUT YOUR DETECTOR Your 1236-X2 was designed to do one thing well provide all the quality tools necessary to help you find good, deep targets in trashy or mineralized soil with minimum hassle. The 1236-X2 does this by providing you a wealth of powerfully, well-designed instrument controls and features that give you maximum flexibility of adjustment to accommodate your unique style of detecting.
-
Page 4
ABOUT YOUR DETECTOR No-Motion Pinpoint Mode With VCO Audio: At the push of a button, the all-metal no-motion pinpoint mode kicks in with VCO (Voltage Controlled Oscillator) audio response for precise target locating. A located target responds with increasing volume and pitch. The tone gets louder and higher, so there’s virtually no doubt when you’re directly over a target. -
Page 5
If you have any questions, suggestions, or interesting 1236-X2 stories, drop us a line. In the meantime… Happy Hunting! Fisher Research Laboratory… -
Page 6: Condensed Operating Instructions
That’s why we recommend that you read the entire manual first. But if you just can’t wait any longer or you’ve already used a Fisher “X” detector, here’s some quick instructions: 1. Set the controls as follows: FREQUENCY = 0 (center frequency = 5.7 KHz)
-
Page 7: Setting Up
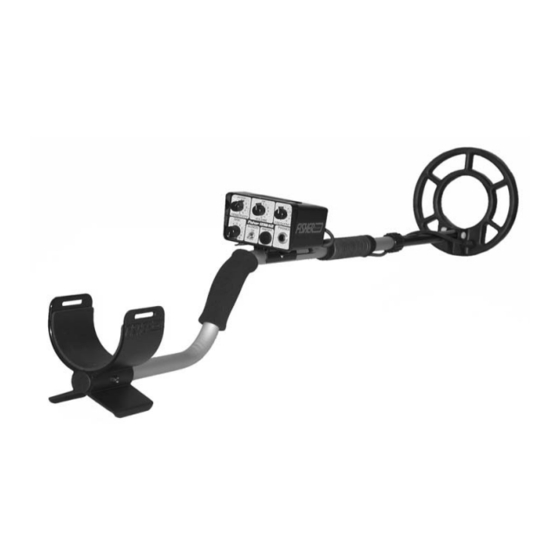
SETTING UP Your new 1236-X2 is just about ready to go, but take a look at the following illustration before proceeding. 1. Unpack your 1236-X2 carefully, and save the carton: it may come in handy if you ever have to return the instrument for service.
-
Page 8
SETTING UP semicircle around the front of the operator. 4. Hand tighten the lock nut and search coil adjusting wing nut. 5. With the stem length properly adjusted, wrap the search coil cable snugly around the upper handle and secure it with velcro straps. Leave just enough slack near the coil to allow it to be tilted completely backward and forward. -
Page 9: Body Or Hipmounting
4. Reconnect the search coil cable to the control housing. 5. The control housing can then be mounted on your belt or on the optional Fisher Chest Harness. It is especially important that the cable connector be installed tightly (hand tightened only) to prevent false signals during body-mount use.
-
Page 10: Control Functions
CONTROL FUNCTIONS 1. SILENCER: When the toggle switch is flipped ON, the 1236-X2 runs in the 3rd derivative SILENCER discrimination mode, eliminating the annoying “pops” and “clicks” heard when searching in extremely trashy areas. Flipping it to OFF, the 1236-X2 runs in classic 2nd derivative discrimination mode.
-
Page 11
CONTROL FUNCTIONS A faint tone indicates weak batteries and no tone means that it’s time for a battery change. 4. VOLUME: This control switches the 1236-X2 on and off and controls the volume of the audio response. A setting of 10 provides maximum audio signal volume. -
Page 12: Discrimination Points
DISCRIMINATION POINTS By adjusting the DISCRIMINATION Control, you will be able to ignore (or “reject”) small pieces of metallic trash and ground minerals while detecting valuable targets. The lowest setting at which an object is rejected is referred to as its “discrimination point.”…
-
Page 13
DISCRIMINATION POINTS Figure 6. Typical 1236-X2 audio reponses (with silencer off) for 2-inch deep targets with search coil sweeping 1 to 2 inches above ground 10. Large pieces of trash such as beer cans or jar lids may sound like a good target no matter what you do. With a little practice, however, you will be able to tell the difference between a large target and a small coin sized object. -
Page 14: Searching
SEARCHING Now comes the fun part if you follow a few simple rules. Good search techniques are every bit as important as a good detector. 1. The 1236-X2 has two operating modes. The “Search” mode is activated simply by turning the unit on.
-
Page 15
SEARCHING a. In relatively non-trashy soil use a low level of discrimination (2 for example) with the SILENCER OFF. In this manner the 1236-X2 will detect all metal targets within its range and you can instantly increase the discrimination for further identification. b. -
Page 16: Pinpointing
PINPOINTING The pinpoint mode requires no tuning and no motion to precisely locate the target. With the Pinpoint push-button depressed, the 1236-X2 is in an all-metal mode, meaning that any discrimination setting you might have selected will no longer apply. The VCO (Voltage Controlled Oscillator) circuitry indicates the presence of a target by increasing both the volume and frequency of the audio output.
-
Page 17: Pinpointing In The Motion Search Mode
PINPOINTING IN MOTION SEARCH MODE Pinpointing in the Search Mode will take a little practice, but you may find that for most targets it’s even quicker than the No- Motion Pinpointing Mode. Simply use the same procedure as in steps 2 through 5 on p. 14. The only difference will be that when you stop the coil over the target you will lose the audio signal.
-
Page 18: Target Recovery
TARGET RECOVERY Once you have pinpointed a target, your objective is to recover it quickly and neatly, leaving virtually no trace of your excavation. There are almost as many ways to do this as there are treasure hunters. Whatever works for you is good enough as long as you don’t break any laws, damage vegetation, or leave your search area looking like a World War II battlefield.
-
Page 19: Operating Tips
OPERATING TIPS 1. We’ve already said it, but it bears repeating: TAKE YOUR TIME AND OVERLAP YOUR SWEEPS. 2. Use good headphones. You won’t miss faint targets, you won’t attract unwanted attention and you won’t bother others. 3. Practice pinpointing. There’s nothing sacred about the methods described in this manual.
-
Page 20: False Signals
FASLE SIGNALS A “false signal” occurs when something that shouldn’t sounds like a good target. Your 1236-X2 does an excellent job of ignoring junk, but it’s so sensitive to good targets that it can be fooled by bad targets with similar electrical characteristics. Large pieces of trash, for example, or even some kinds of bottle caps and pull tabs can fool you.
-
Page 21
FALSE SIGNALS one, you’re probably over a nail or some other large object. But a very shallow coin or a coin on edge will give the same response. SOLUTIONS: In all cases, the target will be between the beeps, or if you sweep at right angles to your original direction, you’ll receive a single beep directly over the target (except for a very shallow coin.) One… -
Page 22: Battery Replacement
BATTERY REPLACEMENT Two 9-volt transistor batteries are located in separate compartments at the rear of the housing of the 1236-X2. When it’s time to replace the batteries, always replace both of them. 1. To open the battery compartments, press gently down and out on the battery door latch.
-
Page 23: Maintenance
MAINTENANCE Your 1236-X2 doesn’t require a lot of care, but there are a few things you should do to keep it in peak operating condition. 1. If you’re not going to be using it for awhile, take the batteries out. Acid damage caused by leaking batteries can be severe.
-
Page 24: Where To Use Your Metal Detector In The U.s
Where To Use Your Metal Detector In The U.S. National Forest and Federal Lands—Metal detecting is allowed only by special permit acquired from the federal government. Each area has a district office. Corps of Engineers, Lakes, Shorelines and Lands—Permission has been granted only on predisturbed sites, such as beaches and attached swimming areas.
-
Page 25: Specifications
SPECIFICATIONS VLF 3rd Derivattive SILENCER MODE Discrimination Pinpoint (No-Motion Mode) VLF All Metal Audio Response …………….416 Hz Search Mode ………………VCO Pinpoint Mode ………………Yes Audio Threshold ………………. Yes Volume Control …………….5.7 KHz Operating Modes ………. Derivative Discrimination Search (Motion-Mode) …………..
-
Page 26
SPECIFICATIONS NOTES 1. Subject to improvement or modification without notice. 2. In Search Mode, the 1236-X2 operates under two modes of discrimination. With the SILENCER off, it operates in a classic 2nd derivative discrimination mode that allows all pops, clicks and partial target responses to be heard for maximum target information. -
Page 28
R E P U T A T I O N Fisher produced the first patented metal detector in 1931. For over 70 years, the Fisher logo has been a mark of excellence. L I F E T I M E W A R R A N T Y…
Краткое содержание страницы № 1
Q U A L I T Y
1236-X2
Fisher detectors are renowned for their quality.
Silent, Discriminating Metal Detector
In the Fisher tradition, each detector is hand crafted with pride
P E R F O R M A N C E
Treasure Hunters worldwide rely on Fisher.
Our detectors are durable, dependable, and search deeper..
REPUTATION
Fisher produced the first patented metal detector in 1931. For
over 70 years, the Fisher logo has been a mark of excellence.
5 — YEAR LIMITED WARRANTY
Fisher believes in the products we p
Краткое содержание страницы № 2
CONTENTS About Your 1236-X2 ………………………………………………………. pg. 3 Condensed Operating Instructions ………………………………… pg. 6 Setting Up ……………………………………………………………………… pg. 7 Body or Hipmounting …………………………………………………….. pg. 9 Control Functions …………………………………………………………… pg. 10 Discrimination Points ……………..
Краткое содержание страницы № 3
ABOUT YOUR DETECTOR SPECIFICATIONS Your 1236-X2 was designed to do one thing well, provide all NOTES the quality tools necessary to help you find good, deep targets 1. Subject to improvement or modification without in trashy or mineralized soil with minimum hassle. The 1236-X2 notice. does this by providing you a wealth of powerfully, well designed 2. In Search Mode, the 1236-X2 operates under two instrument controls and features that give you maximum flexibility modes of discrimination
Краткое содержание страницы № 4
SPECIFICATIONS ABOUT YOUR DETECTOR Operating Modes Search Mode Motion Circuitry: In this mode of operation the 2 Search (Motion Mode) ………………………………….VLF 2nd Derivative motion circuitry in the 1236-X2 responds with a 416 Hz tone as 2 VLF 3rd Derivattive SILENCER MODE Discrimination the search coil is moved over a target. This makes the 1236-X2 Pinpoint (No-Motion Mode) ……………………………………..VLF All Metal less sensitive
Краткое содержание страницы № 5
Where To Use Your Metal Detector In The U.S. ABOUT YOUR DETECTOR National Forest and Federal Lands—Metal detecting is allowed Battery Test: A convenient battery test switch has been only by special permit acquired from the federal government. incorporated into your 1236-X2 to check the relative strength of Each area has a district office. the batteries. Rotating the SENSITIVITY control counterclockwise Corps of Engineers, Lakes, Shorelines and Lands—Permission has to the “BATTERY” position ca
Краткое содержание страницы № 6
MAINTENANCE CONDENSED OPERATING INSTRUCTIONS Using the 1236-X2 is simple, but you’ll have more fun and a Your 1236-X2 doesn’t require a lot of care, but there are a few things you should do to keep it in peak operating condition. better chance of making that BIG find if you have a complete 1. If you’re not going to be using it for awhile, take understanding of what you’re doing and why. That’s why we the batteries out. Acid damage caused by leaking recommend that you read the entire manual
Краткое содержание страницы № 7
SETTING UP BATTERY REPLACEMENT Two 9-volt transistor batteries are located in separate compartments Your new 1236-X2 is just about ready to go, but take a look at at the rear of the housing of the 1236-X2. When it’s time to replace the following illustration before proceeding. the batteries, always replace both of them. 1. Unpack your 1236-X2 carefully, and save the carton: it may come in handy if you ever have to 1. To open the battery compartments, press gently return the instrument for s
Краткое содержание страницы № 8
FALSE SIGNALS SETTING UP 5. Elongated Ferrous Objects: If you hear two beeps Remember, the longer the shaft, the greater the strain on your arm and wrist. The 1236-X2 is very close together and can’t find either one, you’re balanced for comfortable searching in a tight probably over a nail or some other large object. But a semicircle around the front of the operator. very shallow coin or a coin on edge will give the same 4. Hand tighten the lock nut and search coil response. SOLUTIONS: I
Краткое содержание страницы № 9
FALSE SIGNALS BODY or HIPMOUNTING 1. Disconnect the search coil cable from the A “false signal” occurs when something that shouldn’t, sounds like control housing and unwind all but the last 12 a good target. Your 1236-X2 does an excellent job of ignoring junk, inches or so from the upper handle. Secure the but it’s so sensitive to good targets that it can be fooled by bad lower end of the cable with a Velcro® strap at targets with similar electrical characteristics. Large pieces of trash,
Краткое содержание страницы № 10
OPERATING TIPS CONTROL FUNCTIONS 1. We’ve already said it, but it bears repeating: TAKE 1. SILENCER: When the toggle switch is flipped ON, YOUR TIME AND OVERLAP YOUR SWEEPS. the 1236-X2 runs in the 3rd derivative SILENCER 2. Use good headphones. You won’t miss faint discrimination mode, eliminating the annoying “pops” targets, you won’t attract unwanted attention and and “clicks” heard when searching in extremely you won’t bother others. trashy areas. Flipping it to OFF, the
Краткое содержание страницы № 11
TARGET RECOVERY CONTROL FUNCTIONS indicates weak batteries and no tone means that Once you have pinpointed a target, your objective is to recover it quickly and neatly, leaving virtually no trace of your excavation. it’s time for a battery change. There are almost as many ways to do this as there are treasure 4. VOLUME: This control switches the 1236-X2 on and hunters. Whatever works for you is good enough as long as you off and controls the volume of the audio response. don’t break any la
Краткое содержание страницы № 12
PINPOINTING IN MOTION SEARCH MODE DISCRIMINATION POINTS Pinpointing in the Search Mode will take a little practice, but you By adjusting the DISCRIMINATION Control, you will be able to ignore may find that for most targets it’s even quicker than the No-Motion (or “reject”) small pieces of metallic trash and ground minerals Pinpointing Mode. Simply use the same procedure as in steps 2 while detecting valuable targets. The lowest setting at which through 5 on p. 14. The only difference will
Краткое содержание страницы № 13
PINPOINTING DISCRIMINATION POINTS The pinpoint mode requires no tuning and no motion to precisely locate the target. With the Pinpoint push-button depressed, the 1236-X2 is in an all-metal mode, meaning that any discrimination setting you might have selected will no longer apply. The VCO (Voltage Controlled Oscillator) circuitry indicates the presence of a target by increasing both the volume and frequency of the audio output. By depressing the Pinpoint push-button, precise target locatio
Краткое содержание страницы № 14
SEARCHING SEARCHING Now comes the fun part if you follow a few simple rules. Good search within its range and you can instantly increase the techniques are every bit as important as a good detector. discrimination for further identification. b. In trashy areas you’ll probably want to operate 1. The 1236-X2 has two operating modes. The at a higher level of discrimination (6 for example) “Search” mode is activated simply by turning the unit with the SILENCER switched ON to cut down on the
(скачивание инструкции бесплатно)
Формат файла: PDF
Доступность: Бесплатно как и все руководства на сайте. Без регистрации и SMS.
Дополнительно: Чтение инструкции онлайн

Переносной
арочный
металлодетектор
Руководство
пользователя
1
Страница:
(1 из 22)
навигация

1

2

3

4

5

6

7

8

9

10

11

12

13

14

15

16

17

18

19

20

21

22
Оглавление инструкции
- Страница 1 из 23
Переносной арочный металлодетектор Руководство пользователя 1 - Страница 2 из 23
Описание: Габариты Вес Темп. Влажн. Питание Управление Индикация Тревога Сервис Гарантия 2 В рабочем положении — 2,20м х 1,20м х 0,90м Рабочий проем — 2,00м х 0,80м В транспортном виде — 0,66м х 0,58м х 0,90м 45кг. — 20ОС + 60ОС. 95% без конденсата. Встроенные аккумуляторные батареи, время работы - Страница 3 из 23
Инструкция по монтажу: 1. Удалите транспортные ремни и разложите все компоненты. Установите два основания на выбранной поверхности. Чтобы убедиться, что основания расположены правильно и параллельно друг к другу, установите на них блок управления. Не включая блок управления, снимите его с - Страница 4 из 23
4. Положение передающих и приемных панелей определяется ориентацией блока управления. Если смотреть со стороны выхода (позиция оператора), то справа – три передающие панели, слева – три приемные панели. Отличия между приемными и передающими панелями: Приемные панели имеют 32-х контактные разъемы и - Страница 5 из 23
5 - Страница 6 из 23
6. После сборки боковых панелей установите на них блок управления, соблюдая правильность направления вход-выход. Закрепите блок управления защелками. Для удобства монтажа контрольной панели рекомендуется использовать стремянку. В отсутствие стремянки можно собрать конструкцию, как на рисунке внизу, - Страница 7 из 23
Инструкция по демонтажу: 1. Выключите блок управления. Установите вспомогательные опоры, отомкните защелки и снимите блок управления. 2. Разберите боковые панели и отложите их в сторону. Задвиньте вспомогательные опоры в основания. 3. Расправьте транспортные ремни, положите блок управления на - Страница 8 из 23
5. Сложите панели стопкой поверх оснований, таким образом, чтобы стыковочные конусы расположились со стороны колес блока управления. Все элементы металлодетектора имеют стыковочные шипы и пазы, при укладке следите за их совпадением. Защелки должны быть закрыты! 6. Натяните и закрепите транспортные - Страница 9 из 23
Клавиатура: Управление M-Scope осуществляется через клавиатуру на блоке управления. Кнопки ▲ и ▼ – одно функциональные, кнопки 0-9 несут двойную функцию, см. таблицу. Кнопка Обозначение Функция 0 ON/OFF Вкл./Выкл., выход из меню 1 VOL 2 SENS Чувствительность 3 CON Контрастность 4 CNT Счетчик 5 RATE - Страница 10 из 23
Работа с детектором: Включите устройство нажатием клавиши ON/OFF на клавиатуре. Металлодетектор включится и проведет цикл самодиагностики. На экране отобразится логотип и напряжение на аккумуляторах. Во время самодигностики светодиодный индикатор уровня сигнала будет менять значение от минимального - Страница 11 из 23
Оптические детекторы: Внутри проема детектора расположены шесть инфракрасных (ИК) лучевых детекторов, три — со стороны входа и три — со стороны выхода. Сигнал тревоги формируется только в том случае, если произошло пересечение одного и более лучей. Индикатор уровня сигнала может отображать - Страница 12 из 23
Обнаружение металлических предметов: Когда человек проходит сквозь детектор, индикаторы зон остаются зелеными, индикатор статуса горит желтым, а индикатор готовности красным. Индикатор уровня отображает уровень детектируемого сигнала. Если уровень сигнала не превысил пороговое значение ни для одной - Страница 13 из 23
Залипшая кнопка: Если какая либо кнопка нажата более двух секунд, индикатор уровня сигнала гаснет, индикатор готовности и светодиоды зон загораются красным, а на дисплее отображается надпись «KEY IS STUCK!». Также на дисплее отображается вид клавиатуры, где залипшая кнопка выделена темным - Страница 14 из 23
Настройка параметров: Для выхода из любого меню настройки нажмите 0, либо подождите 10 секунд, и тогда M-Scope автоматически вернется в рабочее состояние. Нажатие кнопок ▼/▲ более 1 секунды ускоряет изменение параметра. Громкость Для настройки громкости нажмите 1. M-Scope издаст звуковой сигнал. - Страница 15 из 23
Контрастность Для настройки контрастности ЖК дисплея нажмите 3. Используя кнопки ▼/▲ установите необходимый уровень. Это значение сохраняется в памяти автоматически. Счетчики / Статистика Чтобы просмотреть статистику нажмите 4. На дисплее выводятся четыре значения: PeoPle — общее количество - Страница 16 из 23
Управление паролями: Доступ к настройкам детектора можно ограничить паролем, который задается в меню Access. Нажмите ▼. Если включена защита паролем, на ЖК дисплее появится предложение ввести код. По умолчанию код доступа 01, если пользователь не задал иное значение. На ввод неправильного кода на - Страница 17 из 23
Экран сброса кода User 2. Введите новый код. Длина кода от одного до десяти знаков. Если в течение 4 секунд не нажата ни одна кнопка, дисплей перейдет в меню «Access Codes». Ввиду того, что нет кнопки Enter и длина кода не фиксирована необходимо после ввода кода выждать паузу 4 секунды. Через 4 - Страница 18 из 23
Программы: Ввиду того, что M-Scope является мобильным детектором, то для разных объектов необходимо использовать разные настройки. Для этого предусмотрена возможность сохранить в памяти устройства три заранее заданных программы. Вызов любой из программ осуществляется коротким (< 1секунды) нажатием - Страница 19 из 23
Диагностика: В M-Scope предусмотрен режим диагностики. Для входа в этот режим: выключите детектор, затем включите и быстро нажмите ▼, затем ▲. Интервал между нажатиями – не более 2 секунд. Дождитесь завершения цикла опроса индикаторов. Это заставка режима диагностики. Здесь отображена информация о - Страница 20 из 23
Тест светодиодов: Исправность светодиодов можно проверить из диагностического меню, нажимая соответствующие кнопки на клавиатуре. Время свечения 4,5сек. Кнопка Индикатор уровня Индикаторы зон Индикатор состояния Индикатор готовности 1 1 – зел. Все – зел. Выкл. Выкл. 2 2 – зел. Выкл. Выкл. 3 3 – - Страница 21 из 23
Устранение неисправностей: Перед демонтажом M-Scope обязательно выключите Блок управления! 1. После включения детектор сразу же выключается. Проверьте напряжение на аккумуляторах, и если оно ниже 10,9 вольт, произведите зарядку, либо подключите детектор устройству. 2. Детектор исправен, но не - Страница 22 из 23
Во избежание повреждений при транспортировке M-Scope защелки на панелях должны быть закрыты! НЕПРАВИЛЬНО ПРАВИЛЬНО При работе с M-Scope обращайте внимание: ● ● ● ● ● Контактные группы на панелях, основаниях, блоке управления всегда должны быть чистыми и сухими. Протирка поверхностей проводится - Страница 23 из 23
Инструкции и руководства похожие на GARRETT FISHER M-SCOPE
Другие инструкции и руководства из категории Арочный металлодетектор
© 2023 manuals-help.ru, Все права защищены
Просмотр
Доступно к просмотру 21 страница. Рекомендуем вам скачать файл инструкции, поскольку онлайн просмотр документа может сильно отличаться от оригинала.
-
Переносной арочный металлодетектор Руководство пользователя 1
-
Описание:
Габариты      В рабочем положении         — 2,20м х 1,20м х 0,90м
Рабочий проем               — 2,00м х 0,80м
В транспортном виде         — 0,66м х 0,58м х 0,90м
Вес           45кг.
О
Темп.         - 20 С  + 60 С.
О
Влажн.        95% без конденсата.
Питание       Встроенные аккумуляторные батареи, время работы до 40ч.
Сетевой источник 220В/50Гц — зарядное устройство.
Управление    Цифровая клавиатура с ЖК дисплеем.
Индикация     Светодиоды.
Тревога       Светодиоды 3 зоны, настраиваемый звук.
Сервис        Самодиагностика, автокалибровка.
Гарантия      24 месяца
2
-
Инструкция по монтажу:
1. Удалите транспортные ремни и разложите все компоненты. Установите
два основания на выбранной поверхности. Чтобы убедиться, что основания
расположены правильно и параллельно друг к другу, установите на них блок
управления. Не включая блок управления, снимите его с  оснований.
2. Установите вспомогательные опоры, расположенные на базовых блоках.
Для этого потяните опору из основания до тех пор, пока она не начнет
вращаться, затем поверните ее так, чтобы опора коснулась поверхности
земли, и потяните еще до фиксации. Повторите это со всеми опорами.
3. Выберите, какая сторона портала будет входом, а какая – выходом.
Вход/выход определяется ориентацией блока управления. Позиция
оператора располагается со стороны выхода, на блоке управления с этой
стороны находится светодиодная шкала.
Внимание: неправильное расположение блока управления и панелей
вызывает неисправность в работе устройства!
3
- 1
- 2
- 3
- 4
- 21
Вы здесь
Каталог инструкций » G » Garrett Metal Detectors » Безопасность Garrett Metal Detectors » Garrett Metal Detectors FISHER M-SCOPE » Страница инструкции 1
-

1
-

2
-

3
-

4
-

5
-

6
-

7
-

8
-

9
-

10
-

11
-

12
-

13
-

14
-

15
-

16
-

17
-

18
-

19
-

20
-

21
-

22
Распечатать
Страница 1 из
- << Предыдущая
- Следующая >>

Безопасность Garrett Metal Detectors в инструкции по эксплуатации Garrett Metal Detectors FISHER M-SCOPE
Переносной арочный металлодетектор
Руководство пользователя
- << Предыдущая
- Следующая >>