- Manuals
- Brands
- Dyson Manuals
- Hair Styler
- Airwrap HS01
- Operating manual
-
Contents
-
Table of Contents
-
Bookmarks
Available languages
-
EN
-
FR
Quick Links
Operating manual
Guide d’utilisation
HS01
Related Manuals for Dyson airwrap HS01
Summary of Contents for Dyson airwrap HS01
-
Page 1
Operating manual Guide d’utilisation HS01… -
Page 3
Thank you for buying the Dyson Airwrap™ styler. To read your manual in English go to page 4. Merci d’avoir acheté un peigne- soufflant Dyson Airwrap Pour avoir la version française, allez à la page 22. -
Page 4: Table Of Contents
Contents Important safety instructions Getting started In the box Functions Using your attachments Regular filter maintenance Additional information…
-
Page 5
Thank you for buying the Dyson Airwrap™ styler. By combining our small, powerful digital motor with applied aerodynamics, the Dyson Airwrap™ styler is able to harness the Coanda effect. This allows it to style and dry simultaneously, using air – without extreme heat. -
Page 6
2 years from the date of purchase, subject to the terms of the warranty. If you have any questions about your Dyson appliance, call the Dyson Helpline with your serial number and details of where and when you bought the appliance. -
Page 7
This illustration is for example purposes only. -
Page 8: Important Safety Instructions
To reduce the risk of fire, electric shock, or injury: 1. This Dyson appliance can be used by children aged from 8 years and above and persons with reduced physical, sensory or reasoning capabilities, or lack…
-
Page 9
4. WARNING: Do not use this appliance near bathtubs, showers, basins or other vessels containing water. 5. If the supply cord is damaged, it must be replaced or repaired by the manufacturer, its service agent or similarly qualified persons in order to avoid a hazard. 6. -
Page 10
12. Do not use any lubricants, cleaning agents, polishes or air fresheners on any part of the appliance. 13. Contact the Dyson Helpline when a service or repair is required. Do not disassemble the appliance as incorrect reassembly may result in an electric shock or fire. -
Page 12: In The Box
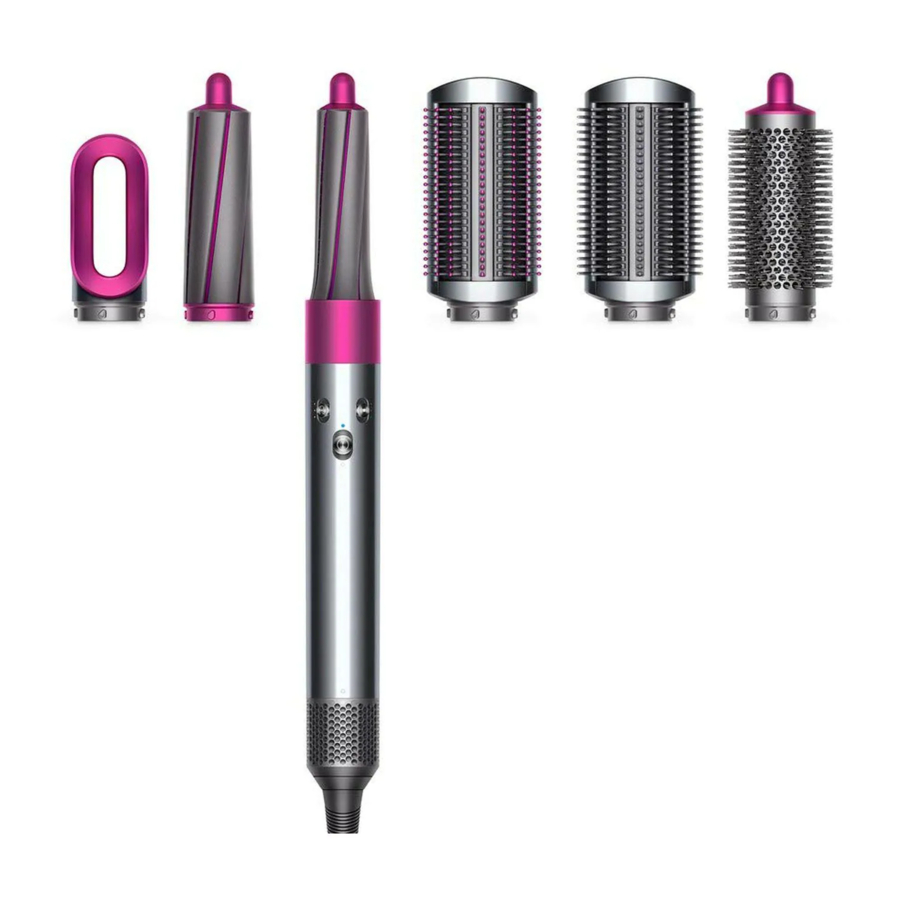
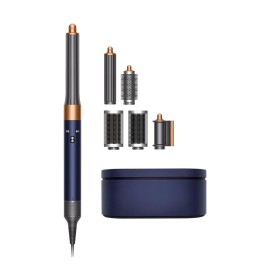
In the box Dyson Airwrap™ styler main body Pre-styling dryer Non-slip mat Filter cleaning brush Some attachments may not be included. 30mm Airwrap™ barrels 40mm Airwrap™ barrels Firm smoothing brush…
-
Page 13: Functions
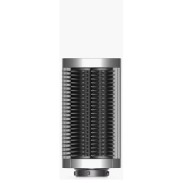
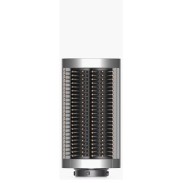
Clean the filter. See the ‘Regular filter maintenance’ section for details. If the red LED lights, and the filter has already been cleaned, contact the Dyson Helpline. Removable filter cage Easy to remove for cleaning (see the ‘Regular filter maintenance’ section for details).
-
Page 14: Using Your Attachments
Using your attachments Connecting Changing the attachment attachments Turn attachment into the main To change attachment, pull down body until it fits securely. on the switch to release.
-
Page 15
To change to another attachment, hold the tip. Take care when handling hot attachments Hold the attachment only in the area indicated. Some attachments may need occasional cleaning. For more information, go to www.dyson.com/ myairwrap. Pre-styling Airwrap™ Firm Soft Round dryer barrels smoothing… -
Page 16: Regular Filter Maintenance
Ensure that you unplug your appliance from the main electricity supply and allow to cool down before cleaning your filter. The Dyson Airwrap™ styler has highly tuned technology to give outstanding performance. This technology needs to be kept free from dust and hair…
-
Page 17
Slide the filter cleaning brush Hold the handle of your over the cable and onto the appliance and pull the filter filter cage. cage downwards, onto the cable. Using a rotating action clean the filter cage thoroughly. Gently pull open the filter cage and slide it off the cable. -
Page 18
Wash the filter cage under Shake the filter cage to remove a warm, running tap. the majority of the excess water, then leave to dry well naturally. -
Page 19
Do not use your appliance without the filter cage attached. clik clik Using a rotating and up and Gently pull the filter cage open down action, clean the filter and slide it onto the cable. mesh with the filter cleaning brush until all the debris has Slide the filter cage towards the been removed. -
Page 20: Additional Information
Please retain your proof of purchase. If you do not have your proof of purchase, your warranty will start 90 days after the date of manufacture, according to Dyson’s records. This warranty provides, at no extra cost to you, all labour and parts necessary to ensure your appliance is in proper operating condition during the warranty period.
-
Page 21
• Please keep your purchase receipt in a safe place to ensure that you have this information. • All work will be coordinated by Dyson Canada Limited or its authorized agents. • Any replaced defective parts will become the property of Dyson. -
Page 22
CAFR Contenu Consignes de sécurité importantes Pour commencer Contenu de la boîte Fonctions Utilisation de vos accessoires Entretien régulier du filtre Information supplémentaire… -
Page 23
Merci d’avoir acheté un peigne-soufflant Dyson Airwrap En combinant notre petit moteur numérique puissant et l’aérodynamique appliquée, le peigne soufflant Dyson Airwrap est en mesure d’utiliser l’effet Coanda. Cette technique permet de faire une mise en plis et de sécher les cheveux en même temps, en utilisant un flux d’air –… -
Page 24
Enregistrement Après avoir enregistré votre garantie de 2 ans, votre appareil Dyson est garanti, pièces et main-d’œuvre, pendant 2 ans à compter de la date d’achat, sous réserve des conditions de la garantie. Si vous avez des questions au sujet de votre appareil, composez le numéro de la ligne… -
Page 25
Le numéro de série se trouve sur la plaque signalétique sur l’étiquette du câble, près de la fiche. Veuillez noter le numéro de série de votre appareil au dos de ce manuel, aux fins de références futures. Cette illustration est présentée à… -
Page 26: Consignes De Sécurité Importantes
CAFR CONSIGNES DE SÉCURITÉ IMPORTANTES Lisez toutes les instructions avant l’utilisation Lorsque vous utilisez un appareil électrique, vous devez toujours suivre les précautions de base suivantes : AVERTISSEMENT Ces avertissements s’appliquent à l’appareil, et le cas échéant, à tous les accessoires, chargeurs ou adaptateurs principaux.
-
Page 27
3. Si vous utilisez l’appareil dans une salle de bains, veillez à le débrancher après utilisation, car la présence d’eau à proximité représente un risque même si l’appareil est débranché. 4. AVERTISSEMENT : N’utilisez pas cet appareil à proximité de bains, de douches, de lavabos ou autres contenants remplis d’eau. -
Page 28
13. Pour toute réparation ou procédure d’entretien, communiquez avec le service d’assistance téléphonique de Dyson. Ne démontez pas l’appareil. S’il est réassemblé de manière inappropriée, cela peut causer un incendie ou des décharges électriques. -
Page 29
14. Si l’appareil ne fonctionne pas comme il devrait, s’il a subi un choc direct, s’il a été échappé, endommagé, laissé à l’extérieur ou plongé dans l’eau, ne l’utilisez pas et composez le numéro de la ligne d’assistance Dyson. Les accessoires peuvent chauffer pendant l’utilisation. -
Page 30: Contenu De La Boîte
Contenu de la boîte Corps principal du peigne soufflant Sèche-cheveux Dyson Airwrap de pré-coiffage Tapis anti-dérapant Brosse pour nettoyer le filtre Il se peut que certains accessoires ne soient pas compris. Barres de 30 mm Airwrap Barres de 40 mm Airwrap…
-
Page 31: Fonctions
Si la DEL rouge s’allume, et que le filtre a déjà été nettoyé, composez le numéro de la ligne d’assistance Dyson. Boîtier du filtre amovible Facile à retirer pour le nettoyage (pour plus de détails, se reporter à la section Entretien régulier du filtre).
-
Page 32: Utilisation De Vos Accessoires
Utilisation de vos accessoires Fixez l’accessoire Changing attachments Faites effectuer une rotation à l’accessoire pour l’insérer dans To change attachment, pull le corps principal jusqu’à ce qu’il down on the switch to release. s’enclenche de manière sûre.
-
Page 33
Lorsque les accessoires sont chauds, manipulez-les avec précaution. Tenez les accessoires seulement aux emplacements indiqués. Certains accessoires ont besoin occasionnellement d’être nettoyés. Pour en savoir davantage, allez à l’adresse www.dyson.com/ myairwrap. Séche- Barres Brosse Brosse Brosse cheveux de Airwrap lissante… -
Page 34: Entretien Régulier Du Filtre
DEL blanche commence à clignoter. Assurez-vous de débrancher l’appareil de l’alimentation principale et laissez-le refroidir avant de nettoyer le filtre. Le peigne soufflant Dyson Airwrap est doté d’une technologie de haute précision qui assure une performance hors du commun. Cette technologie doit être protégée de la poussière et des résidus…
-
Page 35
Passez la brosse de Maintenez l’appareil par la nettoyage du filtre sur poignée et poussez le boîtier le maillage du filtre et sur du filtre vers le bas, en direction le boîtier du filtre. du câble. Pour nettoyer le filtre en Ouvrez avec précaution profondeur, effectuez des le boîtier du filtre et faites-le… -
Page 36
Lavez le boîtier du filtre à Secouez le boîtier du filtre pour l’eau chaude au robinet. évacuer l’eau excédentaire. Ensuite, laissez-le sécher de manière naturelle. -
Page 37
Ne pas utiliser l’appareil sans le boîtier du filtre en place. clik clik Dans un mouvement rotatif Tirez avec précaution le boîtier de haut en bas, nettoyez le du filtre ouvert et faites-le glisser maillage du filtre à l’aide de la en direction du câble. -
Page 38: Information Supplémentaire
CONDITIONS DE LA GARANTIE LIMITÉE DYSON DE 2 ANS CE QUI EST COUVERT • Votre appareil Dyson est garanti contre tout défaut de matériaux d’origine et de main-d’œuvre pendant une période de deux ans à compter de la date d’achat, en usage domestique normal, conformément au guide d’utilisation Dyson.
-
Page 39
• Les conditions de la garantie stipulent que vous devez, avant que soit faite la réparation, composer le numéro du service d’assistance téléphonique de Dyson en ayant en main le nom ou le numéro de modèle de votre appareil, le numéro de série, la date et l’endroit où vous avez effectué l’achat. -
Page 40
Ligne d’assistance Dyson: 1-877-397-6622 Du lundi au vendr. : de 8 h à 19 h (HNE) Le samedi : de 9 h à 17 h (HNE). Adresse: Imported by/Importé par : Dyson Canada Ltd, 312 Adelaide Street West, 7th Floor, Toronto, Ontario. M5V 1R2 Canada…
![]() Логотип Dyson AirWrap
Логотип Dyson AirWrap
Руководство пользователя
В поле

Некоторые вложения могут быть не включены.
Вы можете купить дополнительные насадки на www.dyson.com/mynewairwrap

Начинаем!

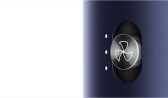
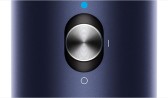
![]() LED
LED
Очистите фильтр.
Подробнее см. в разделе «Регулярное техническое обслуживание фильтра».
Если горит красный светодиод, а фильтр уже очищен, обратитесь в службу поддержки Dyson.
Светодиодные индикаторы расположены в нижней части ручки над клеткой фильтра.
Использование ваших вложений
Подключение насадки
Поверните насадку в основной корпус до надежной фиксации.

Изменение вложений
Чтобы сменить насадку, потяните переключатель вниз, чтобы отпустить.

Крутой сенсорный наконечник
Во время использования насадки Airwrap™, круглая щетка для придания объема и сушилка для разглаживания волос Coanda нагреваются. Чтобы перейти на другую насадку, удерживайте наконечник.
Будьте осторожны при обращении с горячими насадками. Держите насадку только в указанном месте.
Некоторым насадкам может потребоваться периодическая чистка.
Для получения дополнительной информации перейдите к www.dyson.com/mynewairwrap
Предварительный стайлинг
Выглаживающая сушилка Coanda
До сurling, предварительно высушите волосы почти до сухости.
Поставляется с двумя режимами (i) сушка (ii) разглаживание.
Используйте крутой наконечник для переключения между двумя режимами.
CurlИНГ
баррели
Шаг 1
Возьмите прядь волос и подведите ствол к кончикам. Волосы начнут оборачиваться вокруг бочки.
Шаг 2
Переместите стайлер к голове, не нужно крутить. Держите 15 секунд или пока не высохнет.
Шаг 3
Нажмите и удерживайте холодный выстрел в течение 5-10 секунд, чтобы установить c.url. Выключите, чтобы освободить.
Чтобы изменить сurl направлении, поверните холодный наконечник.
Шейпинг
Сглаживающие кисти
Шаг 1
Грубо высушите волосы разглаживающим феном Coanda.
Шаг 2
Используйте сглаживающую кисть, чтобы растушевать от корней до кончиков.
Советы:
Для объема расчешите лицо щетиной наружу.
Поверните кисть внутрь на концах, чтобы создать форму.
Сглаживание
Выглаживающая сушилка Coanda
Поверните холодный наконечник, чтобы выбрать режим сглаживания.
Нажмите на волосы, чтобы изменить направление воздушного потока.
Шаг 3
Используйте на сухих волосах, чтобы скрыть непослушные волосы.
Нанесите на волосы, пока они не притянутся, затем медленно нанесите на кончики.
Для использования на сухих и прямых волосах.
Как пользоваться панелью контактов
Приложите контактную планку к голове, пока не услышите щелчок и волосы не притянутся.
Пробегитесь от корня к кончику, чтобы скрыть разлетающиеся части.
Регулярное обслуживание фильтра
Фильтр необходимо очистить, когда белый светодиод начнет мигать.
Убедитесь, что вы отключили прибор от электросети и дали ему остыть, прежде чем чистить фильтр.
Мультистайлер Dyson Airwrap™ создан на основе передовых технологий, обеспечивающих непревзойденную производительность.
Эта технология должна быть защищена от пыли и остатков средств для волос.
Для поддержания производительности требуется техническое обслуживание.
Шаг 1
Наденьте щетку для очистки фильтра на кабель и на решетку фильтра.
Тщательно очистите корпус фильтра вращательным движением.
Снимите щетку для очистки фильтра.
Наденьте щетку фильтра на клетку фильтра и поверните ее, чтобы очистить клетку фильтра.
Шаг 2
Возьмитесь за ручку прибора и потяните корзину фильтра вниз на кабель.
Осторожно откройте корзину фильтра и снимите ее с кабеля.
Аккуратно потяните клетку фильтра вниз по направлению к кабелю.
Шаг 3
Промойте решетку фильтра под струей теплой воды.
Промойте корпус фильтра под краном.
Шаг 4
Встряхните клетку фильтра, чтобы удалить большую часть лишней воды, затем дайте высохнуть естественным путем.
Шаг 5
Вращая, поднимая и опуская, очищайте сетку фильтра щеткой для очистки фильтра до тех пор, пока не будет удален весь мусор.
Не используйте воду или химические вещества для очистки сетки фильтра.
Вращайте фильтрующую щетку вокруг фильтрующей сетки для очистки.
Шаг 6
Осторожно потяните за решетку фильтра и наденьте ее на кабель.
Сдвиньте решетку фильтра к ручке и поверните, пока она не встанет на место.
Аккуратно откройте клетку фильтра и сдвиньте клетку к ручке, поверните, пока она не встанет на место со щелчком.
SV12 JN.00000 PN.000000-00-00
00.00.00 ВЕРСИЯ № 01
Документы / Ресурсы
Рекомендации

Поддержка | Начало работы с мультистайлером Dyson Airwrap™ | Дайсон
![]() Логотип Dyson AirWrap
Логотип Dyson AirWrap
Руководство пользователя
В поле
Некоторые вложения могут быть не включены.
Вы можете купить дополнительные насадки на www.dyson.com/mynewairwrap
Начиная
![]() LED
LED
Очистите фильтр.
Подробнее см. в разделе «Регулярное техническое обслуживание фильтра».
Если горит красный светодиод, а фильтр уже очищен, обратитесь в службу поддержки Dyson.
Светодиодные индикаторы расположены в нижней части ручки над клеткой фильтра.
Использование ваших вложений
Подключение насадки
Поверните насадку в основной корпус до надежной фиксации.
Изменение вложений
Чтобы сменить насадку, потяните переключатель вниз, чтобы отпустить.
Крутой сенсорный наконечник
Во время использования насадки Airwrap™, круглая щетка для придания объема и сушилка для разглаживания волос Coanda нагреваются. Чтобы перейти на другую насадку, удерживайте наконечник.
Будьте осторожны при обращении с горячими насадками. Держите насадку только в указанном месте.
Некоторым насадкам может потребоваться периодическая чистка.
Для получения дополнительной информации перейдите к www.dyson.com/mynewairwrap
Предварительный стайлинг
Выглаживающая сушилка Coanda
До сurling, предварительно высушите волосы почти до сухости.
Поставляется с двумя режимами (i) сушка (ii) разглаживание.
Используйте крутой наконечник для переключения между двумя режимами.
CurlИНГ
баррели
Шаг 1
Возьмите прядь волос и подведите ствол к кончикам. Волосы начнут оборачиваться вокруг бочки.
Шаг 2
Переместите стайлер к голове, не нужно крутить. Держите 15 секунд или пока не высохнет.
Шаг 3
Нажмите и удерживайте холодный выстрел в течение 5-10 секунд, чтобы установить c.url. Выключите, чтобы освободить.
Чтобы изменить сurl направлении, поверните холодный наконечник.
Шейпинг
Сглаживающие кисти
Шаг 1
Грубо высушите волосы разглаживающим феном Coanda.
Шаг 2
Используйте сглаживающую кисть, чтобы растушевать от корней до кончиков.
Советы:
Для объема расчешите лицо щетиной наружу.
Поверните кисть внутрь на концах, чтобы создать форму.
Сглаживание
Выглаживающая сушилка Coanda
Поверните холодный наконечник, чтобы выбрать режим сглаживания.
Нажмите на волосы, чтобы изменить направление воздушного потока.
Шаг 3
Используйте на сухих волосах, чтобы скрыть непослушные волосы.
Нанесите на волосы, пока они не притянутся, затем медленно нанесите на кончики.
Для использования на сухих и прямых волосах.
Как пользоваться панелью контактов
Приложите контактную планку к голове, пока не услышите щелчок и волосы не притянутся.
Пробегитесь от корня к кончику, чтобы скрыть разлетающиеся части.
Регулярное обслуживание фильтра
Фильтр необходимо очистить, когда белый светодиод начнет мигать.
Убедитесь, что вы отключили прибор от электросети и дали ему остыть, прежде чем чистить фильтр.
Мультистайлер Dyson Airwrap™ создан на основе передовых технологий, обеспечивающих непревзойденную производительность.
Эта технология должна быть защищена от пыли и остатков средств для волос.
Для поддержания производительности требуется техническое обслуживание.
Шаг 1
Наденьте щетку для очистки фильтра на кабель и на решетку фильтра.
Тщательно очистите корпус фильтра вращательным движением.
Снимите щетку для очистки фильтра.
Наденьте щетку фильтра на клетку фильтра и поверните ее, чтобы очистить клетку фильтра.
Шаг 2
Возьмитесь за ручку прибора и потяните корзину фильтра вниз на кабель.
Осторожно откройте корзину фильтра и снимите ее с кабеля.
Аккуратно потяните клетку фильтра вниз по направлению к кабелю.
Шаг 3
Промойте решетку фильтра под струей теплой воды.
Промойте корпус фильтра под краном.
Шаг 4
Встряхните клетку фильтра, чтобы удалить большую часть лишней воды, затем дайте высохнуть естественным путем.
Шаг 5
Вращая, поднимая и опуская, очищайте сетку фильтра щеткой для очистки фильтра до тех пор, пока не будет удален весь мусор.
Не используйте воду или химические вещества для очистки сетки фильтра.
Вращайте фильтрующую щетку вокруг фильтрующей сетки для очистки.
Шаг 6
Осторожно потяните за решетку фильтра и наденьте ее на кабель.
Сдвиньте решетку фильтра к ручке и поверните, пока она не встанет на место.
Аккуратно откройте клетку фильтра и сдвиньте клетку к ручке, поверните, пока она не встанет на место со щелчком.
SV12 JN.00000 PN.000000-00-00
00.00.00 ВЕРСИЯ № 01
Документы / Ресурсы
Рекомендации
Поддержка | Начало работы с мультистайлером Dyson Airwrap™ | Дайсон
![]()
Download Article
![]()
Download Article
The Dyson Airwrap is a new all-in-one hairstyling product that makes curling, brushing, shaping, and drying your hair easier than ever. Unlike traditional curlers, it uses hot air instead of hot metal, so there’s much less risk of damaging your hair. It also has dryer and brush attachments that can add volume and shape to your hair while drying it at the same time. Using this machine is simple, so don’t hesitate to try it out. Just remember to wet and towel dry your hair so it’s damp when you start, then style your hair however you want!
-

1
Attach the 1.2 in barrel for small curls. The Airwrap comes with 2 curling barrels. The 1.2 in barrel is for smaller curls, so choose this barrel if this is the look you’re going for.[1]
- The curling barrels, along with all the other attachments, click simply onto the Airwrap. Press all attachments into the top of the handle and turn it clockwise to lock it in place.
-

2
Use the 1.6 in barrel for larger curls. If you’re going for large, flowing curls, then the 1.6 in barrel is a better choice. Click it onto the Airwrap and turn it counterclockwise to lock it into place.[2]
Advertisement
-

3
Apply any styling products that you use. If you usually use any prodcuts before styling your hair, then apply it now, before curling. This helps your hair retain its curls.[3]
- Mousse is a common choice for prepping your hair before curling. Squeeze out a handful, then rub it all over your hair to protect it and lock in your curls.
- Setting spray is another good pre-curling choice. If you want to set your curls in more firmly, then spritz your hair with some setting spray before curling.
- You could also curl without any products. Your curls may not last as long or stay in place as well, though.
-

4
Pull a section of hair 1–3 in (2.5–7.6 cm) thick in front of your head. Separate your hair into sections roughly as large as you want the curls to be. If you have thick hair, aim for roughly 1 in (2.5 cm) sections. With thinner hair, you can use a section closer to 3 in (7.6 cm) if you want to. Grab a section and pull it in front of you.[4]
- In general for smaller curls, pull a thinner section of hair. If you’d like larger curls, then grab a larger section.
- Since curling is so easy with the Airwrap, you can experiment with differently-sized hair sections to see what you like best.
-

5
Set the Airwrap to the high heat and high power positions. On the Airflow handle there are 2 knobs, one for heat setting and the other for power. Set both of these to high before you start curling.[5]
- You don’t have to wait for the Airwrap to warm up like a regular curling iron, so don’t turn it on until you’re ready to use it.
- The Airwrap doesn’t damage or burn your hair like other curling irons can because it only uses air.
-

6
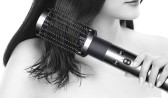
Wrap the curling barrel around your hair and hold it for 15 seconds. Touch the barrel to the tips of your hair. The air automatically wraps your hair around the barrel, so you don’t have to twist it. Slowly bring the curler towards your scalp and let it wrap up your hair. Leave it in place for 15 seconds to dry your hair.[6]
- If you want a looser curl, then wrap your hair around the barrel by hand instead of letting the air wrap it up. This gives you a more subtle style.[7]
- If you don’t know which way to hold the curler, look for the arrows on the barrel. Make sure they’re pointing away from you.[8]
- If you want a looser curl, then wrap your hair around the barrel by hand instead of letting the air wrap it up. This gives you a more subtle style.[7]
-

7
Switch to the cold shot setting to set the curl in place. The cold shot button is on the Airflow handle, underneath the power and heat settings. Press and hold it down for 5-10 seconds to set the curl.[9]
-

8
Turn the power off and pull the Airflow down to release the curls. Hit the power button to turn the power off, releasing your hair. Then pull the curler straight down so it slides out. Repeat this wrapping, drying, and removing process to curl all your hair.[10]
- Don’t pull the Airflow out while the power is still on. This could damage your hair.
Advertisement
-

1
Attach the soft brush if you have thin hair. These smoothing brushes are great for straightening your hair. For thin, straight hair, the soft brush is the best choice. Clip the brush into the Airflow by inserting it into the handle and turning it clockwise.[11]
-

2
Use the firm brush for thicker and wavier hair. The other brush type, firm, is best for thicker hair types. Use this attachment if you need to control your hair a bit more.[12]
-

3
Set the Airflow to medium power and heat for simple smoothing. If you just want to brush out your hair, then medium is the perfect setting. This will flatten your hair for a simple, stylish look.[13]
- For a sleeker look, set the heat to high.
- You can also experiment with different settings when you learn how to use the Airflow.
-

4
Brush from your scalp to your hairline first. Turn the power on and start brushing. If you have a part in your hair, start there and brush outward until you reach your hairline. Don’t brush all the way down to the hair tips yet. Repeat this for your whole scalp.[14]
- This might be easier if you separate your hair with clips, but you don’t have to.
-

5
Finish by brushing the Airflow from your hairline to your hair ends. Bring the Airflow below the level you just brushed. Brush in a slow motion from your hairline all the way down to the tips of your hair. Work all the way around your head to finish up.[15]
- The brushing should dry your hair as well. If your hair isn’t drying, try brushing a little slower.
-

6
Set the airflow to low heat and brush through your hair again. This is a final touch-up to finish drying your hair and brush out any more tangles. Keep brushing until your hair is completely dry.[16]
-

7
Shape your ends with the curling barrel to if you want to. You can add a bit more style to your hair with a light curl. Clip the curling barrel onto the Airflow and set it to high heat and power. Wrap the ends of your hair for 10 seconds for a quick shaping.[17]
Advertisement
-

1
Clip the volume brush onto the Airflow. If you want more volume, bounce, or curl in your hair, then the volume brush is a perfect attachment. Take the brush attachment and press it into the Airflow handle, then twist it clockwise to lock it in place.[18]
- The volume brush can curl your hair slightly, but not as much as the curling barrels. Use those instead if you want full curls.
-

2
Set the Airflow to medium heat and power. These 2 settings are on the Airflow handle. Slide both switches to the medium setting before you start brushing.[19]
- You could also use high power if you want to curl your hair a bit more.
-

3
Brush through each section of your hair. Turn the power on and start brushing from your scalp down to your hair tips. Brush slowly so the Airflow dries your hair as well. Work around your hair until it’s completely dry.[20]
- If you just brush your hair without any other styling, your hair will have a wavy look. You can also do some more styling with the volume brush.
-

4
Point the brush outward to add more volume. Brushing from below gives your hair a fuller look. Instead of brushing towards your scalp, tuck the brush underneath your hair and point the bristles away from your scalp. Then brush away from your scalp all the way to your hair tips and let the hair fall.[21]
- You could also brush up to give your hair more volume.
- You could brush all your hair this way, or just the sections that you want to have more volume.
- This is an especially good trick to add volume to thinner or straighter hair types.
-

5
Wrap the tips around the brush to create more shape. The volume brush can also curl your hair a bit. Wrap a section of hair up and hold it in place for 10 seconds. Then press the cold snap button to lock the curl in place and straighten your hair back out.[22]
- You could also use the curling barrel on the tips for more shaping.
Advertisement
Ask a Question
200 characters left
Include your email address to get a message when this question is answered.
Submit
Advertisement
-
Your curls won’t set if you don’t use the cold blast to finish up, so don’t forget that step.
-
Rather than towel-drying your hair, you could use the dryer attachment first. Remember to stop drying while your hair is still damp.
-
If you want more suggestions on how to use the Airwrap, there are video tutorials on the Dyson website.
Thanks for submitting a tip for review!
Advertisement
References
About This Article
Article SummaryX
To use your Dyson Airwrap to curl your hair, start with damp, towel-dried hair. Insert the 1.2 inch barrel into your Airwrap, then set your device to high heat and high airflow. Curl a small section of your hair and hold for 15 seconds, or until your hair feels dry to the touch. Then, push the cold shot button on your Airwrap for 5-10 seconds, which will set the curl. Turn off the Airwrap, then release the curl. Continue curling small sections of your hair. To use your Airwrap to straighten your hair, start with damp, towel-dried hair. Tie the top section of your hair up so it’s out of the way. Then, attach the soft smoothing brush to your Airwrap. Turn on the device and run the brush through the bottom section of your hair from root to tip, repeating until dry. Use the cold shot for 5-10 seconds to set your style. Untie the top of your hair and repeat the process.
Did this summary help you?
Thanks to all authors for creating a page that has been read 50,590 times.
Did this article help you?
-

Главная
-

Каталог
-

Избранное
-

Корзина
- Главная
- Каталог
- Стайлеры Dyson Airwrap
- Стайлер Dyson Airwrap HS05 (берлинская лазурь/медь) Complete Long с чехлом
333252-01
Технические характеристики
![]()
Отрицательные ионы
Помогает уменьшить статику
Воздушный поток (л/с)
13.5
Габариты устройства
272мм*41мм*48мм
Мощность прибора (Вт)
1300
Комплектация
![]()
Профессиональный стайлер
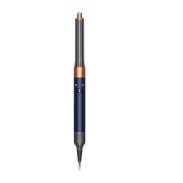
Цилиндрическая насадка Airwrap 40 мм

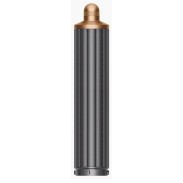
Цилиндрическая насадка Airwrap 30 мм
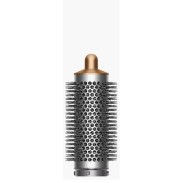
Круглая щетка
Расчёска с жесткими щетинками
Расческа с мягкими щетинками

Насадка для деликатной сушки
Щетка для чистки

Бокс для хранения
Отзывы
![]()
Инга
Хоть я еще и не научилась пользоваться стайлером полностью, ставлю ему самую высокую отметку. Новая модель вообще классная — есть насадка для сушки и укладки. Делаю локоны, первые разы не получалось, сейчас приноровилась и прическа практически аккуратная.
Илона В
Фен-стайлер конечно крутой, но он был бы еще круче если бы работал без провода как и выпрямитель.
Айгуль
Заказала стайлер на сайте с максимальной скидкой и полным комплектом насадок. Товар и правда классный, как о нем пишут другие девушки. Делаю укладки каждый день, а волосы не портятся и выглядят стильно.
Алиса
Это самый классный продукт, не имеющий аналогов на рынке. Я по качеству его сравниваю с Айфоном, ни одного недостатка не выявила.
Лиля
Очень нравится стайлер Airwrap, меня подкупило то что много насадок. Они все функциональные, пользуюсь всеми насадками и делаю разные прически.
Артем
Заказывал стайлер в подарок, все понравилось, магазин рекомендую.
Алина
Я почти никогда не пишу отзывы, но тут я в диком восторге от продукта. Стайлер настолько крутой, что я напишу об этом. Он имеет много насадок. все они находятся в красивом чехле. Это настоящее спасение для меня, теперь прически делаю сама и не трачусь на салон красоты. Укладку делаю сама дома, а поэтому экономлю на походе в салон красоты.
Полезные ссылки
![]()
Описание
Современный стайлер Dyson Airwrap HS05 разработан для ежедневного ухода за волосами. В нем сочетаются сразу несколько функций. Он способен подсушивать, добавлять прикорневой объем, завивать прямые или выпрямлять вьющиеся волосы. Стайлер имеет встроенный датчик контроля нагрева, который не позволяет ему разогреться выше 150 градусов и навредить волосам. Комплектация состоит стайлера 6 насадок и синего бокса для компактного хранения и перевозки устройства.
-
Встроенный датчик контроля температуры
В стайлере предусмотрено три уровня нагрева воздуха, включая режим холодного воздуха. Не допускается повышение температуры выше установленных значений, поэтому волосы остаются здоровыми
-
Возможность управления воздушным потоком
Три точные скорости воздушного потока, соответствующие вашему стилю
-
Холодный воздух
Немедленно отключает нагревательный элемент, чтобы более прохладный воздух зафиксировал укладку
-
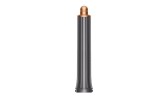
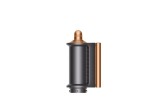
Цилиндрическая насадка 3 см
В отличие от стандартной комплектации насадка одна, она отличается большей длиной и предназначена для укладки длинных волос. Для создания причесок по и против часовой стрелки достаточно переключить режим. Локоны получаются аккуратными и красивыми
-
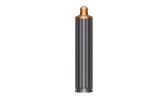
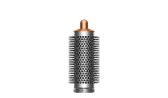
Цилиндрическая насадка 4 см
Для укладки волос в разных направлениях теперь достаточно одной насадки длиной 18 см. Она предназначена для создания небрежных локонов на длинных волосах и имеет диаметр 4 см
-

Жесткая щетка
Насадка предназначена для распутывания волос и придания им привлекательного вида. Зубчики деликатно воздействуют на кожу головы
-
Мягкая щетка
Волосы разглаживаются под мощным потоком воздуха. За счет мягких шариков на конце щетинок отсутствует негативное влияние на кожу головы и волосы
-
Щетка брашинг
Основное предназначение насадки — придание объема волосам. Мощный поток направляется на пряди, волосы постепенно вытягиваются и приобретают объем
-
Насадка для деликатной сушки
Насадка необходима для легкого подсушивания волос перед укладкой. Она отличается небольшой мощностью, поэтому для основной сушки не подходит
-
Одновременно сушит и укладывает волосы
Благодаря подаче мощного потока воздуха и контроля температуры стайлер Dyson Airwrap позволяет высушивать и укладывать волосы без экстремальных температур
-
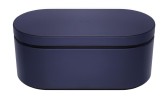
Бокс-чехол синего цвета
Вместительный и стильный бокс имеет сверху магнитную кнопку, которая прочно фиксирует крышку, чтобы она случайно не открывалась. Внутри мягкая обивка, которая защищает устройство и насадки от потертостей
-
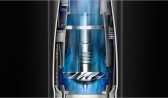
Оснащен двигателем с цифровым управлением Dyson V9
Стайлер Dyson Airwrap оснащен 13-лопастной импеллер, который вращается со скоростью до 110 000 об/мин. При этом он нагнетает воздух под давлением в 3,2 кПа, что позволяет достичь эффекта Коанда при создании локонов
-
Эффект Коанда для выпрямления волос
Благодаря эффекту Коанда, волосы притягиваются к поверхности щетки. После этого воздух проходит вдоль этих прядей, имитируя технологию укладки, которую используют стилисты
-

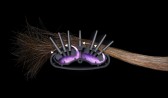
Притягивает и накручивает волосы с помощью воздуха
Эффект Коанда основан на притяжении ваших волос к цилиндрической насадке. После чего плавно накручивает их. Без использования зажимов или других неудобных приспособлений для завивки. Но создавая роскошные объемные локоны или волны
-
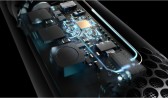
Без экстремальных температур
В стайлере интеллектуальная система контроля измеряет температуру воздуха более 40 раз в секунду и регулирует нагрев. В результате чего температура всегда остается ниже 150°C и не повреждает волосы
Комплектация
-
Профессиональный стайлер
-
Цилиндрическая насадка Airwrap 40 мм
-
Цилиндрическая насадка Airwrap 30 мм
-
Круглая щетка
-
Расчёска с жесткими щетинками
-
Расческа с мягкими щетинками
-
Насадка для деликатной сушки
-
Щетка для чистки
-
Бокс для хранения
FAQs
Можно ли посмотреть продукт до оплаты и убедиться в его целостности?
![]()
Да, до оплаты можно распаковать продукт, осмотреть содержимое всех коробок, убедиться в том, что комплектация полная, проверить подлинность и потом оплатить курьеру заказ удобным способом.
Сколько времени ждать доставку?
![]()
По Москве курьеры доставляют товар в течение 2-3 часов. Если расстояние больше 10 километров, то потребуется немного больше времени. По России доставка идет 3-6 дня и зависит от удаленности города.
Сколько стоит доставка?
![]()
Стоимость доставки рассчитывается индивидуально. По Москве и за пределами МКАД 300-500 рублей. По России доставка до 1000 рублей, но на дальние расстояния стоимость может составить около 1200 рублей.
Есть ли возможность самовывоза?
![]()
Да, вы можете сами забрать товар в удобном пункте выдачи. Но для этого нужно связаться с менеджерами и подобрать удобное отделение для получения товара.
Как получить гарантию на продукцию?
![]()
Гарантия действует с момента покупки 2-5 лет (в зависимости от типа техники). После совершения покупки необходимо зарегистрировать свою технику на официальном сайте Dyson, чтобы гарантия вступила в силу. При наступлении гарантийного случая необходимо обратиться в сервисный центр Dyson.
Отзывы
Инга
Хоть я еще и не научилась пользоваться стайлером полностью, ставлю ему самую высокую отметку. Новая модель вообще классная — есть насадка для сушки и укладки. Делаю локоны, первые разы не получалось, сейчас приноровилась и прическа практически аккуратная.
Илона В
Фен-стайлер конечно крутой, но он был бы еще круче если бы работал без провода как и выпрямитель.
Айгуль
Заказала стайлер на сайте с максимальной скидкой и полным комплектом насадок. Товар и правда классный, как о нем пишут другие девушки. Делаю укладки каждый день, а волосы не портятся и выглядят стильно.
Алиса
Это самый классный продукт, не имеющий аналогов на рынке. Я по качеству его сравниваю с Айфоном, ни одного недостатка не выявила.
Лиля
Очень нравится стайлер Airwrap, меня подкупило то что много насадок. Они все функциональные, пользуюсь всеми насадками и делаю разные прически.
Артем
Заказывал стайлер в подарок, все понравилось, магазин рекомендую.
Алина
Я почти никогда не пишу отзывы, но тут я в диком восторге от продукта. Стайлер настолько крутой, что я напишу об этом. Он имеет много насадок. все они находятся в красивом чехле. Это настоящее спасение для меня, теперь прически делаю сама и не трачусь на салон красоты. Укладку делаю сама дома, а поэтому экономлю на походе в салон красоты.
Вы недавно смотрели
Задать вопрос
![]()
![]()
Ваша корзина
![]()
Условия доставки
Наш интернет-магазин Dyson-rus.com осуществляет доставку по всей России.
Доставка осуществляется бесплатно при заказе на сумму свыше 7 000 руб.*
Для Москвы и Московской области действуют особые условия доставки:
Москва и Московская область на расстояние до 10 км. от МКАД
Интервалы доставки:
- 09:00 — 15:00
- 15:00 — 19:00
- 19:00 — 23:00
Есть возможность оформить экспресс доставку за 2-3 часа.
Москва и Московская область на расстояние от 10 до 50 км. от МКАД (кроме пятницы)
10:00 — 22:00
Другие города России
Доставка в другие города России осуществляется с помощью транспортной компании «DPD» и другими: зависит от города доставки.
При отправке товара транспортной компанией возможна доставка:
- до пункта самовывоза в вашем городе
- по указанному вами адресу до двери в пределах города.
Возможные формы оплаты: оплата пластиковой картой на сайте, наличными при получении товара.
* Для товаров по Акции условия доставки могут быть изменены. Уточняйте подробности у оператора.
![]()
Ваш заказ оформлен

Спасибо, что воспользовались нашими услугами, мы свяжемся с вами в ближайшее время
ВЕРНУТЬСЯ НА САЙТ
HS01

2
Thank you for buying the
Dyson Airwrap™ styler.
To read your manual in English
go to page 4.
Vielen Dank, dass Sie sich für
den Dyson Airwrap™ Styler
entschieden haben.
Um das Handbuch auf Deutsch
zu lesen, gehen Sie auf Seite 18.
Gracias por comprar el modelador
Dyson Airwrap™.
Para leer el manual en español,
vaya a la página 34.
Merci d’avoir acheté l’outil de coiffage
Dyson Air wrap™.
Pour lire votre manuel en français
rendez-vous à la page 50.
Grazie per aver acquistato
Dyson Airwrap™ styler.
Per leggere il manuale in italiano,
andare a pagina 64.

3
Hartelijk dank voor uw aankoop
van de Dyson Airwrap™ styler.
Ga naar pagina 78 om uw gebruikers
handleiding in het Nederlands te
lezen.
Dziękujemy za zakup urządzenia
do stylizacji Dyson Airwrap™.
Instrukcja obsługi w języku angielskim
jest dostępna na stronie 92.
Zahvaljujemo se vam za
nakup oblikovalnika pričeske
Dyson Airwrap™ styler.
Priročnik v slovenščini je na strani 106.
Благодарим вас за приобретение
стайлера для укладки волос
Dyson Air wrap™.
Инструкция на русском языке
находится на странице 120.

7
10
11
12
14
16
4
EN
Contents
Important safety instructions
Getting started
In the box
Functions
Using your attachments
Regular filter maintenance
Additional information

C 12/ M 100 / Y 0 / K 0
Dyson Fuchsia
N308 3-Step Guide QR Code
C 85/ M100 / Y 0 / K 0
Dyson Purple
5
How to curl your hair with Coanda air.
Watch the 30sec film
Scan with phone camera or app, or
visit www.dyson.com/myairwrap
Thank you for buying the
Dyson Airwrap™ styler.
By combining our small, powerful
digital motor with applied
aerodynamics, the Dyson Airwrap™
styler is able to harness the Coanda
effect. This allows it to style and dry
simultaneously, using air – without
extreme heat.
6
After registering your 2 year guarantee, your Dyson
appliance will be covered for parts and labour for 2 years
from the date of purchase, subject to the terms of the
guarantee.
If you have any questions about your Dyson appliance, call
the Dyson Helpline with your serial number and details of
where and when you bought the appliance.
Most questions can be solved over the phone by one of our
trained Dyson Helpline staff.
Visit www.dyson.com/support for online help,
support videos, general tips and useful information about
Dyson.
Your 2 year guarantee is based on ‘normal use’. It does not
apply to use in salons or by stylists.
Your serial number can be found on the rating plate located
on the cable label, towards the plug.
Note your serial number for future reference on the back
page of this manual.
Registration
This illustration is for
example purposes only.

7
EN
IMPORTANT SAFETY
INSTRUCTIONS
READ ALL INSTRUCTIONS
BEFORE USE
When using an electrical appliance, basic
precautions should always be followed,
including the following:
WARNING
THESE WARNINGS APPLY TO THE
APPLIANCE, AND ALSO WHERE
APPLICABLE, TO ALL TOOLS,
ACCESSORIES, CHARGERS OR
MAINS ADAPTORS.
TO REDUCE THE RISK OF FIRE,
ELECTRIC SHOCK, OR INJURY:
1. This Dyson appliance can be used by
children aged from 8 years and above
and persons with reduced physical,
sensory or reasoning capabilities, or lack
of experience and knowledge, only if they
have been given supervision or instruction
by a responsible person concerning
use of the appliance in a safe way
and understand the hazards involved.
Cleaning and user maintenance shall not
be made by children without supervision.
2. Do not allow to be used as a toy. Close
attention is necessary when used by
or near children. Children should be
8
supervised to ensure that they do not play
with the appliance.
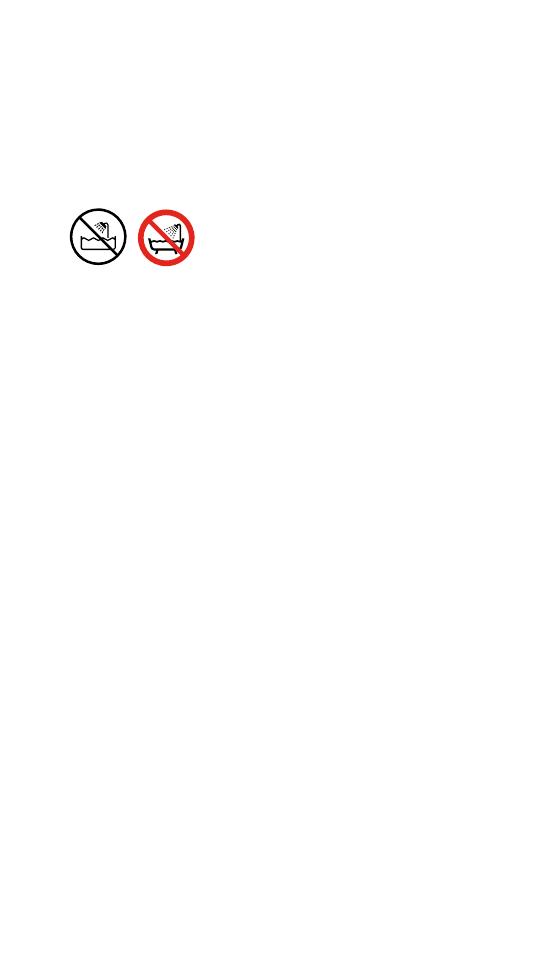
3. If the appliance is used in a bathroom,
unplug after use. The proximity of
water presents a hazard even when the
appliance is switched off.
4. WARNING: Do not use this appliance
near bathtubs, showers, basins or other
vessels containing water.
5. If the supply cord is damaged, it must be
replaced or repaired by the manufacturer,
its service agent or similarly qualified
persons in order to avoid a hazard.
6. This appliance has a non-self resetting
thermal cut-out safety device to prevent
overheating. If your appliance cuts out,
unplug it from the mains supply socket
and leave to cool.
7. CAUTION: In order to avoid a hazard
due to inadvertent resetting of the thermal
cut-out, this appliance must not be
supplied through an external switching
device, such as a timer, or connected to
a circuit that is regularly switched on and
off by the utility company, or plugged into
any socket where the electrical supply is
unstable or likely to be turned off.
8. For additional protection, the installation
of a residual current device (RCD) having
a rated residual operating current not
9
exceeding 30mA is advisable. Ask your
installer for advice.
9. Do not use the appliance for any other
purpose than styling hair.
10. Do not handle any part of the plug or
appliance with wet hands.
11. Do not unplug by pulling on the cable
or stretch or pull the cable when in use.
Do not use an extension lead and do not
wrap the cable around the appliance.
12. Do not use any lubricants, cleaning
agents, polishes or air fresheners on any
part of the appliance.
13. Contact the Dyson Helpline when a
service or repair is required. Do not
disassemble the appliance as incorrect
reassembly may result in an electric shock
or fire.
14. If the appliance is not working as it should,
if it has received a sharp blow, if it has
been dropped, damaged, left outdoors,
or dropped into water, do not use and
contact the Dyson Helpline.
The attachments may
become hot during use.
10
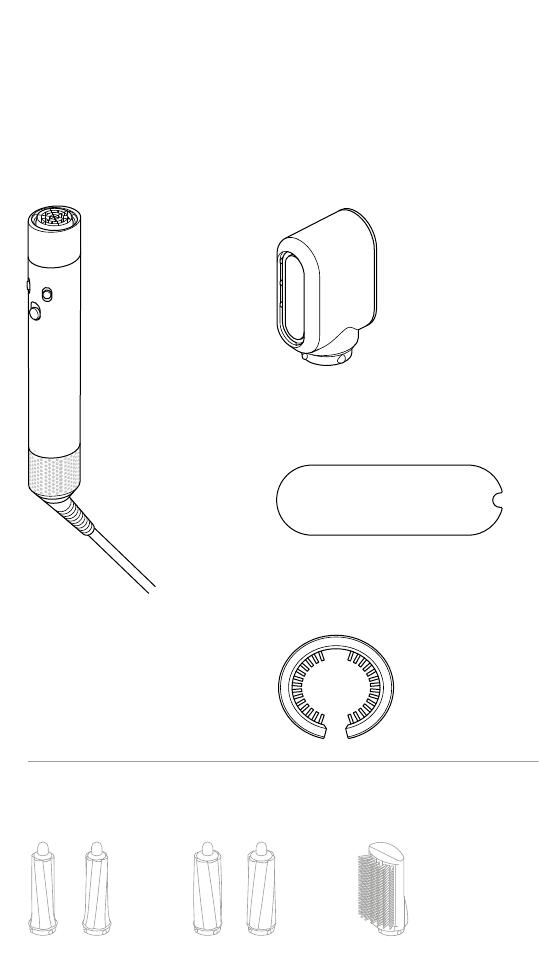
In the box
Dyson Airwrap™
styler main body
30mm Airwrap™ barrels 40mm Airwrap™ barrels Firm smoothing brush
Some attachments may not be included.
Filter cleaning brush
Non-slip mat
Pre-styling dryer
11
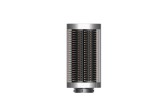
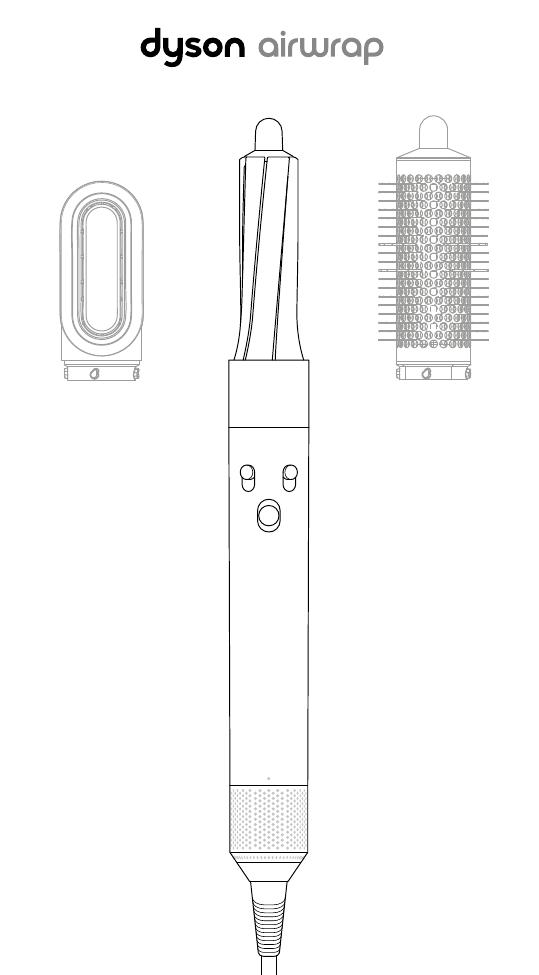
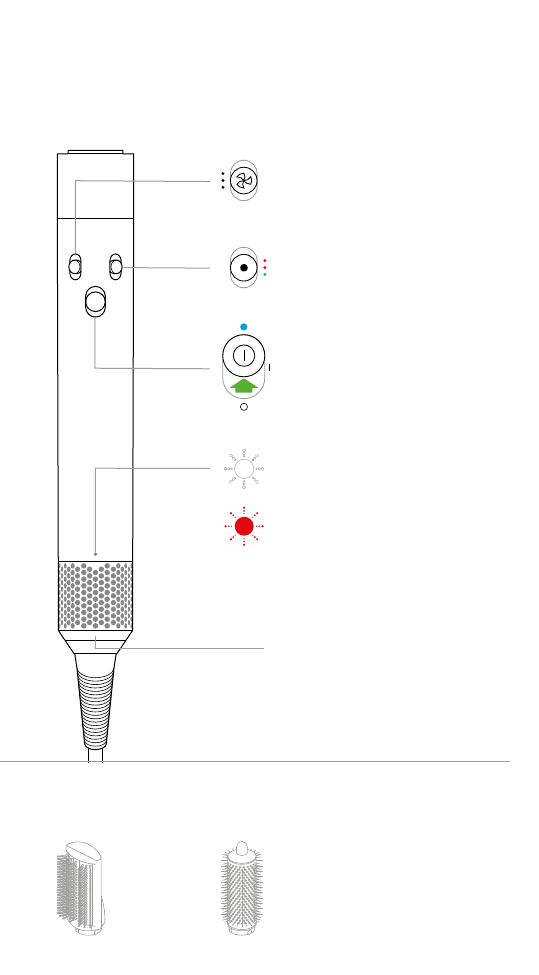
Removable filter cage
Easy to remove for cleaning (see
the ‘Regular filter maintenance’
section for details).
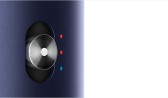
Power on/off with cold shot
Sliding switch with cold shot
to set your style.
Temperature control
2 heat settings plus a cold
setting to finish your style.
Airflow control
3 airflow speeds.
LED
Clean the filter. See the ‘Regular
filter maintenance’ section for
details.
If the red LED lights, and the
filter has already been cleaned,
contact the Dyson Helpline.
Soft smoothing brush Round volumising brush
Functions
Attachments can be purchased separately at
www.dyson.com/myairwrap.
12
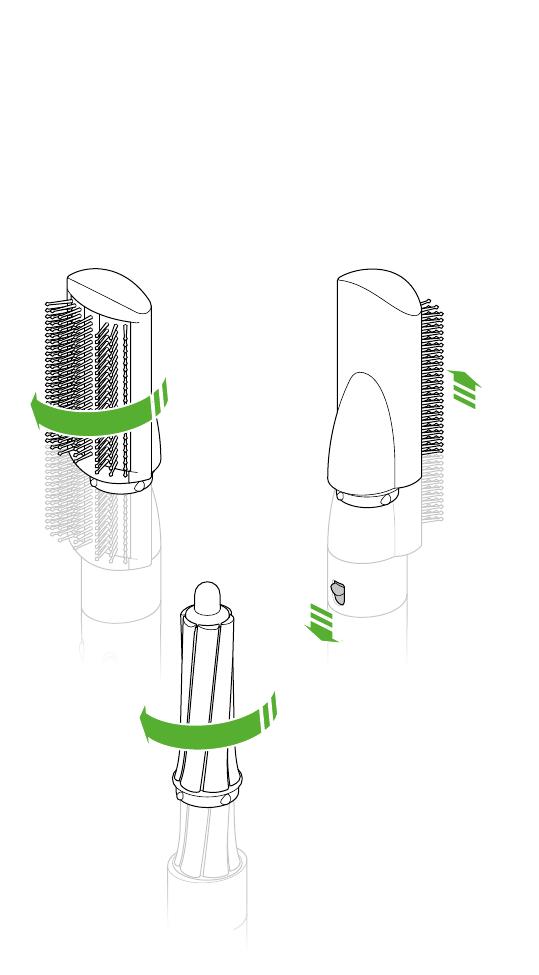
Connecting
the attachment
Turn attachment into the
main body until it fits securely.
Changing
attachments
To change attachment,
pull down on the switch to
release.
Using your attachments

13
Cool touch tip
During use, the curlers
and round volumising
brush will get hot.
To change to another
attachment, hold the tip.
Firm
smoothing
brush
Soft
smoothing
brush
Pre-styling
dryer
Round
volumising
brush
Airwrap™
barrels
Take care when
handling hot
attachments
Hold the attachment only
in the area indicated.
Some attachments may
need occasional cleaning.
For more information, go
www.dyson.com/myairwrap.

1 2
14
Ensure that you unplug your
appliance from the mains
electricity supply and allow
to cool down before cleaning
your filter.
The Dyson Airwrap™ styler has
highly tuned technology to give
outstanding performance.
This technology needs to
be kept free from dust and
hair product residue and
maintenance is required to
maintain performance.
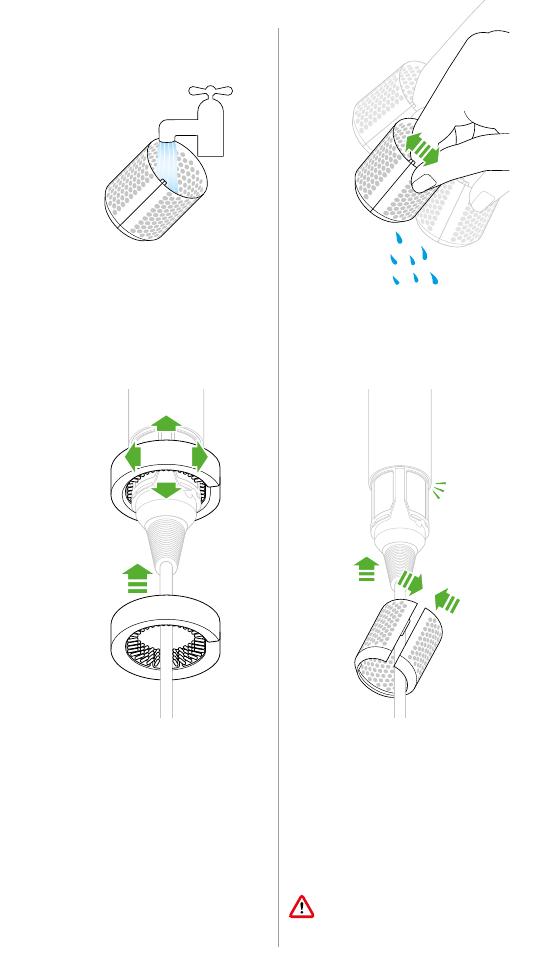
Slide the filter cleaning brush
over the cable and onto the
filter cage.
Using a rotating action clean
the filter cage thoroughly.
Remove the filter cleaning
brush.
Hold the handle of your
appliance and pull the filter
cage downwards, onto the
cable.
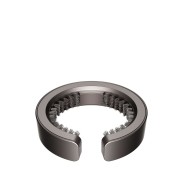
Gently pull open the filter cage
and slide it off the cable.
Filter mesh Filter cageFilter cleaning brush
Regular filter
maintenance
The filter must be cleaned when the white LED starts flashing.
3 4
5 6
clik
15
Using a rotating and up and
down action, clean the filter
mesh with the filter cleaning
brush until all the debris has
been removed.
Do not use water or
chemicals to clean the filter
mesh.
Gently pull the filter cage
open and slide it onto the
cable.
Slide the filter cage towards
the handle and twist until it
snaps into place.
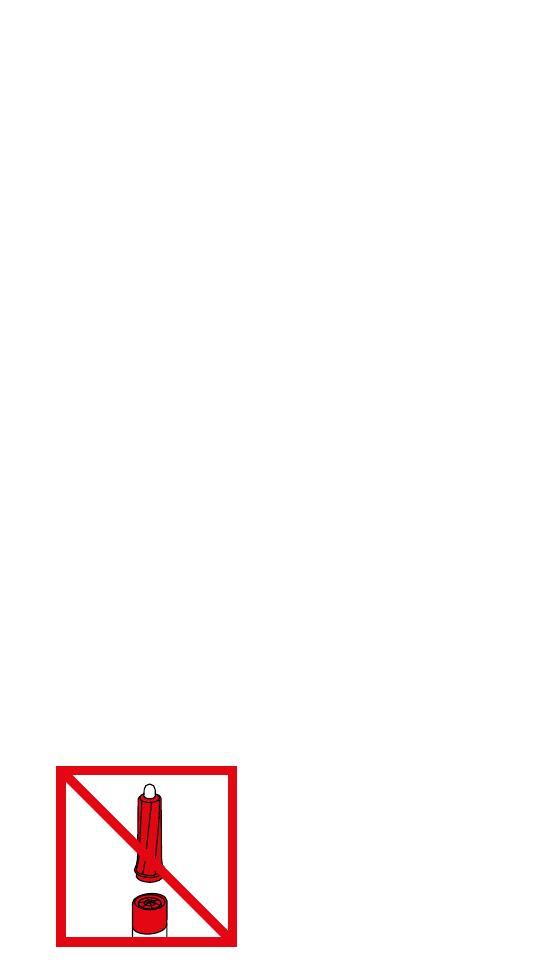
Do not use your appliance
without the filter cage attached.
Wash the filter cage under
a warm, running tap.
Shake the filter cage to remove
the majority of the excess water,
then leave to dry well naturally.

16
EN
LIMITED 2 YEAR GUARANTEE
TERMS AND CONDITIONS OF THE DYSON 2 YEAR
LIMITED GUARANTEE
WHAT IS COVERED
• The repair or replacement of your Dyson appliance (at Dyson’s discretion)
if it is found to be defective due to faulty materials, workmanship or
function within 2 years of purchase or delivery (if any part is no longer
available or out of manufacture Dyson will replace it with a functional
replacement part).
• Where this appliance is sold outside of the EU, this guarantee will only be
valid if the appliance is used in the country in which it was sold.
• Where this appliance is sold within the EU, this guarantee will only be
valid (i) if the appliance is used in the country in which it was sold or (ii) if
the appliance is used in Austria, Belgium, France, Germany, Ireland, Italy,
Netherlands, Spain or the United Kingdom and the same model as this
appliance is sold at the same voltage rating in the relevant country.
WHAT IS NOT COVERED
Dyson does not guarantee the repair or replacement of a product
where a defect is the result of:
• Damage caused by not carrying out the recommended
appliance maintenance.
• Accidental damage, faults caused by negligent use or care, misuse,
neglect, carelessness or operation or handling of the appliance which
is not in accordance with the Dyson Operating Manual.
• Use of the appliance for anything other than the use it is designed for.
• Use of the appliance outside of ‘normal use’ which is defined as more
than 2 hours per day.
• Use of the appliance in salons or by stylists.
• Use of parts not assembled or installed in accordance with the
instructions of Dyson.
• Use of parts and accessories which are not genuine Dyson components.
• Faulty installation (except where installed by Dyson).
• Repairs or alterations carried out by parties other than Dyson
or its authorised agents.
• Normal wear and tear (e.g. fuse etc.).
If you are in any doubt as to what is covered by your guarantee,
please contact the Dyson Helpline.
SUMMARY OF COVER
• The guarantee becomes effective from the date of purchase (or the date
topof delivery if this is later).
• You must provide proof of (both the original and any subsequent) delivery/
purchase before any work can be carried out on your Dyson appliance.
Without this proof, any work carried out will be chargeable. Keep your
receipt or delivery note.
Additional information

17
• All work will be carried out by Dyson or its authorised agents.
• Any parts which are replaced by Dyson will become the property
of Dyson.
• The repair or replacement of your Dyson appliance under guarantee
will not extend the period of guarantee.
• The guarantee provides benefits which are additional to and do not
affect your statutory rights as a consumer.
IMPORTANT DATA
PROTECTION INFORMATION
• Your information will be held by Dyson and its agents for promotional,
marketing and servicing purposes.
• If your personal details change, if you change your mind about any
of your marketing preferences or if you have any queries about how
we use your information, please contact the Dyson Helpline.
• For more information on how we protect your privacy, please see
our privacy policy on the Dyson website.
DISPOSAL INFORMATION
• Dyson products are made from high grade recyclable materials.
Recycle where possible.
• This marking indicates that this product should not be disposed with
other household wastes throughout the EU. To prevent possible harm
to the environment or human health from uncontrolled waste disposal,
recycle it responsibly to promote the sustainable reuse of material
resources. To return your used device, please use the return and collection
systems or contact the retailer where the product was purchased. They can
take this product for environmentally safe recycling.

21
26
27
28
30
32
18
DE
Inhalt
Wichtige Sicherheitshinweise
Erste Schritte
Lieferumfang
Funktionen
Verwendung der Aufsätze
Regelmäßige Filterwartung
Zusätzliche Informationen

C 12/ M 100 / Y 0 / K 0
Dyson Fuchsia
N308 3-Step Guide QR Code
C 85/ M100 / Y 0 / K 0
Dyson Purple
19
Vielen Dank, dass Sie sich
für den Dyson Airwrap™
Styler entschieden haben.
Durch Kombination unseres kleinen
und leistungsstarken digitalen Motors
mit angewandter Aerodynamik kann
mit dem Dyson Airwrap™ Styler
der Coandă-Effekt erzielt werden.
Dadurch wird simultanes Stylen
und Trocknen unter Einsatz von Luft
ermöglicht — ohne extreme Hitze.
Locken kreieren mit dem
Coandă-Effekt.
30-Sekunden-Film ansehen
20
Nur für Illustrationszwecke.
Für Ihr Dyson Gerät gewähren wir Ihnen ab Kaufdatum
für einen Zeitraum von 2 Jahren gemäß unseren
Garantiebestimmungen Garantie auf alle Teile und
Reparaturarbeiten.
Wenden Sie sich bei Fragen zu Ihrem Dyson Gerät
telefonisch an den Kundendienst von Dyson und geben
Sie Ihre Seriennummer sowie das Datum und den Ort des
Kaufs Ihres Geräts an.
Die meisten Fragen können telefonisch von einem unserer
Kundendienstmitarbeiter beantwortet werden.
Auf der Dyson Webseite (www.dyson.de/support (DE)
www.dyson.at/support (AT) oder www.dyson.ch/support
(CH)) finden Sie im Service-Bereich die Online-Hilfe,
nützliche Anleitungsvideos sowie allgemeine Tipps und
hilfreiche Informationen zu Dyson.
Ihre 2-jährige Garantie basiert auf „normaler Nutzung“.
Sie gilt nicht bei Nutzung in Friseursalons oder durch
Stylisten.
Die Seriennummer befindet sich auf dem Typenschild am
Kabeletikett in der Nähe des Steckers.
Notieren Sie die Seriennummer für spätere Verwendung
auf der Rückseite dieser Anleitung.
Registrierung