
Руководство пользователя
DAP-1150
Беспроводная точка доступа с поддержкой
режима маршрутизатора
Версия ПО 1.2.66. Март, 2011 г.
-
Contents
-
Table of Contents
-
Bookmarks
Quick Links
User Manual
DAP-1150
Wireless Access Point Supporting Router Mode
December 2011
Related Manuals for D-Link DAP-1150
Summary of Contents for D-Link DAP-1150
-
Page 1
User Manual DAP-1150 Wireless Access Point Supporting Router Mode December 2011… -
Page 2: Table Of Contents
DAP-1150 Wireless Access Point Supporting Router Mode User Manual Contents Chapter 1. Introduction……….5 Contents and Audience…………5 Conventions…………..5 Document Structure…………5 Chapter 2. Overview……….6 General Information…………6 Specifications…………..7 Product Appearance…………10 Front Panel…………..10 Back Panel……………11 Delivery Package…………12 Chapter 3. Installation and Connection……13 Before You Begin…………13 Connecting to PC…………14…
-
Page 3
DAP-1150 Wireless Access Point Supporting Router Mode User Manual Wi-Fi…………..41 Common settings…………41 Basic Settings…………42 Security Settings…………43 MAC Filter……………48 Station List………….50 WPS…………..51 WDS…………..54 Additional Settings…………56 WMM…………..58 Client…………..60 Advanced…………..63 Device mode…………..63 Firewall…………..64 MAC Filter……………64 System…………..65 Administrator Password………..65 Configuration…………66 System Log……………67 Firmware Upgrade…………69 Telnet…………..70… -
Page 4
DAP-1150 Wireless Access Point Supporting Router Mode User Manual Wi-Fi…………..125 Common settings…………125 Basic Settings…………126 Security Settings…………127 MAC Filter…………..132 Station List…………134 WPS…………..135 WDS…………..138 Additional Settings………….140 WMM…………..142 Client…………..144 Advanced…………..147 UPnP…………..147 DDNS…………..148 DNS…………..150 Routing…………..151 Device mode………….153 Remote Access…………154 IGMP…………..156 Firewall…………..157 IP Filters…………..157 Virtual Servers…………160 DMZ…………..162… -
Page 5: Chapter 1. Introduction
Chapter 2 gives an overview of the device’s hardware and software features, describes its appearance and the package contents. Chapter 3 explains how to install the DAP-1150 device and configure a PC in order to access its web-based interface. Chapter 4 describes all pages of the web-based interface for the device in the access point mode.
-
Page 6: Chapter 2. Overview
WPA/WPA2), MAC address filtering, WPS, WDS, WMM. You are able to connect the wireless access point DAP-1150 switched to the router mode to a cable or DSL modem or to a private Ethernet line and use a high-speed Internet connection to successfully fulfill a wide range of professional tasks.
-
Page 7: Specifications
DAP-1150 Wireless Access Point Supporting Router Mode Overview User Manual Specifications LAN Interface: 1 10/100BASE-TX Ethernet port with auto MDI/MDIX. • WLAN Interface: IEEE 802.11b/g/n. • Operation Mode: Access point mode • Router mode. • Network Functions: WAN connection types: •…
-
Page 8
DAP-1150 Wireless Access Point Supporting Router Mode Overview User Manual Wireless Connection: WLAN splitting (up to 4 SSIDs) • Supported security settings: • ◦ WEP ◦ WPA/WPA2 Personal ◦ WPA/WPA2 Enterprise MAC filter • Managing connected stations • PIN and PBC methods of WPS •… -
Page 9
DAP-1150 Wireless Access Point Supporting Router Mode Overview User Manual Configuration and Management: Multilingual web-based interface for configuration and management • Access via TELNET • Firmware update via web-based interface • Saving/restoring configuration to/from file • Support of remote logging •… -
Page 10: Product Appearance
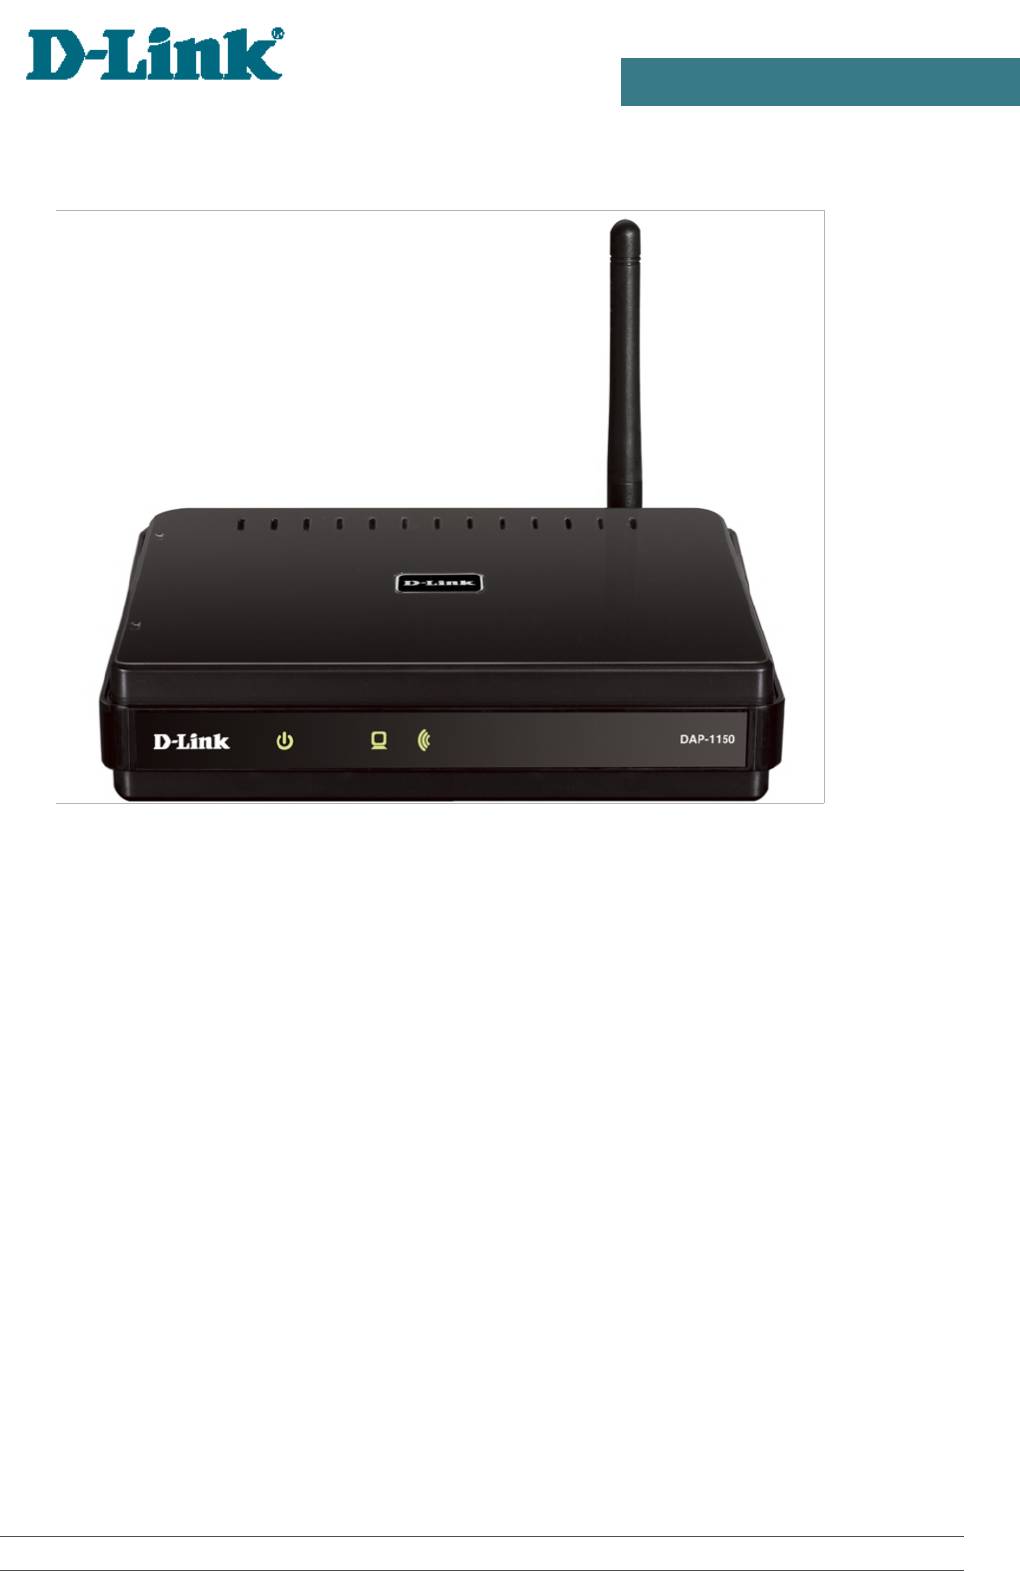
DAP-1150 Wireless Access Point Supporting Router Mode Overview User Manual Product Appearance Front Panel Figure 1. Front panel view. Mode Description The device is powered on. Solid green The device is powered off. No light When powered on: the device is being loaded; when…
-
Page 11: Back Panel
DAP-1150 Wireless Access Point Supporting Router Mode Overview User Manual Back Panel Figure 2. Back panel view. Port Description Access point mode: an Ethernet port to connect to a computer. Router mode: an Ethernet port to connect to a cable or DSL modem…
-
Page 12: Delivery Package
DAP-1150 Wireless Access Point Supporting Router Mode Overview User Manual Delivery Package The following should be included: Access point DAP-1150 • Power adapter 5V/1.2A • Ethernet cable (CAT 5E) • CD-ROM with “User Manual” and “Quick Installation Guide” • “Quick Installation Guide” (brochure).
-
Page 13: Chapter 3. Installation And Connection
Operating System Configuration of the access point DAP-1150 supporting the router mode (hereinafter referred to as “the access point”) is performed via the built-in web-based interface. The web-based interface is available from any operating system that supports a web browser.
-
Page 14: Connecting To Pc
DAP-1150 Wireless Access Point Supporting Router Mode Installation and Connection User Manual Connecting to PC PC with Ethernet Adapter 1. Make sure that your PC is powered off. 2. Connect an Ethernet cable between the LAN port located on the back panel of the access point and the Ethernet port of your PC.
-
Page 15
DAP-1150 Wireless Access Point Supporting Router Mode Installation and Connection User Manual 3. In the Local Area Connection Properties window, on the General tab, select the Internet Protocol (TCP/IP) line. Click the Properties button. Figure 4. The Local Area Connection Properties window. -
Page 16
DAP-1150 Wireless Access Point Supporting Router Mode Installation and Connection User Manual 4. Select the Obtain an IP address automatically and Obtain DNS server address automatically radio buttons. Click the OK button. Figure 5. The Internet Protocol (TCP/IP) Properties window. -
Page 17: Obtaining Ip Address Automatically In Os Windows 7
DAP-1150 Wireless Access Point Supporting Router Mode Installation and Connection User Manual Obtaining IP Address Automatically in OS Windows 7 1. Click the Start button and proceed to the Control Panel window. 2. Select the Network and Sharing Center section. (If the Control Panel has the category…
-
Page 18
DAP-1150 Wireless Access Point Supporting Router Mode Installation and Connection User Manual 3. In the menu located on the left part of the window, select the Change adapter settings line. Figure 7. The Network and Sharing Center window. Page 18 of 175… -
Page 19
DAP-1150 Wireless Access Point Supporting Router Mode Installation and Connection User Manual 4. In the opened window, right-click the relevant Local Area Connection icon and select the Properties line in the menu displayed. Figure 8. The Network Connections window. Page 19 of 175… -
Page 20
DAP-1150 Wireless Access Point Supporting Router Mode Installation and Connection User Manual 5. In the Local Area Connection Properties window, on the Networking tab, select the Internet Protocol Version 4 (TCP/IPv4) line. Click the Properties button. Figure 9. The Local Area Connection Properties window. -
Page 21: Pc With Wi-Fi Adapter
DAP-1150 Wireless Access Point Supporting Router Mode Installation and Connection User Manual 6. Select the Obtain an IP address automatically and Obtain DNS server address automatically radio buttons. Click the OK button. Figure 10. The Internet Protocol Version 4 (TCP/IPv4) Properties window.
-
Page 22: Configuring Wi-Fi Adapter In Os Windows Xp
DAP-1150 Wireless Access Point Supporting Router Mode Installation and Connection User Manual Configuring Wi-Fi Adapter in OS Windows XP 1. Click the Start button and proceed to the Control Panel > Network and Internet Connections > Network Connections window. 2. Select the icon of the wireless network connection and make sure that your Wi-Fi adapter is Figure 11.
-
Page 23: Configuring Wi-Fi Adapter In Os Windows 7
DAP-1150 Wireless Access Point Supporting Router Mode Installation and Connection User Manual Configuring Wi-Fi Adapter in OS Windows 7 1. Click the Start button and proceed to the Control Panel window. 2. Select the Network and Sharing Center section. (If the Control Panel has the category…
-
Page 24
DAP-1150 Wireless Access Point Supporting Router Mode Installation and Connection User Manual 6. In the opened window, in the list of available wireless networks, select the wireless network DAP-1150 and click the Connect button. Figure 14. The list of available networks. -
Page 25: Connecting To Web-Based Interface
2. In the address bar of the web browser, enter the IP address of the access point (by default, the following IP address is specified: 192.168.0.50). Press the Enter key. Figure 15. Connecting to the web-based interface of the DAP-1150 device. 3. On the opened page, enter the username (login) and password for the administrator account (by default, the following username and password are specified: admin, admin).
-
Page 26
To get back to the quick settings page from the Wi-Fi Setup Wizard or any web-based interface menu section, left-click the D-Link logo in the top left corner of the page. To configure all parameters of the access point independently without the Wizard, click the Configure manually button. -
Page 27
To get back to the quick settings page from any Wizard or web-based interface menu section, left- click the D-Link logo in the top left corner of the page. To configure all parameters of the access point independently without the Wizards, click the Configure manually button. -
Page 28
DAP-1150 Wireless Access Point Supporting Router Mode Installation and Connection User Manual Figure 20. The system statistics page. From the system statistics page you can proceed to the page for upgrading the access point’s firmware, contact the technical support group, and proceed to the settings of the local interface or the device’s WLAN. -
Page 29: Saving And Restoring Settings
DAP-1150 Wireless Access Point Supporting Router Mode Installation and Connection User Manual Saving and Restoring Settings Note that you should regularly save the changes of the device’s settings to the non- volatile memory. The web-based interface displays the notification on unsaved changes at the top of the page.
-
Page 30: Device Operation Modes
DAP-1150 Wireless Access Point Supporting Router Mode Installation and Connection User Manual When you keep the button pushed for more than 8 seconds, the access point switches to crash recovery mode. To restore normal operation of the access point, please, contact the Technical Support Service.
-
Page 31: Chapter 4. Configuring Device (Access Point Mode)
DAP-1150 Wireless Access Point Supporting Router Mode Configuring Device (Access Point Mode) User Manual CHAPTER 4. CONFIGURING DEVICE (ACCESS POINT MODE) Setup Wizard Wi-Fi Setup Wizard To specify all needed settings for your wireless network, click the Configure Wi-Fi button.
-
Page 32
DAP-1150 Wireless Access Point Supporting Router Mode Configuring Device (Access Point Mode) User Manual In the Basic settings section, you can change the basic parameters of your access point’s WLAN: “hide” your wireless network (Hide Access Point), specify a name for the network (SSID),… -
Page 33
DAP-1150 Wireless Access Point Supporting Router Mode Configuring Device (Access Point Mode) User Manual Figure 27. Network authentication types supported by the access point. The access point supports the following authentication types: Authentication type Description Open authentication (with WEP encryption for wireless network Open modes not supporting 802.11n devices). -
Page 34
DAP-1150 Wireless Access Point Supporting Router Mode Configuring Device (Access Point Mode) User Manual When the Open or Shared value is selected, the WEP Encryption settings section is displayed (the section is unavailable for the wireless network operating modes which support the standard 802.11n):… -
Page 35
DAP-1150 Wireless Access Point Supporting Router Mode Configuring Device (Access Point Mode) User Manual When the WPA-PSK, WPA2-PSK, or WPA-PSK/WPA2-PSK mixed value is selected, the WPA Encryption settings section is displayed: Figure 29. The WPA2-PSK value is selected from the Network Authentication drop-down list. -
Page 36
DAP-1150 Wireless Access Point Supporting Router Mode Configuring Device (Access Point Mode) User Manual When the WPA, WPA2, or WPA/WPA2 mixed value is selected, the RADIUS settings and WPA Encryption settings sections are available: Figure 30. The WPA2 value is selected from the Network Authentication drop-down list. -
Page 37: Status
DAP-1150 Wireless Access Point Supporting Router Mode Configuring Device (Access Point Mode) User Manual Status The pages of this section display data on the current state of the access point: network statistics • data on devices connected to the access point’s network and its web-based interface.
-
Page 38: Lan Clients
DAP-1150 Wireless Access Point Supporting Router Mode Configuring Device (Access Point Mode) User Manual LAN Clients On the Status / LAN clients page, you can view the list of devices connected to the access point and devices accessing its web-based interface.
-
Page 39: Net
DAP-1150 Wireless Access Point Supporting Router Mode Configuring Device (Access Point Mode) User Manual In this menu you can configure basic parameters of the local area network of the access point. To configure the access point’s local interface, proceed to the Net / LAN page.
-
Page 40
DAP-1150 Wireless Access Point Supporting Router Mode Configuring Device (Access Point Mode) User Manual In the DHCP server section, you can configure the built-in DHCP sever of the access point. Figure 35. The section for configuring the DHCP server. Parameter Description An operating mode of the access point’s DHCP server. -
Page 41: Wi-Fi
DAP-1150 Wireless Access Point Supporting Router Mode Configuring Device (Access Point Mode) User Manual Wi-Fi In this menu you can specify all needed settings for your wireless network. Common settings On the Wi-Fi / Common settings page, you can enable your wireless local area network (WLAN) and split it into parts.
-
Page 42: Basic Settings
(It is recommended not to select this checkbox in order to simplify initial configuration of your WLAN.) A name for the WLAN. By default, the value DAP-1150 is specified. If your network is splitted into parts, each part has the SSID default name (DAP-1150.2, DAP-1150.3, and DAP-1150.4).
-
Page 43: Security Settings
DAP-1150 Wireless Access Point Supporting Router Mode Configuring Device (Access Point Mode) User Manual Security Settings On the Wi-Fi / Security settings page, you can modify security settings of the WLAN. Figure 38. The default security settings. By default, the Open network authentication type with no encryption is specified for the WLAN.
-
Page 44
DAP-1150 Wireless Access Point Supporting Router Mode Configuring Device (Access Point Mode) User Manual Figure 39. Network authentication types supported by the access point. The access point supports the following authentication types: Authentication type Description Open authentication (with WEP encryption for wireless network Open modes not supporting 802.11n devices). -
Page 45
DAP-1150 Wireless Access Point Supporting Router Mode Configuring Device (Access Point Mode) User Manual When the Open or Shared value is selected, the WEP Encryption settings section is displayed (the section is unavailable for the wireless network operating modes which support the standard 802.11n):… -
Page 46
DAP-1150 Wireless Access Point Supporting Router Mode Configuring Device (Access Point Mode) User Manual When the WPA-PSK, WPA2-PSK, or WPA-PSK/WPA2-PSK mixed value is selected, the WPA Encryption settings section is displayed: Figure 41. The WPA2-PSK value is selected from the Network Authentication drop-down list. -
Page 47
DAP-1150 Wireless Access Point Supporting Router Mode Configuring Device (Access Point Mode) User Manual When the WPA, WPA2, or WPA/WPA2 mixed value is selected, the RADIUS settings and WPA Encryption settings sections are available: Figure 42. The WPA2 value is selected from the Network Authentication drop-down list. -
Page 48: Mac Filter
DAP-1150 Wireless Access Point Supporting Router Mode Configuring Device (Access Point Mode) User Manual MAC Filter On the Wi-Fi / MAC Filter page, you can define a set of MAC addresses of devices which will be allowed to access the WLAN, or define MAC addresses of devices which will not be allowed to access the WLAN.
-
Page 49
DAP-1150 Wireless Access Point Supporting Router Mode Configuring Device (Access Point Mode) User Manual Figure 44. The tab for adding a MAC address. Enter an address in the MAC address field of the MAC address adding section and click the Add button. -
Page 50: Station List
DAP-1150 Wireless Access Point Supporting Router Mode Configuring Device (Access Point Mode) User Manual Station List On the Wi-Fi / Station List page, you can view the list of wireless clients connected to the access point. Devices connected to the access point via the WDS function are not displayed in the list.
-
Page 51: Wps
DAP-1150 Wireless Access Point Supporting Router Mode Configuring Device (Access Point Mode) User Manual On the Wi-Fi / WPS page, you can enable the function for secure configuration of the WLAN and select a method used to easily add wireless devices to the WLAN.
-
Page 52
DAP-1150 Wireless Access Point Supporting Router Mode Configuring Device (Access Point Mode) User Manual To activate the WPS function, select the WPS Enable checkbox and click the Change button. When the checkbox is selected, the Information and Connection sections are available on the page. -
Page 53
DAP-1150 Wireless Access Point Supporting Router Mode Configuring Device (Access Point Mode) User Manual To add a wireless device via the PIN method of the WPS function, follow the next steps: 1. Select the WPS Enable checkbox. 2. Click the Change button. -
Page 54: Wds
DAP-1150 Wireless Access Point Supporting Router Mode Configuring Device (Access Point Mode) User Manual On the Wi-Fi / WDS page, you can enable the WDS function and select a mode of this function. The WDS function allows joining local area networks together via a wireless connection of access points.
-
Page 55
DAP-1150 Wireless Access Point Supporting Router Mode Configuring Device (Access Point Mode) User Manual The following fields are available on the page: Parameter Description The WDS function mode. Disable: The function is disabled. Bridge mode: Access points communicate to each other only, WDS Mode wireless devices cannot connect to them. -
Page 56: Additional Settings
DAP-1150 Wireless Access Point Supporting Router Mode Configuring Device (Access Point Mode) User Manual Additional Settings On the Wi-Fi / Additional settings page, you can define additional parameters for the WLAN of the access point. Changing parameters presented on this page may negatively affect your WLAN! Figure 48.
-
Page 57
DAP-1150 Wireless Access Point Supporting Router Mode Configuring Device (Access Point Mode) User Manual Parameter Description The 802.11b and 802.11g protection function is used to minimize collisions between devices of your wireless network. Select a value from the drop-down list. -
Page 58: Wmm
DAP-1150 Wireless Access Point Supporting Router Mode Configuring Device (Access Point Mode) User Manual On the Wi-Fi / WMM page, you can enable the Wi-Fi Multimedia function. The WMM function implements the QoS features for Wi-Fi networks. It helps to improve the quality of data transfer over Wi-Fi networks by prioritizing different types of traffic.
-
Page 59
DAP-1150 Wireless Access Point Supporting Router Mode Configuring Device (Access Point Mode) User Manual For every Access Category the following fields are available: Parameter Description Arbitrary Inter-Frame Space Number. This parameter influences Aifsn time delays for the relevant Access Category. The lower the value, the higher is the Access Category priority. -
Page 60: Client
Figure 50. Connecting DAP-1150 in the access point mode as a client. To allow the devices from the LAN of DAP-1150 to obtain the IP addresses from the DHCP server of the remote access point or network, it is necessary to disable the built-in DHCP server of the device.
-
Page 61
DAP-1150 Wireless Access Point Supporting Router Mode Configuring Device (Access Point Mode) User Manual Figure 51. The page for configuring the client mode. To configure the access point as a client, select the Enable client checkbox. When the checkbox is… -
Page 62
For the WPA-PSK, WPA2-PSK, or WPA-PSK/WPA2-PSK mixed authentication types, fill in the Encryption Key PSK field and click the Change button. After clicking the Change button, the wireless channel of DAP-1150 will switch to the channel of the wireless access point to which you have connected. -
Page 63: Advanced
DAP-1150 Wireless Access Point Supporting Router Mode Configuring Device (Access Point Mode) User Manual Advanced This menu is designed for switching the operating modes of the device. Device mode On the Advanced / Device mode page, you can change the operating mode of the device.
-
Page 64: Firewall
DAP-1150 Wireless Access Point Supporting Router Mode Configuring Device (Access Point Mode) User Manual Firewall In this menu you can configure the firewall of the access point. MAC Filter On the Firewall / MAC filter page, you can configure MAC-address-based filtering for computers of the access point’s LAN.
-
Page 65: System
DAP-1150 Wireless Access Point Supporting Router Mode Configuring Device (Access Point Mode) User Manual System In this menu you can do the following: change the password used to access the access point’s settings • save the current settings to the non-volatile memory •…
-
Page 66: Configuration
DAP-1150 Wireless Access Point Supporting Router Mode Configuring Device (Access Point Mode) User Manual Configuration On the System / Configuration page, you can save the changed settings to the non-volatile memory, restore the factory defaults, backup the current configuration, or restore the device’s configuration from a previously created file.
-
Page 67: System Log
DAP-1150 Wireless Access Point Supporting Router Mode Configuring Device (Access Point Mode) User Manual System Log On the System / System log page, you can set the system log options and configure sending the system log to a remote host.
-
Page 68
DAP-1150 Wireless Access Point Supporting Router Mode Configuring Device (Access Point Mode) User Manual After specifying the needed parameters, click the Change button. To disable logging of the system events, deselect the Logging checkbox and click the Change button. On the Log tab, the events specified in the Logging level list are displayed. -
Page 69: Firmware Upgrade
DAP-1150 Wireless Access Point Supporting Router Mode Configuring Device (Access Point Mode) User Manual Firmware Upgrade On the System / Firmware upgrade page, you can upgrade the firmware of the access point. Upgrade the firmware only when the access point is connected to your PC via a wired connection (available only in the access point mode).
-
Page 70: Telnet
DAP-1150 Wireless Access Point Supporting Router Mode Configuring Device (Access Point Mode) User Manual Telnet On the System / Telnet page, you can enable or disable access to the device settings via TELNET from your LAN. By default, access is enabled.
-
Page 71: Chapter 5. Configuring Device (Router Mode)
DAP-1150 Wireless Access Point Supporting Router Mode Configuring Device (Router Mode) User Manual CHAPTER 5. CONFIGURING DEVICE (ROUTER MODE) Setup Wizards Internet Setup Wizard To configure connection to the Internet, click the Connect to internet button. Figure 61. Configuring connection to the Internet.
-
Page 72
DAP-1150 Wireless Access Point Supporting Router Mode Configuring Device (Router Mode) User Manual Figure 62. The page for selecting the connection type. On the opened page, select the needed choice of the radio button and click the Next button. Page 72 of 175… -
Page 73: Pppoe Connection
DAP-1150 Wireless Access Point Supporting Router Mode Configuring Device (Router Mode) User Manual PPPoE Connection Figure 63. Configuring PPPoE WAN connection. In the Name field, specify a name for the connection for easier identification and click the Next button. Figure 64. Configuring PPPoE WAN connection.
-
Page 74
DAP-1150 Wireless Access Point Supporting Router Mode Configuring Device (Router Mode) User Manual In the Username field, enter your login, and in the Password and Password confirmation fields – the password provided by your ISP. If authorization is not required, select the Without authorization checkbox. -
Page 75
DAP-1150 Wireless Access Point Supporting Router Mode Configuring Device (Router Mode) User Manual Parameter Description Select the checkbox if you want the access point to keep you connected to your ISP even when the connection has been inactive Keep Alive for a specified period of time. -
Page 76
DAP-1150 Wireless Access Point Supporting Router Mode Configuring Device (Router Mode) User Manual If needed, change the connection settings available in the Miscellaneous section. Figure 66. Configuring PPPoE WAN connection. Parameter Description Enable RIP Select the checkbox to allow using RIP for this connection. -
Page 77: Static Ip Connection
DAP-1150 Wireless Access Point Supporting Router Mode Configuring Device (Router Mode) User Manual Static IP Connection Figure 67. Configuring Static IP WAN connection. In the Name field, specify a name for the connection for easier identification and click the Next button.
-
Page 78
DAP-1150 Wireless Access Point Supporting Router Mode Configuring Device (Router Mode) User Manual Also you can set the address of a device connected to the access point’s LAN at the moment. To do this, select the relevant value from the drop-down list located to the right of the field (the field will be filled in automatically). -
Page 79
DAP-1150 Wireless Access Point Supporting Router Mode Configuring Device (Router Mode) User Manual If needed, change the connection settings available in the Miscellaneous section. Figure 70. Configuring Static IP WAN connection. Parameter Description Enable RIP Select the checkbox to allow using RIP for this connection. -
Page 80: Dynamic Ip Connection
DAP-1150 Wireless Access Point Supporting Router Mode Configuring Device (Router Mode) User Manual Dynamic IP Connection Figure 71. Configuring Dynamic IP WAN connection. In the Name field, specify a name for the connection for easier identification and click the Next button.
-
Page 81
DAP-1150 Wireless Access Point Supporting Router Mode Configuring Device (Router Mode) User Manual If your ISP has provided the addresses of the DNS servers, deselect the Obtain DNS server addresses automatically checkbox and fill in the Primary DNS server and Secondary DNS server fields. -
Page 82: Pptp + Static Ip Or L2Tp + Static Ip Connection
DAP-1150 Wireless Access Point Supporting Router Mode Configuring Device (Router Mode) User Manual PPTP + Static IP L2TP + Static IP Connection Figure 74. Configuring PPTP + Static IP WAN connection. In the Name field, specify a name for the connection for easier identification and click the Next button.
-
Page 83
DAP-1150 Wireless Access Point Supporting Router Mode Configuring Device (Router Mode) User Manual Also you can set the address of a device connected to the access point’s LAN at the moment. To do this, select the relevant value from the drop-down list located to the right of the field (the field will be filled in automatically). -
Page 84
DAP-1150 Wireless Access Point Supporting Router Mode Configuring Device (Router Mode) User Manual If needed, change the connection settings available in the Miscellaneous section. Figure 77. Configuring PPTP + Static IP WAN connection. Parameter Description Enable RIP Select the checkbox to allow using RIP for this connection. -
Page 85
DAP-1150 Wireless Access Point Supporting Router Mode Configuring Device (Router Mode) User Manual Figure 78. Configuring PPTP + Static IP WAN connection. Leave the Connect automatically checkbox selected to allow automatic start of the connection upon the load of the access point. -
Page 86
DAP-1150 Wireless Access Point Supporting Router Mode Configuring Device (Router Mode) User Manual If needed, specify additional settings for your PPTP + Static IP or L2TP + Static IP WAN connection. Parameter Description Select a method of MPPE encryption. No encrypt: MPPE encryption is not applied. -
Page 87
DAP-1150 Wireless Access Point Supporting Router Mode Configuring Device (Router Mode) User Manual If needed, change the settings of the VPN tunnel available in the Miscellaneous section. Figure 79. Configuring PPTP + Static IP WAN connection. Parameter Description Enable RIP Select the checkbox to allow using RIP for this connection. -
Page 88: Pptp + Dynamic Ip Or L2Tp + Dynamic Ip Connection
DAP-1150 Wireless Access Point Supporting Router Mode Configuring Device (Router Mode) User Manual PPTP + Dynamic IP or L2TP + Dynamic IP Connection Figure 80. Configuring PPTP + Dynamic IP WAN connection. In the Name field, specify a name for the connection for easier identification and click the Next button.
-
Page 89
DAP-1150 Wireless Access Point Supporting Router Mode Configuring Device (Router Mode) User Manual If your ISP has provided the addresses of the DNS servers, deselect the Obtain DNS server addresses automatically checkbox and fill in the Primary DNS server and Secondary DNS server fields. -
Page 90
DAP-1150 Wireless Access Point Supporting Router Mode Configuring Device (Router Mode) User Manual Figure 83. Configuring PPTP + Dynamic IP WAN connection. Leave the Connect automatically checkbox selected to allow automatic start of the connection upon the load of the access point. -
Page 91
DAP-1150 Wireless Access Point Supporting Router Mode Configuring Device (Router Mode) User Manual If needed, specify additional settings for your PPTP + Dynamic IP or L2TP + Dynamic IP WAN connection. Parameter Description Select a method of MPPE encryption. No encrypt: MPPE encryption is not applied. -
Page 92
DAP-1150 Wireless Access Point Supporting Router Mode Configuring Device (Router Mode) User Manual If needed, change the settings of the VPN tunnel available in the Miscellaneous section. Figure 84. Configuring PPTP + Dynamic IP WAN connection. Parameter Description Enable RIP Select the checkbox to allow using RIP for this connection. -
Page 93: Site Setup Wizard
DAP-1150 Wireless Access Point Supporting Router Mode Configuring Device (Router Mode) User Manual Site Setup Wizard To create a virtual server for redirecting incoming Internet traffic to a specified IP address in the LAN, click the Host site button. Figure 85. The page for adding a virtual server.
-
Page 94: Wi-Fi Setup Wizard
DAP-1150 Wireless Access Point Supporting Router Mode Configuring Device (Router Mode) User Manual Wi-Fi Setup Wizard To specify all needed settings for your wireless network, click the Configure Wi-Fi button. Figure 86. Common and advanced settings of the wireless LAN.
-
Page 95
DAP-1150 Wireless Access Point Supporting Router Mode Configuring Device (Router Mode) User Manual On the next page, you can modify security settings of the WLAN. By default, the Open network authentication type with no encryption is specified for the WLAN. -
Page 96
DAP-1150 Wireless Access Point Supporting Router Mode Configuring Device (Router Mode) User Manual Figure 89. Network authentication types supported by the access point. The access point supports the following authentication types: Authentication type Description Open authentication (with WEP encryption for wireless network Open modes not supporting 802.11n devices). -
Page 97
DAP-1150 Wireless Access Point Supporting Router Mode Configuring Device (Router Mode) User Manual When the Open or Shared value is selected, the WEP Encryption settings section is displayed (the section is unavailable for the wireless network operating modes which support the standard 802.11n):… -
Page 98
DAP-1150 Wireless Access Point Supporting Router Mode Configuring Device (Router Mode) User Manual When the WPA-PSK, WPA2-PSK, or WPA-PSK/WPA2-PSK mixed value is selected, the WPA Encryption settings section is displayed: Figure 91. The WPA2-PSK value is selected from the Network Authentication drop-down list. -
Page 99
DAP-1150 Wireless Access Point Supporting Router Mode Configuring Device (Router Mode) User Manual When the WPA, WPA2, or WPA/WPA2 mixed value is selected, the RADIUS settings and WPA Encryption settings sections are available: Figure 92. The WPA2 value is selected from the Network Authentication drop-down list. -
Page 100: Status
DAP-1150 Wireless Access Point Supporting Router Mode Configuring Device (Router Mode) User Manual Status The pages of this section display data on the current state of the access point switched to the router mode: network statistics • the routing table •…
-
Page 101: Routing Table
DAP-1150 Wireless Access Point Supporting Router Mode Configuring Device (Router Mode) User Manual Routing Table The Status / Routing table page displays the information on routes. The table contains destination IP addresses, gateways, subnet masks, and other data. Figure 94. The Status / Routing table page.
-
Page 102: Lan Clients
DAP-1150 Wireless Access Point Supporting Router Mode Configuring Device (Router Mode) User Manual LAN Clients On the Status / LAN clients page, you can view the list of devices connected to the access point and devices accessing its web-based interface.
-
Page 103: Net
DAP-1150 Wireless Access Point Supporting Router Mode Configuring Device (Router Mode) User Manual In this menu you can configure basic parameters of the local area network of the access point and configure connection to the Internet (a WAN connection). On the Net / WAN page, you can create and edit connections used by the access point.
-
Page 104: Creating Pppoe Wan Connection
DAP-1150 Wireless Access Point Supporting Router Mode Configuring Device (Router Mode) User Manual Creating PPPoE WAN Connection To create a connection of the PPPoE type, click the Add button on the Net / WAN page. On the opened page, select the PPPoE value from the Connection Type drop-down list and specify the needed values.
-
Page 105
DAP-1150 Wireless Access Point Supporting Router Mode Configuring Device (Router Mode) User Manual Figure 98. The page for creating a new connection. The PPP and Miscellaneous sections. Parameter Description Username A username (login) to access the Internet. Select the checkbox if you don’t need to enter a username and Without authorization password to access the Internet. -
Page 106
DAP-1150 Wireless Access Point Supporting Router Mode Configuring Device (Router Mode) User Manual Parameter Description Select the checkbox if you want the access point to keep you connected to your ISP even when the connection has been inactive Keep Alive for a specified period of time. -
Page 107: Creating Static Ip Wan Connection
DAP-1150 Wireless Access Point Supporting Router Mode Configuring Device (Router Mode) User Manual Creating Static IP WAN Connection To create a connection of the Static IP type, click the Add button on the Net / WAN page. On the opened page, select the Static IP value from the Connection Type drop-down list and specify the needed values.
-
Page 108
DAP-1150 Wireless Access Point Supporting Router Mode Configuring Device (Router Mode) User Manual Parameter Description A MAC address assigned to the interface. This parameter is mandatory if your ISP uses MAC address binding. In the field, enter the MAC address registered by your ISP upon concluding the agreement. -
Page 109
DAP-1150 Wireless Access Point Supporting Router Mode Configuring Device (Router Mode) User Manual Parameter Description Select the checkbox to allow multicast traffic from the external Enable IGMP Multicast network (e.g. video streaming) to be received. Select the checkbox if you want one WAN IP address to be used for all computers of your LAN. -
Page 110: Creating Dynamic Ip Wan Connection
DAP-1150 Wireless Access Point Supporting Router Mode Configuring Device (Router Mode) User Manual Creating Dynamic IP WAN Connection To create a connection of the Dynamic IP type, click the Add button on the Net / WAN page. On the opened page, select the Dynamic IP value from the Connection Type drop-down list and specify the needed values.
-
Page 111
DAP-1150 Wireless Access Point Supporting Router Mode Configuring Device (Router Mode) User Manual Parameter Description A MAC address assigned to the interface. This parameter is mandatory if your ISP uses MAC address binding. In the field, enter the MAC address registered by your ISP upon concluding the agreement. -
Page 112
DAP-1150 Wireless Access Point Supporting Router Mode Configuring Device (Router Mode) User Manual Parameter Description Select the checkbox if you want one WAN IP address to be used for all computers of your LAN. Select the checkbox to enable protection against ARP and DDoS Firewall attacks. -
Page 113: Creating Pptp + Static Ip Or L2Tp + Static Ip Wan Connection
DAP-1150 Wireless Access Point Supporting Router Mode Configuring Device (Router Mode) User Manual Creating PPTP + Static IP or L2TP + Static IP WAN Connection To create a connection of the PPTP + Static IP or L2TP + Static IP type, click the Add button on the Net / WAN page.
-
Page 114
DAP-1150 Wireless Access Point Supporting Router Mode Configuring Device (Router Mode) User Manual Parameter Description A MAC address assigned to the interface. This parameter is mandatory if your ISP uses MAC address binding. In the field, enter the MAC address registered by your ISP upon concluding the agreement. -
Page 115
DAP-1150 Wireless Access Point Supporting Router Mode Configuring Device (Router Mode) User Manual Parameter Description Select the checkbox to allow multicast traffic from the external Enable IGMP Multicast network (e.g. video streaming) to be received. Select the checkbox if you want one WAN IP address to be used for all computers of your LAN. -
Page 116
DAP-1150 Wireless Access Point Supporting Router Mode Configuring Device (Router Mode) User Manual Parameter Description VPN server address The IP or URL address of the PPTP or L2TP authentication server. Select a method of MPPE encryption. No encrypt: MPPE encryption is not applied. -
Page 117
DAP-1150 Wireless Access Point Supporting Router Mode Configuring Device (Router Mode) User Manual Parameter Description Select the checkbox to enable protection against ARP and DDoS Firewall attacks. When all needed settings are configured, click the Save button. Page 117 of 175… -
Page 118: Creating Pptp + Dynamic Ip Or L2Tp + Dynamic Ip Wan Connection
DAP-1150 Wireless Access Point Supporting Router Mode Configuring Device (Router Mode) User Manual Creating PPTP + Dynamic IP or L2TP + Dynamic IP WAN Connection To create a connection of the PPTP + Dynamic IP or L2TP + Dynamic IP type, click the Add button on the Net / WAN page.
-
Page 119
DAP-1150 Wireless Access Point Supporting Router Mode Configuring Device (Router Mode) User Manual Figure 107. The page for creating a new connection. The IP and Miscellaneous sections. Parameter Description Obtain DNS server Select the checkbox to configure automatic assignment of DNS addresses server addresses. -
Page 120
DAP-1150 Wireless Access Point Supporting Router Mode Configuring Device (Router Mode) User Manual Figure 108. The page for creating a new connection. The VPN and Miscellaneous sections. Parameter Description Select the checkbox to enable auto-start of the connection upon the Connect automatically boot-up of the access point. -
Page 121
DAP-1150 Wireless Access Point Supporting Router Mode Configuring Device (Router Mode) User Manual Parameter Description Select a method of MPPE encryption. No encrypt: MPPE encryption is not applied. • MPPE 40/128 bit: MPPE encryption with a 40-bit or 128-bit •… -
Page 122
DAP-1150 Wireless Access Point Supporting Router Mode Configuring Device (Router Mode) User Manual Parameter Description Miscellaneous Enable RIP Select the checkbox to allow using RIP for this connection. Select the checkbox if you want one WAN IP address to be used for all computers of your LAN. -
Page 123: Lan
DAP-1150 Wireless Access Point Supporting Router Mode Configuring Device (Router Mode) User Manual To configure the access point’s local interface, proceed to the Net / LAN page. Figure 109. Basic settings of the local interface. If needed, edit the basic settings of the local interface.
-
Page 124
DAP-1150 Wireless Access Point Supporting Router Mode Configuring Device (Router Mode) User Manual In the DHCP server section, you can configure the built-in DHCP sever of the access point. Figure 111. The section for configuring the DHCP server. Parameter Description An operating mode of the access point’s DHCP server. -
Page 125: Wi-Fi
DAP-1150 Wireless Access Point Supporting Router Mode Configuring Device (Router Mode) User Manual Wi-Fi In this menu you can specify all needed settings for your wireless network. Common settings On the Wi-Fi / Common settings page, you can enable your wireless local area network (WLAN) and split it into parts.
-
Page 126: Basic Settings
(It is recommended not to select this checkbox in order to simplify initial configuration of your WLAN.) A name for the WLAN. By default, the value DAP-1150 is specified. If your network is splitted into parts, each part has the SSID default name (DAP-1150.2, DAP-1150.3, and DAP-1150.4).
-
Page 127: Security Settings
DAP-1150 Wireless Access Point Supporting Router Mode Configuring Device (Router Mode) User Manual Security Settings On the Wi-Fi / Security settings page, you can modify security settings of the WLAN. Figure 114. The default security settings. By default, the Open network authentication type with no encryption is specified for the WLAN.
-
Page 128
DAP-1150 Wireless Access Point Supporting Router Mode Configuring Device (Router Mode) User Manual Figure 115. Network authentication types supported by the access point. The access point supports the following authentication types: Authentication type Description Open authentication (with WEP encryption for wireless network Open modes not supporting 802.11n devices). -
Page 129
DAP-1150 Wireless Access Point Supporting Router Mode Configuring Device (Router Mode) User Manual When the Open or Shared value is selected, the WEP Encryption settings section is displayed (the section is unavailable for the wireless network operating modes which support the standard 802.11n):… -
Page 130
DAP-1150 Wireless Access Point Supporting Router Mode Configuring Device (Router Mode) User Manual When the WPA-PSK, WPA2-PSK, or WPA-PSK/WPA2-PSK mixed value is selected, the WPA Encryption settings section is displayed: Figure 117. The WPA2-PSK value is selected from the Network Authentication drop-down list. -
Page 131
DAP-1150 Wireless Access Point Supporting Router Mode Configuring Device (Router Mode) User Manual When the WPA, WPA2, or WPA/WPA2 mixed value is selected, the RADIUS settings and WPA Encryption settings sections are available: Figure 118. The WPA2 value is selected from the Network Authentication drop-down list. -
Page 132: Mac Filter
DAP-1150 Wireless Access Point Supporting Router Mode Configuring Device (Router Mode) User Manual MAC Filter On the Wi-Fi / MAC Filter page, you can define a set of MAC addresses of devices which will be allowed to access the WLAN, or define MAC addresses of devices which will not be allowed to access the WLAN.
-
Page 133
DAP-1150 Wireless Access Point Supporting Router Mode Configuring Device (Router Mode) User Manual Figure 120. The tab for adding a MAC address. Enter an address in the MAC address field of the MAC address adding section and click the Add button. -
Page 134: Station List
DAP-1150 Wireless Access Point Supporting Router Mode Configuring Device (Router Mode) User Manual Station List On the Wi-Fi / Station List page, you can view the list of wireless clients connected to the access point. Devices connected to the access point via the WDS function are not displayed in the list.
-
Page 135: Wps
DAP-1150 Wireless Access Point Supporting Router Mode Configuring Device (Router Mode) User Manual On the Wi-Fi / WPS page, you can enable the function for secure configuration of the WLAN and select a method used to easily add wireless devices to the WLAN.
-
Page 136
DAP-1150 Wireless Access Point Supporting Router Mode Configuring Device (Router Mode) User Manual To activate the WPS function, select the WPS Enable checkbox and click the Change button. When the checkbox is selected, the Information and Connection sections are available on the page. -
Page 137
DAP-1150 Wireless Access Point Supporting Router Mode Configuring Device (Router Mode) User Manual To add a wireless device via the PIN method of the WPS function, follow the next steps: 1. Select the WPS Enable checkbox. 2. Click the Change button. -
Page 138: Wds
DAP-1150 Wireless Access Point Supporting Router Mode Configuring Device (Router Mode) User Manual On the Wi-Fi / WDS page, you can enable the WDS function and select a mode of this function. The WDS function allows joining local area networks together via a wireless connection of access points.
-
Page 139
DAP-1150 Wireless Access Point Supporting Router Mode Configuring Device (Router Mode) User Manual The following fields are available on the page: Parameter Description The WDS function mode. Disable: The function is disabled. Bridge mode: Access points communicate to each other only, WDS Mode wireless devices cannot connect to them. -
Page 140: Additional Settings
DAP-1150 Wireless Access Point Supporting Router Mode Configuring Device (Router Mode) User Manual Additional Settings On the Wi-Fi / Additional settings page, you can define additional parameters for the WLAN of the access point. Changing parameters presented on this page may negatively affect your WLAN! Figure 124.
-
Page 141
DAP-1150 Wireless Access Point Supporting Router Mode Configuring Device (Router Mode) User Manual Parameter Description The 802.11b and 802.11g protection function is used to minimize collisions between devices of your wireless network. Select a value from the drop-down list. Auto: The protection function is enabled and disabled automatically… -
Page 142: Wmm
DAP-1150 Wireless Access Point Supporting Router Mode Configuring Device (Router Mode) User Manual On the Wi-Fi / WMM page, you can enable the Wi-Fi Multimedia function. The WMM function implements the QoS features for Wi-Fi networks. It helps to improve the quality of data transfer over Wi-Fi networks by prioritizing different types of traffic.
-
Page 143
DAP-1150 Wireless Access Point Supporting Router Mode Configuring Device (Router Mode) User Manual For every Access Category the following fields are available: Parameter Description Arbitrary Inter-Frame Space Number. This parameter influences Aifsn time delays for the relevant Access Category. The lower the value, the higher is the Access Category priority. -
Page 144: Client
To use the access point as a WISP repeater, you need to configure the same channel of the wireless connection for DAP-1150 and the WISP access point. Other parameters of the wireless network of DAP-1150 do not depend upon the settings of the WISP access point.
-
Page 145
DAP-1150 Wireless Access Point Supporting Router Mode Configuring Device (Router Mode) User Manual Figure 127. The page for configuring the client mode. To configure the access point as a client, select the Enable client checkbox. When the checkbox is selected, the following fields are displayed on the page:… -
Page 146
For the WPA-PSK, WPA2-PSK, or WPA-PSK/WPA2-PSK mixed authentication types, fill in the Encryption Key PSK field and click the Change button. After clicking the Change button, the wireless channel of DAP-1150 will switch to the channel of the wireless access point to which you have connected. -
Page 147: Advanced
DAP-1150 Wireless Access Point Supporting Router Mode Configuring Device (Router Mode) User Manual Advanced In this menu you can configure advanced settings of the access point switched to the router mode: enable the UPnP function • configure a DDNS service •…
-
Page 148: Ddns
DAP-1150 Wireless Access Point Supporting Router Mode Configuring Device (Router Mode) User Manual DDNS On the Advanced / DDNS page, you can define parameters of the DDNS service, which allows associating a domain name with dynamic IP addresses. Figure 129. The Advanced / DDNS page.
-
Page 149
DAP-1150 Wireless Access Point Supporting Router Mode Configuring Device (Router Mode) User Manual You can specify the following parameters: Parameter Description DDNS Service Select a DDNS provider from the drop-down list. Host name The domain name registered at your DDNS provider. -
Page 150: Dns
DAP-1150 Wireless Access Point Supporting Router Mode Configuring Device (Router Mode) User Manual On the Advanced / DNS page, you can add DNS servers to the system. Figure 131. The Advanced / DNS page. DNS servers are used to determine the IP address from the name of a server in Intranets or the Internet (as a rule, they are specified by an ISP or assigned by a network administrator).
-
Page 151: Routing
DAP-1150 Wireless Access Point Supporting Router Mode Configuring Device (Router Mode) User Manual Routing On the Advanced / Routing page, you can add static routes (routes for networks that are not connected directly to the device but are available through the interfaces of the device) into the system.
-
Page 152
DAP-1150 Wireless Access Point Supporting Router Mode Configuring Device (Router Mode) User Manual Figure 133. The page for adding a static route. You can specify the following parameters: Parameter Description Destination network A destination network to which this route is assigned. -
Page 153: Device Mode
DAP-1150 Wireless Access Point Supporting Router Mode Configuring Device (Router Mode) User Manual Device mode On the Advanced / Device mode page, you can change the operating mode of the device. Figure 134. The page for changing the operating mode of the device.
-
Page 154: Remote Access
DAP-1150 Wireless Access Point Supporting Router Mode Configuring Device (Router Mode) User Manual Remote Access On the Advanced / Remote access page, you can configure access to the web-based interface of the access point. By default, the access from external networks to the access point is closed. If you need to allow access to the access point from the external network, create relevant rules.
-
Page 155
DAP-1150 Wireless Access Point Supporting Router Mode Configuring Device (Router Mode) User Manual Figure 136. The page for adding a rule for remote management. You can specify the following parameters: Parameter Description IP address A host or a subnet to which the rule is applied. -
Page 156: Igmp
DAP-1150 Wireless Access Point Supporting Router Mode Configuring Device (Router Mode) User Manual IGMP On the Advanced / IGMP page, you can enable IGMP for the access point. IGMP is used for managing multicast traffic (transferring data to a group of destinations). This protocol allows using network resources for some applications, e.g., for streaming video, more…
-
Page 157: Firewall
DAP-1150 Wireless Access Point Supporting Router Mode Configuring Device (Router Mode) User Manual Firewall In this menu you can configure the firewall of the access point switched to the router mode: add rules for IP filtering • create virtual servers •…
-
Page 158
DAP-1150 Wireless Access Point Supporting Router Mode Configuring Device (Router Mode) User Manual Figure 139. The page for adding a rule for IP filtering. You can specify the following parameters: Parameter Description IP filter rule editing Name A name for the rule for easier identification. -
Page 159
DAP-1150 Wireless Access Point Supporting Router Mode Configuring Device (Router Mode) User Manual Parameter Description The source host/subnet IP address. If the IP address range checkbox is selected, specify the starting IP address of the range in the Source (first) field and the ending IP address in the Source (last) field. -
Page 160: Virtual Servers
DAP-1150 Wireless Access Point Supporting Router Mode Configuring Device (Router Mode) User Manual Virtual Servers On the Firewall / Virtual servers page, you can create virtual servers for redirecting incoming Internet traffic to a specified IP address in the local area network.
-
Page 161
DAP-1150 Wireless Access Point Supporting Router Mode Configuring Device (Router Mode) User Manual You can specify the following parameters: Parameter Description Select a virtual server template from the drop-down list, or select Template Custom to specify all parameters of the new virtual server manually. -
Page 162: Dmz
DAP-1150 Wireless Access Point Supporting Router Mode Configuring Device (Router Mode) User Manual A DMZ is a host or network segment located “between” internal (local) and external (global) networks. In the access point, the DMZ implements the capability to transfer a request coming to a port of the access point from the external network to a specified host of the internal network.
-
Page 163: Mac Filter
DAP-1150 Wireless Access Point Supporting Router Mode Configuring Device (Router Mode) User Manual MAC Filter On the Firewall / MAC filter page, you can configure MAC-address-based filtering for computers of the device’s LAN. Figure 143. The Firewall / MAC filter page.
-
Page 164: Control
DAP-1150 Wireless Access Point Supporting Router Mode Configuring Device (Router Mode) User Manual Control This menu is designed to create restrictions on access to certain web sites. URL Filter On the Control / URL filter page, you can specify restrictions on access to certain web sites.
-
Page 165
DAP-1150 Wireless Access Point Supporting Router Mode Configuring Device (Router Mode) User Manual Figure 146. The Control / URL filter page. The URL addresses tab. On the opened page, specify the needed parameters. Figure 147. The page for adding an address for the URL filter. -
Page 166: System
DAP-1150 Wireless Access Point Supporting Router Mode Configuring Device (Router Mode) User Manual System In this menu you can do the following: change the password used to access the access point’s settings • save the current settings to the non-volatile memory •…
-
Page 167: Configuration
DAP-1150 Wireless Access Point Supporting Router Mode Configuring Device (Router Mode) User Manual Configuration On the System / Configuration page, you can save the changed settings to the non-volatile memory, restore the factory defaults, backup the current configuration, or restore the device’s configuration from a previously created file.
-
Page 168: System Log
DAP-1150 Wireless Access Point Supporting Router Mode Configuring Device (Router Mode) User Manual System Log On the System / System log page, you can set the system log options and configure sending the system log to a remote host. Figure 150. The System / System log page. The Configuration tab.
-
Page 169
DAP-1150 Wireless Access Point Supporting Router Mode Configuring Device (Router Mode) User Manual After specifying the needed parameters, click the Change button. To disable logging of the system events, deselect the Logging checkbox and click the Change button. On the Log tab, the events specified in the Logging level list are displayed. -
Page 170: Firmware Upgrade
DAP-1150 Wireless Access Point Supporting Router Mode Configuring Device (Router Mode) User Manual Firmware Upgrade On the System / Firmware upgrade page, you can upgrade the firmware of the access point. Upgrade the firmware only when the access point is connected to your PC via a wired connection (available only in the access point mode).
-
Page 171: Ntp Client
DAP-1150 Wireless Access Point Supporting Router Mode Configuring Device (Router Mode) User Manual NTP Client On the System / NTP client page, you can configure automatic synchronization of the system time with a time server on the Internet. Figure 153. The System / NTP client page.
-
Page 172: Telnet
DAP-1150 Wireless Access Point Supporting Router Mode Configuring Device (Router Mode) User Manual Telnet On the System / Telnet page, you can enable or disable access to the device settings via TELNET from your LAN. By default, access is enabled.
-
Page 173: Chapter 6. Operation Guidelines
RF noise in your home or office. To maximize your wireless range, follow the guidelines below. 1. Keep the number of walls and ceilings between the DAP-1150 device and other network devices to a minimum – each wall or ceiling can reduce your wireless network range by 3- 90 feet (1-30 meters).
-
Page 174: Chapter 7. Abbreviations And Acronyms
DAP-1150 Wireless Access Point Supporting Router Mode Abbreviations and Acronyms User Manual CHAPTER 7. ABBREVIATIONS AND ACRONYMS Access Category Advanced Encryption Standard Address Resolution Protocol BSSID Basic Service Set Identifier Complementary Code Keying Cyclic Redundancy Check DDNS Dynamic Domain Name System…
-
Page 175
DAP-1150 Wireless Access Point Supporting Router Mode Abbreviations and Acronyms User Manual PPPoE Point-to-point protocol over Ethernet PPTP Point-to-point tunneling protocol Pre-shared key Quality of Service RADIUS Remote Authentication in Dial-In User Service Routing Information Protocol Request To Send SSID…
Раздел: Сети, связь, телекоммуникации, интернет, безопасность
Тип: Беспроводная Точка Доступа
Инструкция к Беспроводной Точке Доступа D-Link DAP-1150
Руководство пользователя
DAP-1150
Беспроводная точка доступа с поддержкой
режима маршрутизатора
Версия ПО 1.2.66. Март, 2011 г.

DAP-1150 Беспроводная точка доступа с поддержкой режима маршрутизатора
Руководство пользователя
Содержание
Глава 1. Введение….……..………..…......................5
Аудитория и содержание….…..……..…..……..……..……..….....5
Условные обозначения….…..……..…..……..……..……..……....5
Структура документа….…..……..…..……..……..……..…….....5
Глава 2. Обзор точки доступа…..................................6
Общее описание…….…..……..…..……..……..……..……..…..6
Технические характеристики….…..……..…..……..……..….........7
Внешний вид устройства….…..……..…..……..……..…….........10
Передняя панель…………………….…..……..…..……..…….10
Задняя панель…………………………..……..…..……..…….11
Комплект поставки….…..……..…..……..……..……..……..….12
Глава 3. Установка и подключение точки доступа..................13
Предварительная подготовка….…..……..…..……..…….............13
Подключение к компьютеру и его настройка (в ОС Windows XP).................14
Подключение к компьютеру с Ethernet-адаптером….…..…….............14
Настройка автоматического получения IP-адреса….…..…….............14
Подключение к компьютеру с Wi-Fi-адаптером….…..……..…..…......16
Настройка Wi-Fi-адаптера…………….…..……..…..……..…….17
Подключение к web-интерфейсу….…..……..…..……..…..............18
Сохранение и восстановление настроек….…..……........................20
Режимы работы устройства….…..……..…..……..……..…..........21
Режим точки доступа……………………..……..…..……..…….21
Режим маршрутизатора………………..…..……..…..……..…….21
Глава 4. Настройка устройства в режиме точки доступа............22
Статус…………..…..……..…..……..……..……..……..…..22
Сетевая статистика………………….…..……..…..……..…….22
Таблица маршрутизации……………….…..……..…..……..…….23
LAN-клиенты………………………..…..……..…..……..…….23
Сеть…………….…..……..…..……..……..……..……..…..24
Соединения……………………………..……..…..……..…….24
Редактирование параметров локального интерфейса……………………25
Wi-Fi………………..……..…..……..……..……..……..…..29
Общие настройки…………………….…..……..…..……..…….29
Основные настройки………………….…..……..…..……..…….30
Настройки безопасности…………………..……..…..……..…….32
MAC-фильтр……………………………..……..…..……..…….40
Станционный список………………….…..……..…..……..…….42
WPS……………………………….…..……..…..……..…….43
WDS……………………………….…..……..…..……..…….46
Дополнительные настройки…………….…..……..…..……..…….48
WMM……………………………….…..……..…..……..…….50
Страница 2 из 133

DAP-1150 Беспроводная точка доступа с поддержкой режима маршрутизатора
Руководство пользователя
Клиент…………………………….…..……..…..……..…….52
Дополнительно…….…..……..…..……..……..……..……..…..54
Режим устройства………………………..……..…..……..…….54
Система………….…..……..…..……..……..……..……..…..55
Пароль администратора……………….…..……..…..……..…….55
Конфигурация……………………….…..……..…..……..…….56
Журнал событий……………………..…..……..…..……..…….57
Обновление ПО…………………………..……..…..……..…….59
NTP-клиент……………………………..……..…..……..…….60
Глава 5. Настройка устройства в режиме маршрутизатора...........61
Статус…………..…..……..…..……..……..……..……..…..61
Сетевая статистика………………….…..……..…..……..…….61
Таблица маршрутизации……………….…..……..…..……..…….62
LAN-клиенты………………………..…..……..…..……..…….63
Сеть…………….…..……..…..……..……..……..……..…..64
Соединения……………………………..……..…..……..…….64
Редактирование параметров локального интерфейса……………………65
WAN-соединение типа PPPoE…………………………………….…69
WAN-соединение типа IPoE……………………………………..…73
WAN-соединение типа PPTP или L2TP……………………………..…76
Wi-Fi………………..……..…..……..……..……..……..…..79
Общие настройки…………………….…..……..…..……..…….79
Основные настройки………………….…..……..…..……..…….80
Настройки безопасности…………………..……..…..……..…….82
MAC-фильтр……………………………..……..…..……..…….91
Станционный список………………….…..……..…..……..…….93
WPS……………………………….…..……..…..……..…….94
WDS……………………………….…..……..…..……..…….97
Дополнительные настройки…………….…..……..…..……..…….99
WMM…………………………………..……..…..……..…….101
Клиент………………………………..……..…..……..…….103
Дополнительно………..……..…..……..……..……..……..…..105
UPnP……………………………..…..……..…..……..…….105
DDNS……………………………..…..……..…..……..…….106
Серверы имен…………………………..……..…..……..…….108
Маршрутизация……………………..…..……..…..……..…….109
Режим устройства…………………..…..……..…..……..…….111
Удаленный доступ…………………..…..……..…..……..…….112
IGMP……………………………..…..……..…..……..…….114
Межсетевой экран….…..……..…..……..……..……..……..….115
IP-фильтры………………………..…..……..…..……..…….115
Виртуальные серверы………………..…..……..…..……..…….118
DMZ…………………………………..……..…..……..…….120
MAC-фильтр………………………..…..……..…..……..…….121
Страница 3 из 133

DAP-1150 Беспроводная точка доступа с поддержкой режима маршрутизатора
Руководство пользователя
Контроль………..…..……..…..……..……..……..……..…..122
URL-фильтр………………………..…..……..…..……..…….122
Система……………..……..…..……..……..……..……..…..123
Пароль администратора…………………..……..…..……..…….123
Конфигурация…………………………..……..…..……..…….124
Журнал событий…………………….…..……..…..……..…….125
Обновление ПО……………………..…..……..…..……..…….127
NTP-клиент………………………..…..……..…..……..…….128
Глава 6. Рекомендации по использованию точки доступа...........129
Инструкции по безопасности….…..……..…..……..……............129
Рекомендации по установке беспроводных устройств..........................130
Глава 7. Аббревиатуры и сокращения.............................131
Страница 4 из 133

DAP-1150 Беспроводная точка доступа с поддержкой режима маршрутизатора
Введение
Руководство пользователя
ГЛАВА 1. ВВЕДЕНИЕ
Аудитория и содержание
В данном руководстве приводится описание точки доступа DAP-1150, порядок настройки и
рекомендации по его использованию.
Настоящее руководство предназначено для пользователей, знакомых с основными
принципами организации сетей, которые создают домашнюю локальную сеть, а также
системных администраторов, которые устанавливают и настраивают сети в офисах
компаний.
Условные обозначения
Пример Описание
текст Основной текст документа.
Предварительная
Ссылка на главу или раздел данного руководства
подготовка
пользователя.
«Руководство по
Ссылка на документ.
быстрой установке»
Название раздела меню, пункта меню, какого-либо элемента
Изменить
web-интерфейса (поле, флажок, переключатель, кнопка и пр.)
192.168.0.50
Текст, который необходимо ввести в указанное поле.
Важная информация, на которую необходимо обратить
Информация
!
внимание.
Структура документа
Глава 1 содержит сведения о назначении и организации документа.
Глава 2 содержит описание технических характеристик устройства DAP-1150 и его
внешнего вида, а также перечисление содержимого комплекта поставки.
Глава 3 описывает процесс установки устройства DAP-1150 и настройки компьютера для
подключения к web-интерфейсу.
Глава 4 содержит подробное описание всех разделов меню web-интерфейса для устройства в
режиме точки доступа.
Глава 5 содержит подробное описание всех разделов меню web-интерфейса для устройства в
режиме маршрутизатора.
Глава 6 содержит рекомендации по безопасному использованию устройства DAP-1150 и
советы по построению беспроводной сети.
Глава 7 содержит список сокращений, используемых в настоящем руководстве
пользователя.
Страница 5 из 133

DAP-1150 Беспроводная точка доступа с поддержкой режима маршрутизатора
Обзор точки доступа
Руководство пользователя
ГЛАВА 2. ОБЗОР ТОЧКИ ДОСТУПА
Общее описание
Устройство DAP-1150 представляет собой беспроводную точку доступа с поддержкой
режима маршрутизатора. Это доступное решение для создания беспроводных сетей дома и в
офисе.
Используя устройство DAP-1150, Вы сможете быстро организовать беспроводную сеть и
разрешить Вашим сотрудникам или членам Вашей семьи подключаться к ней практически в
любой точке (в зоне действия беспроводной сети). Точка доступа работает с беспроводными
устройствами стандарта 802.11n (со скоростью до 150 Мбит/с) и поддерживает устройства
стандартов 802.11b и g.
В устройстве реализовано множество функций для беспроводного интерфейса. Устройство
поддерживает несколько стандартов безопасности (WEP, WPA/WPA2, IEEE 802.1X),
фильтрацию подключаемых устройств по MAC-адресу, несколько режимов работы (клиент,
мост), а также позволяет использовать технологии WPS и WMM.
Вы можете подключить беспроводную точку доступа DAP-1150 в режиме маршрутизатора к
кабельному или DSL-модему или выделенной Ethernet-линии, чтобы использовать
высокоскоростное соединение с сетью Интернет для решения широкого круга
профессиональных задач.
В режиме маршрутизатора устройство DAP-1150 оснащено встроенным межсетевым
экраном. Расширенные функции безопасности позволяют минимизировать последствия
действий хакеров и предотвращают вторжения в Вашу сеть и доступ к нежелательным
сайтам для пользователей Вашей локальной сети.
Для управления и настройки устройства DAP-1150 используется простой и удобный
встроенный web-интерфейс (доступен на двух языках – русском и английском).
Страница 6 из 133

DAP-1150 Беспроводная точка доступа с поддержкой режима маршрутизатора
Обзор точки доступа
Руководство пользователя
Технические характеристики
Интерфейс LAN:
• 1 порт 10/100BASE-TX Ethernet с автоматическим определением полярности
MDI/MDIX.
Интерфейс WLAN:
• IEEE 802.11b/g/n.
Сетевые функции (режим маршрутизатора):
• типы подключения WAN:
• IPoE,
• PPPoE,
• PPTP,
• L2TP,
• DHCP-сервер и DHCP-клиент,
• DNS relay,
• пропуск VPN-тоннеля (PPTP),
• Dynamic DNS,
• статическая IP-маршрутизация,
• удаленный доступ,
• сетевая статистика для каждого интерфейса,
• IGMP Proxy,
• RIP,
• UPnP.
Страница 7 из 133

DAP-1150 Беспроводная точка доступа с поддержкой режима маршрутизатора
Обзор точки доступа
Руководство пользователя
Беспроводное соединение:
• сегментация беспроводной сети (до 4-х SSID),
• поддерживаемые стандарты безопасности:
◦ WEP,
◦ WPA/WPA2 Personal,
◦ WPA/WPA2 Enterprise,
◦ IEEE 802.1X,
• MAC-фильтр,
• управление подключенными устройствами,
• методы PIN и PBC функции WPS,
• функция WMM (Wi-Fi QoS),
• расширенные настройки,
• функция WDS,
• поддержка режима «клиент».
Функции межсетевого экрана (режим маршрутизатора):
• преобразование сетевых адресов (NAT),
• контроль состояния соединений (SPI),
• IP-фильтры,
• URL-фильтр,
• MAC-фильтр,
• DMZ-зона,
• функция защиты от ARP- и DDoS-атак,
• виртуальные серверы.
Настройка и управление:
• web-интерфейс настройки и управления на двух языках (русском и английском),
• обновление внутреннего программного обеспечения устройства через web-интерфейс,
• сохранение и загрузка конфигурации,
• поддержка удаленного журналирования,
• автоматическая синхронизация системного времени с NTP-сервером.
Страница 8 из 133

DAP-1150 Беспроводная точка доступа с поддержкой режима маршрутизатора
Обзор точки доступа
Руководство пользователя
Индикаторы:
• Питание,
• LAN/WAN,
• WLAN.
Питание:
• источник питания: внешний адаптер питания постоянного тока 5В/1,2А,
• кнопка Reset для возврата к заводским установкам по умолчанию.
Рабочая температура:
0
• от 0 до 55
C.
Влажность при эксплуатации:
• от 10% до 90% без конденсата.
Сертификаты:
• CE,
• FCC Class B,
• C-Tick,
• Wi-Fi.
Страница 9 из 133
DAP-1150 Беспроводная точка доступа с поддержкой режима маршрутизатора
Обзор точки доступа
Руководство пользователя
Внешний вид устройства
Передняя панель
Рисунок 1. Вид передней панели DAP-1150.
Светодиодный
Режим Значение
индикатор
Горит постоянно (зелёный)
Питание включено
Не горит
Питание отключено
После включения – загрузка устройства;
Питание
Горит постоянно (желтый)
после загрузки – сбой в работе
устройства
В режиме точки доступа – устройство
имеет IP-адрес и доступно для настройки
Горит постоянно (зеленый)
В режиме маршрутизатора – WAN-
соединение установлено
Порт активен (трафик в одном из
Мигает (зеленый)
направлений)
LAN/WAN
После включения – загрузка устройства;
после загрузки в режиме
Горит постоянно (желтый)
маршрутизатора – WAN-соединение не
установлено
Горит постоянно (зеленый)
Беспроводная сеть включена
WLAN-интерфейс активен (трафик в
Мигает (зеленый)
WLAN
одном из направлений)
Страница 10 из 133

DAP-1150 Беспроводная точка доступа с поддержкой режима маршрутизатора
Обзор точки доступа
Руководство пользователя
Задняя панель
Рисунок 2. Вид задней панели DAP-1150.
Порт Описание
В режиме точки доступа: Ethernet-порт для подключения
компьютера.
В режиме маршрутизатора: Ethernet-порт для подключения
LAN
кабельного или DSL-модема или подключения к выделенной
Ethernet-линии (рекомендуется использовать кабель, входящий в
комплект поставки).
5V-1.2A Разъём питания.
Кнопка для сброса настроек к заводским установкам.
RESET
Для восстановления заводских установок необходимо нажать и
удерживать 5 секунд (при включенном устройстве).
Также точка доступа оборудована съемной антенной с разъемом Reverse SMA.
Страница 11 из 133

DAP-1150 Беспроводная точка доступа с поддержкой режима маршрутизатора
Обзор точки доступа
Руководство пользователя
Комплект поставки
Перед использованием устройства убедитесь, что в комплект поставки включено следующее:
• точка доступа DAP-1150,
• адаптер питания постоянного тока 5В/1,2А,
• Ethernet-кабель (CAT 5E),
• компакт-диск с документами «Руководство пользователя» и «Руководство по
быстрой установке»,
• документ «Руководство по быстрой установке» (буклет).
Использование источника питания с напряжением, отличным от поставляемого с
!
устройством, может привести к повреждению устройства и потере гарантии на него.
Страница 12 из 133

DAP-1150 Беспроводная точка доступа с поддержкой режима маршрутизатора
Установка и подключение точки
Руководство пользователя
доступа
ГЛАВА 3. УСТАНОВКА И ПОДКЛЮЧЕНИЕ ТОЧКИ
ДОСТУПА
Предварительная подготовка
Перед подключением устройства прочтите данное руководство пользователя. Убедитесь, что
у Вас имеется все необходимое оборудование, а также информация по всем используемым
устройствам.
Операционная система
Настройка и управление точкой доступа DAP-1150 с поддержкой режима маршрутизатора
(далее – «точкой доступа») выполняется с помощью встроенного web-интерфейса. Web-
интерфейс доступен в любой операционной системе, которая поддерживает web-браузер.
Web-браузер
Для доступа к web-интерфейсу настройки и управления точкой доступа рекомендуется
использовать web-браузеры Windows Internet Explorer, Mozilla Firefox или Opera.
Для успешной работы с web-интерфейсом настройки и управления в web-браузере должна
быть включена поддержка JavaScript. Убедитесь, что данная опция не была отключена
другим программным обеспечением (например, антивирусной программой или другим ПО,
обеспечивающим безопасную работу в глобальной сети), запущенным на Вашем
компьютере.
Проводная или беспроводная сетевая карта (Ethernet- или Wi-Fi-адаптер)
Любой компьютер, использующий точку доступа, должен быть оснащен Ethernet- или Wi-Fi-
адаптером (сетевой картой). Если Ваш портативный или настольный компьютер не оснащен
подобным устройством, установите Ethernet- или Wi-Fi-адаптер перед тем, как приступить к
использованию точки доступа.
Беспроводная связь
Чтобы устройства, образующие беспроводную сеть, могли использовать точку доступа, в них
должна быть установлена беспроводная сетевая карта (Wi-Fi-адаптер) стандарта 802.11b, g
или n. Кроме того, для данных устройств необходимо задать значения идентификатора SSID,
номера канала и параметров безопасности, которые определены в web-интерфейсе точки
доступа.
Страница 13 из 133
DAP-1150 Беспроводная точка доступа с поддержкой режима маршрутизатора
Установка и подключение точки
Руководство пользователя
доступа
Подключение к компьютеру и его настройка (в ОС
Windows XP)
Подключение к компьютеру с Ethernet-адаптером
1. Выключите питание Вашего компьютера.
2. Подключите Ethernet-кабель к LAN-порту, расположенному на задней панели точки
доступа, и к Ethernet-адаптеру Вашего компьютера.
3. Подключите адаптер питания к соответствующему разъему на задней панели точки
доступа, а затем – к электрической розетке.
4. Включите компьютер и дождитесь загрузки операционной системы.
Настройка автоматического получения IP-адреса
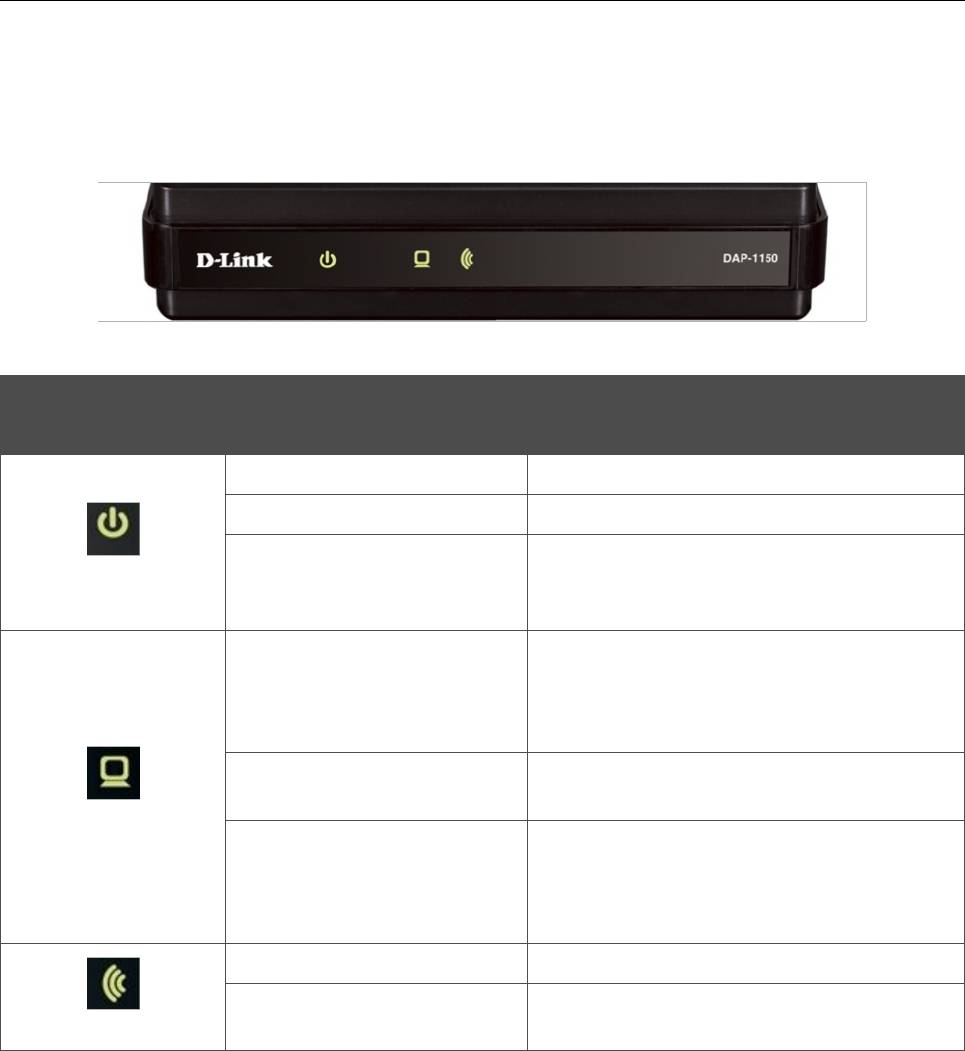
1. Нажмите кнопку Пуск и перейдите в раздел Панель управления > Сеть и
подключения к Интернету > Сетевые подключения.
2. В окне Сетевые подключения щелкните правой кнопкой мыши по
соответствующему Подключению по локальной сети и выберите строку
Свойства в появившемся контекстном меню.
Рисунок 3. Окно Сетевые подключения.
Страница 14 из 133
DAP-1150 Беспроводная точка доступа с поддержкой режима маршрутизатора
Установка и подключение точки
Руководство пользователя
доступа
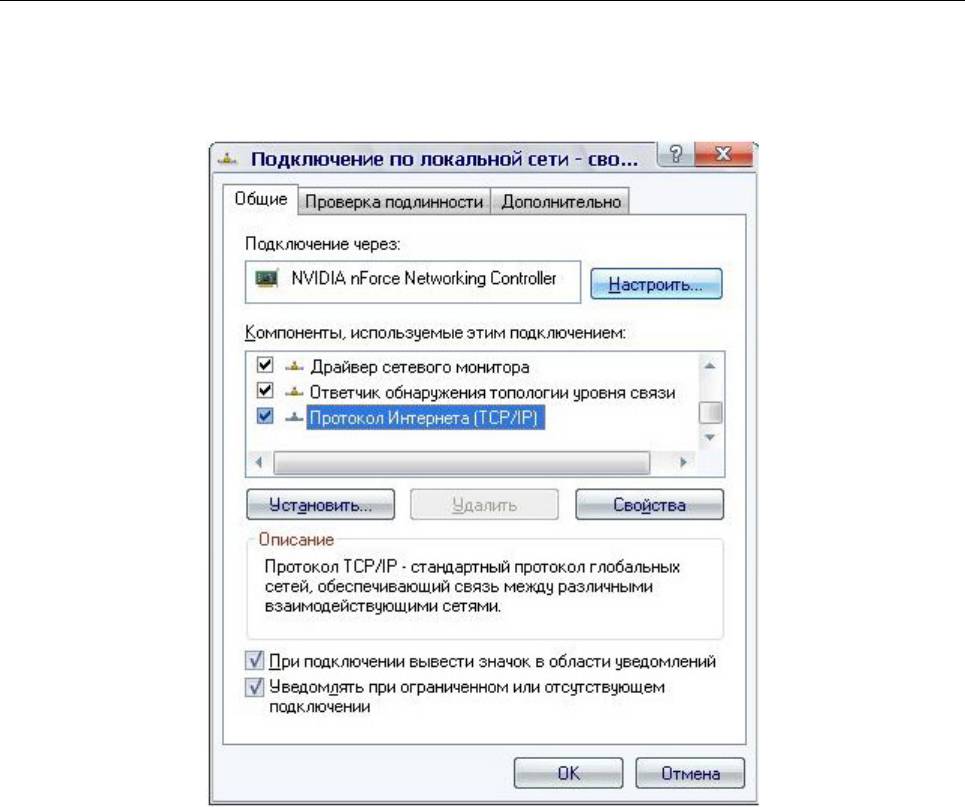
3. В окне Подключение по локальной сети – свойства, на вкладке Общие, в
разделе Компоненты, используемые этим подключением выделите строку
Протокол Интернета (TCP/IP). Нажмите кнопку Свойства.
Рисунок 4. Окно свойств подключения по локальной сети.
Страница 15 из 133
DAP-1150 Беспроводная точка доступа с поддержкой режима маршрутизатора
Установка и подключение точки
Руководство пользователя
доступа
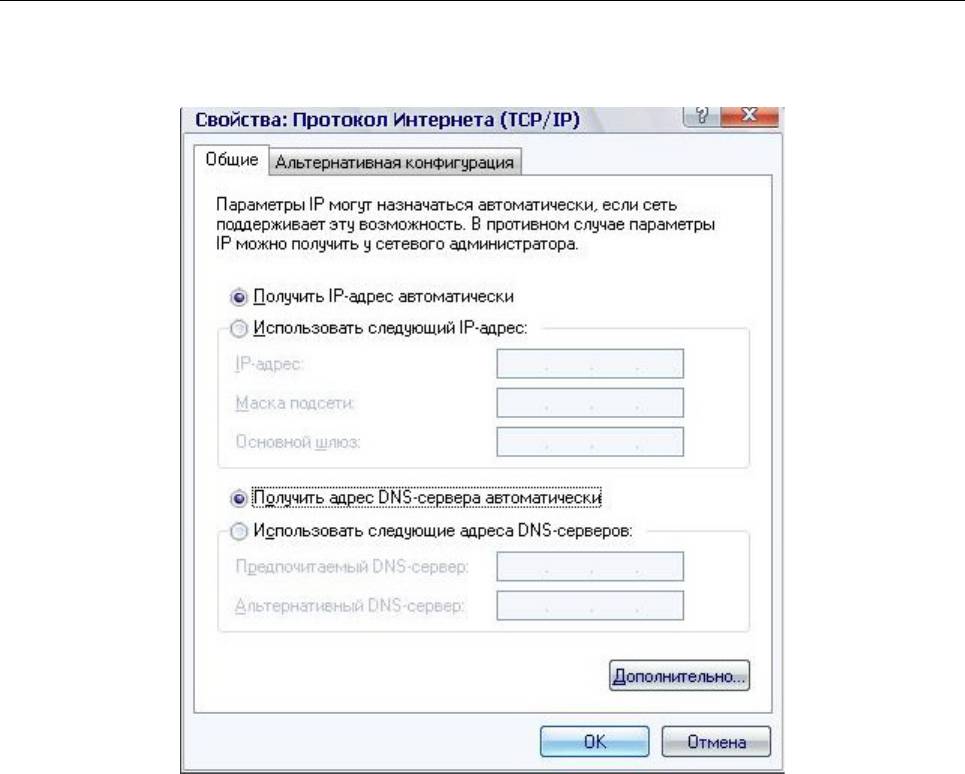
4. Установите переключатель в положение Получить IP-адрес автоматически.
Нажмите кнопку OK.
Рисунок 5. Окно свойств протокола TCP/IP.
Нажмите кнопку ОК в окне Подключение по локальной сети – свойства. Теперь Ваш
компьютер настроен на автоматическое получение IP-адреса.
Подключение к компьютеру с Wi-Fi-адаптером
1. Подключите адаптер питания к соответствующему разъему на задней панели точки
доступа, а затем – к электрической розетке.
2. Включите компьютер, дождитесь загрузки операционной системы.
3. Включите Wi-Fi-адаптер. На портативных компьютерах, оснащенных встроенным
беспроводным сетевым адаптером, как правило, есть кнопка или переключатель,
активирующий беспроводной сетевой адаптер (см. документацию по Вашему ПК).
Если Ваш компьютер оснащен подключаемым беспроводным сетевым адаптером,
установите программное обеспечение, поставляемое вместе с адаптером.
Страница 16 из 133

DAP-1150 Беспроводная точка доступа с поддержкой режима маршрутизатора
Установка и подключение точки
Руководство пользователя
доступа
Настройка Wi-Fi-адаптера
1. Нажмите кнопку Пуск и перейдите в раздел Панель управления > Сеть и
подключения к Интернету > Сетевые подключения.
2. Выделите значок беспроводного сетевого подключения и убедитесь, что Ваше
беспроводное сетевое устройство включено.
Рисунок 6. Окно Сетевые подключения.
3. Выполните поиск доступных сетей.
4. В открывшемся окне Беспроводное сетевое подключение выделите
беспроводную сеть DAP-1150 и нажмите кнопку Подключить.
После нажатия на кнопку Подключить отобразится окно Состояние беспроводного
сетевого соединения.
Если первичная настройка точки доступа выполняется через Wi-Fi- соединение, то
сразу после изменения настроек беспроводной сети, заданных по умолчанию,
!
необходимо будет заново установить беспроводное соединение с устройством,
используя только что заданные параметры.
Страница 17 из 133
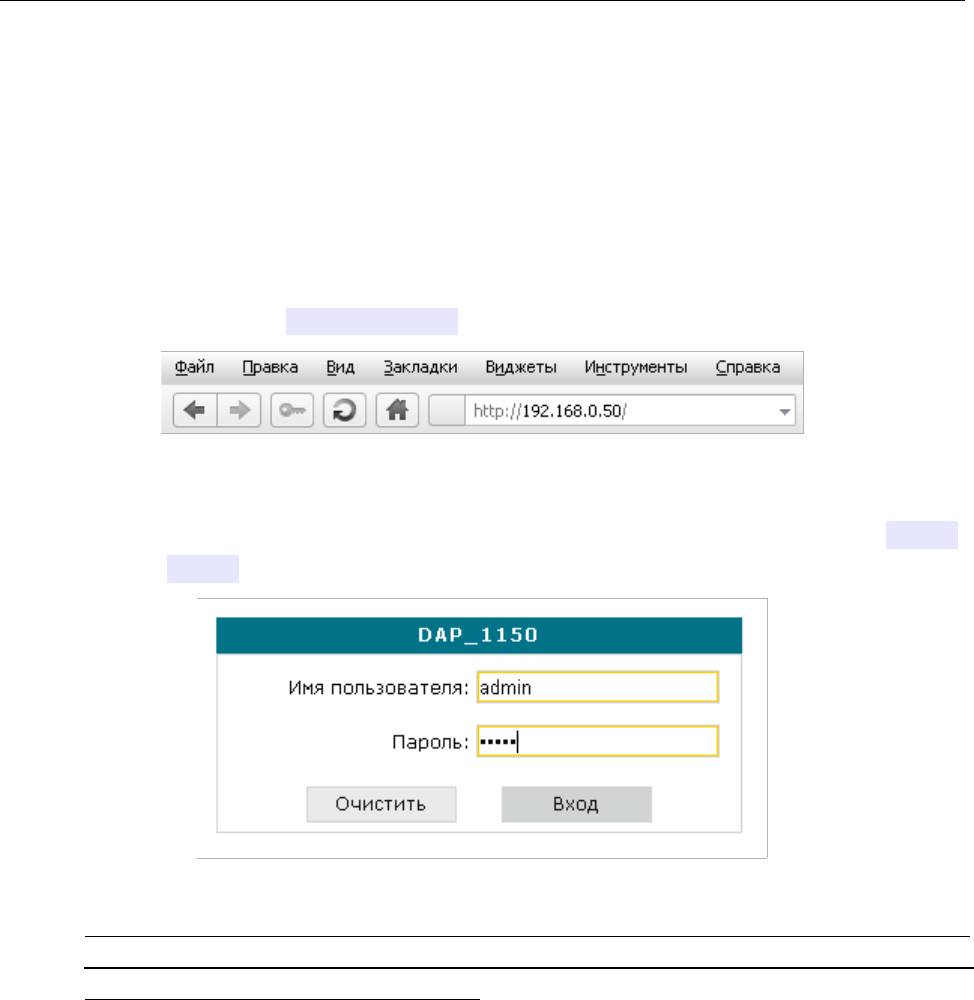
DAP-1150 Беспроводная точка доступа с поддержкой режима маршрутизатора
Установка и подключение точки
Руководство пользователя
доступа
Подключение к web-интерфейсу
После настройки соединения с точкой доступа Вы можете обратиться к web-интерфейсу
настройки и управления для задания необходимых параметров (настройки беспроводной
сети, изменения режима работы устройства, создания WAN-соединения для подключения к
сети Интернет, настройки межсетевого экрана и др.)
1. Запустите web-браузер (см. раздел Предварительная подготовка, стр. 13).
2. В адресной строке web-браузера введите IP-адрес точки доступа (по умолчанию
установлен IP-адрес 192.168.0.50). Нажмите клавишу Enter.
Рисунок 7. Ввод IP-адреса DAP-1150 в адресной строке web-браузера.
3. На открывшейся странице введите имя пользователя и пароль администратора для
доступа к web-интерфейсу точки доступа (по умолчанию имя пользователя – admin,
пароль – admin). Нажмите кнопку Вход.
Рисунок 8. Страница входа в систему.
Если при попытке подключения к web-интерфейсу точки доступа браузер выдает
ошибку типа «Невозможно отобразить страницу» , убедитесь, что устройство
!
правильно подключено к компьютеру.
Сразу после первого обращения к web-интерфейсу точки доступа откроется страница для
изменения пароля администратора, установленного по умолчанию.
Страница 18 из 133
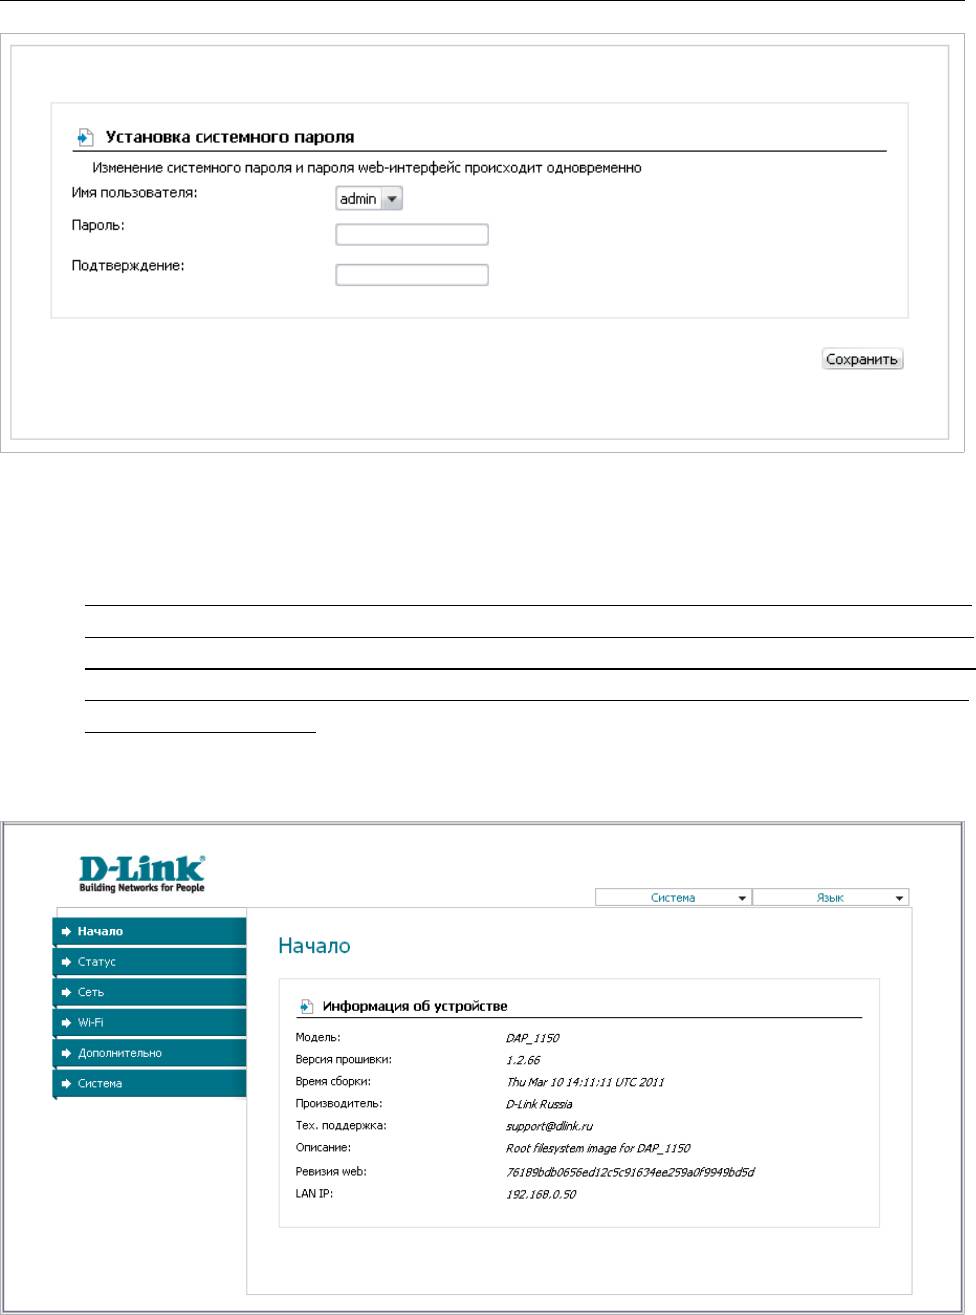
DAP-1150 Беспроводная точка доступа с поддержкой режима маршрутизатора
Установка и подключение точки
Руководство пользователя
доступа
Рисунок 9. Страница изменения пароля администратора, заданного по умолчанию.
Введите новый пароль для доступа к web-интерфейсу в полях Пароль и Подтверждение.
Затем нажмите кнопку Сохранить.
Запомните или запишите новый пароль администратора. В случае утери нового
пароля администратора Вы сможете получить доступ к web-интерфейсу точки
доступа только после восстановления заводских настроек по умолчанию при
!
помощи аппаратной кнопки Reset. Такая процедура уничтожит все заданные Вами
настройки устройства.
В случае успешной регистрации открывается страница системной статистики. На странице
приведена общая информация по точке доступа и ее программному обеспечению.
Рисунок 10. Страница системной статистики.
Страница 19 из 133
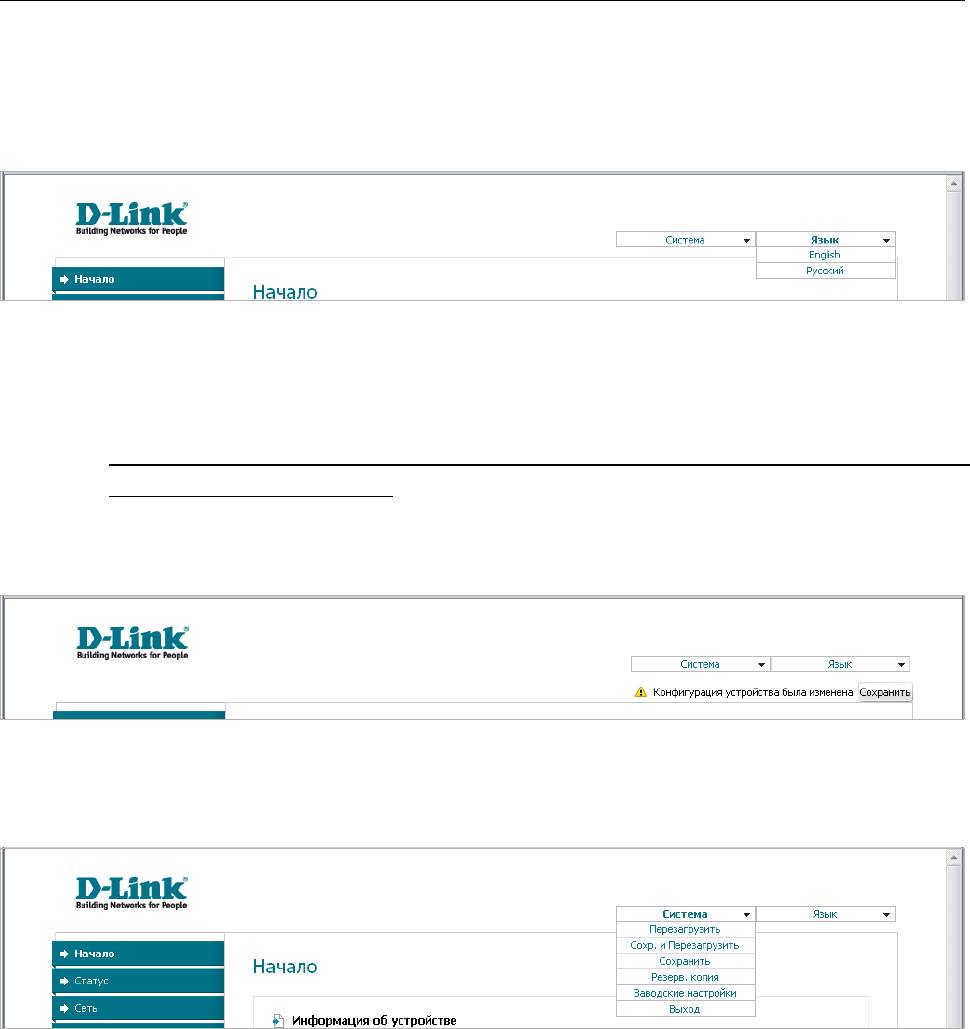
DAP-1150 Беспроводная точка доступа с поддержкой режима маршрутизатора
Установка и подключение точки
Руководство пользователя
доступа
Web-интерфейс устройства доступен на двух языках – английском и русском. Выберите
нужный язык в меню, которое отображается при наведении указателя мыши на надпись
Язык в правом верхнем углу страницы. Вы можете переключить язык в любом разделе
меню web-интерфейса точки доступа.
Рисунок 11. Переключение языка web-интерфейса.
Сохранение и восстановление настроек
При настройке точки доступа необходимо сохранять выполненные изменения в
!
энергонезависимой памяти.
Web-интерфейс точки доступа отображает уведомление о несохраненных изменениях в
верхней части страницы.
Рисунок 12. Уведомление о несохраненных изменениях.
Вы можете сохранить настройки точки доступа при помощи меню, которое отображается
при наведении указателя мыши на надпись Система в правом верхнем углу страницы.
Рисунок 13. Меню в верхней части страницы.
Нажмите на строку Перезагрузить, если ранее Вы уже сохранили настройки точки
доступа.
Нажмите на строку Сохр. и Перезагрузить, чтобы сохранить выполненные Вами
настройки и немедленно перезагрузить точку доступа.
Нажмите на строку Сохранить, чтобы сохранить выполненные Вами настройки точки
доступа в энергонезависимой памяти и продолжить настройку устройства. Вы также можете
сохранить параметры устройства, нажав кнопку Сохранить на странице Система /
Конфигурация.
Страница 20 из 133
Аннотации для Беспроводной Точки Доступа D-Link DAP-1150 в формате PDF
Топ 10 инструкций
Другие инструкции
-
Contents
-
Table of Contents
-
Bookmarks
Quick Links
Related Manuals for D-Link DAP-1150
Summary of Contents for D-Link DAP-1150
-
Page 2: Table Of Contents
Statistics …………….31 QoS Engine …………..70 Help …………….32 Firewall & DMZ ………….71 Configuration for Repeater Mode ……..33 Advanced Network…………72 Web-based Configuration Utility ……..33 Routing …………….73 Wireless Setup …………..34 Device Administration ………..74 LAN Setup …………..37 Save and Restore …………75 D-Link DAP-1150 User Manual…
-
Page 3
Connect to a Wireless Network Using Windows XP ..92 ® Configure WEP/WPA-PSK ……….93 Using Windows Vista (Secured Network) ….94 ® Using Windows Vista (Unsecured Network) ….97 ® Wireless Basics …………. 100 Wireless Modes ………….. 104 Networking Basics …………105 D-Link DAP-1150 User Manual… -
Page 4: Product Overview
• Quick Installation Guide • Ethernet Cable Note: Using a power supply with a different voltage rating than the one included with the DAP-1150 will cause damage and void the warranty for this product. System Requirements • Computers with Windows…
-
Page 5: Features
• Connect home and soho to a wireless network — Create a wireless network for your home and office using the D-Link DAP-1150 as an 802.11n standard Wireless Access Point. Connect this Access Point to a broadband modem and let others wirelessly access your Internet connection.
-
Page 6: Hardware Overview
Pressing the Reset Button restores computer, switch the access point to its original and hub. factory default settings. Power: Receptor for the Power Adapter. D-Link DAP-1150 User Manual…
-
Page 7: Leds
Section 1 — Product Overview Hardware Overview LEDs WLAN: Blinking green light Power: Solid green light indicates wireless activity;solid indicates connection to a green light indicates connection power source LAN:Blinking green light indicates activity;Solid green light indicates connection D-Link DAP-1150 User Manual…
-
Page 8: Wireless Installation Considerations
1. Keep the number of walls and ceilings between the D-Link access point and other network devices to a minimum — each wall or ceiling can reduce your adapter’s range from 3-90 feet (1-30 meters.) Position your devices so that the number of walls or ceilings is minimized.
-
Page 9: Ap/Repeater/Wireless Client Mode
AP/Repeater/Router Mode How you use your DAP-1150 will determine which mode you choose on the DAP-1150. This section will help you figure out which setting works with your setup. Access Point Mode In Access Point mode, the DAP-1150 acts as a central connection point for any computer (client) that has a 802.11n or backward-compatible 802.11b/g wireless network adapter and is within range of the AP.
-
Page 10: Repeater Mode
The APs and wireless router (if used) must be within range of each other. Make sure that all clients, APs, and the wireless router all use the same SSID (wireless network name) and channel. Extending the Wireless Coverage of a Wireless Router Using the DAP-1150 D-Link DAP-1150 User Manual…
-
Page 11: Router Mode
Router Mode In the Router mode, the DAP-1150 connects to a broadband modem. In this mode, the DAP-1150 also acts as a router for wireless clients on your network and provides NAT (Network Address Translation) and a DHCP server to generate IP addresses.
-
Page 12: Configuration For Ap Mode
Configuration for AP Mode Web-based Configuration Utility If you wish to change the default settings or optimize the performance of the DAP-1150, you may use the configuration utility that D-Link has included a configuration utility for this purpose. After you have completed the initial installation, you can access the configuration menu, at any time, by opening the web-browser and typing in the ip address of the DAP-1150.
-
Page 13: Wireless Setup Wizard
Section 3 — Configuration Wireless Setup Wizard Click Launch Wireless Setup Wizard to quickly configure your access point. Follow the steps to configure your DAP-1150. D-Link DAP-1150 User Manual…
-
Page 14
15. Click Next to continue. If you choose WPA-PSK encryption, the following screen will display the Network Key to be entered on your wireless clients. Click Save to finish the Setup Wizard. D-Link DAP-1150 User Manual… -
Page 15
If you choose WEP encryption, the following screen will show you your Network Key to enter on your wireless clients. Click Save to finish the Setup Wizard. Choose Manually assign a network key to create your own key. Click Next to continue. D-Link DAP-1150 User Manual… -
Page 16
63 characters long or enter exactly 64 characters using 0-9 and A-F. Click Next to continue. If you select WPA encryption, the following screen will display the network key to be entered on your wireless clients. Click Save to finish the Setup Wizard. D-Link DAP-1150 User Manual… -
Page 17
13 characters long or exactly 10 or 26 characters using 0-9 and A-F. Click Next to continue. If you select WEP encryption, the following screen will show you your network key to enter on your wireless clients. Click Save to finish the Setup Wizard. D-Link DAP-1150 User Manual… -
Page 18: Wireless Setup
Check this option if you would not like the SSID of your wireless network to be broadcasted by the DAP-1150. If this option Wireless: is checked, the SSID of the DAP-1150 will not be seen by Site Survey utilities so your wireless clients will have to know the SSID of your DAP-1150 in order to connect to it.
-
Page 19
WEP key as before your wireless network adapters. Please establish wireless you did on the AP. connectivity before enabling encryption. Your wireless signal may degrade when enabling encryption due to the added overhead. D-Link DAP-1150 User Manual… -
Page 20
AP with a wireless adapter, you will lose connectivity until you enable WPA/ WPA2 (whichever of the three options you have selected above) on your adapter and enter the same network key as you did on the AP. D-Link DAP-1150 User Manual… -
Page 21
RADIUS server. 1812 is the default port. 6. Next to Shared Secret, enter the security key. 7. If you have a secondary RADIUS server, enter its IP address, port, and secret key. 8. Click Save Settings to save your settings. D-Link DAP-1150 User Manual… -
Page 22: Lan Setup
Check the box to transfer the DNS server Relay: information from your ISP to your computers. If unchecked, your computers will use the AP for a DNS server. Refer to the next page for DHCP information. D-Link DAP-1150 User Manual…
-
Page 23: Dhcp Setup Settings
Section 3 — Configuration DHCP Server Settings DHCP stands for Dynamic Host Control Protocol. The DAP-1150 has a built-in DHCP server. The DHCP Server will automatically assign an IP address to the computers on the LAN/private network. Be sure to set your computers to be DHCP clients by setting their TCP/IP settings to “Obtain an IP Address…
-
Page 24: Advanced Wireless
Select if you are not using any 802.11n wireless clients. This is the default setting. Short GI: Check this box to reduce the guard interval time therefore increasing the data capacity. However, it’s less reliable and may create higher data loss. D-Link DAP-1150 User Manual…
-
Page 25: Device Administration
AP. Putting an asterisk (*) into this field would present a security risk and is not recommended. Port: The port number used to access the DAP-1150. For example: http://x.x.x.x:8080 whereas x.x.x.x is the LAN IP address of the DAP-1150 and 8080 is the port used for the Web-Management interface. D-Link DAP-1150 User Manual…
-
Page 26: Save And Restore
If you want to save the current AP configuration settings, use the Save button above. Clear Language Click the Clear button to uninstall the language Pack: pack. D-Link DAP-1150 User Manual…
-
Page 27: Firmware Update
You can upgrade the firmware of the AP here. Make sure the firmware you want to use is on the local hard drive of the computer. Click on Browse to locate the firmware file to be used for the update. Please check the D-Link support site for firmware updates at http://support.dlink.com.
-
Page 28: Device Info
Section 3 — Configuration Device Info This window displays the current information for the DAP-1150. It will display the LAN, and Wireless information. Wired: Displays the MAC address and the private (local) IP settings for the AP. Wireless Displays the wireless MAC address and your 802.11N:…
-
Page 29: Log
Click the checkbox(es) of the type of log information &Level: requested: “System, Firewall & Security, AP Status, Critical, Warning and Information” Send by Mail: Enter the your SNTP server name(or IP address) and enter your mail address before sending your system log by mail. D-Link DAP-1150 User Manual…
-
Page 30: Wireless
Section 3 — Configuration Wireless The wireless client table displays a list of current connected wireless clients. This table also displays the connection time and MAC address of the connected wireless client. D-Link DAP-1150 User Manual…
-
Page 31: Statistics
Section 3 — Configuration Statistics The window below displays the Traffic Statistics. Here you can view the amount of packets that pass through the DAP-1150 on the LAN port. The traffic counter will reset if the device is rebooted. D-Link DAP-1150 User Manual…
-
Page 32: Help
Section 3 — Configuration Help Click the desired hyperlink to get more information about how to use the AP. D-Link DAP-1150 User Manual…
-
Page 33: Configuration For Repeater Mode
Configuration for Repeater Mode Web-based Configuration Utility If you wish to change the default settings or optimize the performance of the DAP-1150, you may use the configuration utility that D-Link has included a configuration utility for this purpose. After you have completed the initial installation, you can access the configuration menu, at any time, by opening the web-browser and typing in the ip address of the DAP-1150.
-
Page 34: Wireless Setup
SSID is case-sensitive. Wireless Mode: Select Repeater mode. Enable Indicates the channel setting for the DAP-1150. By default Wireless the channel is set to 6. The Channel can be changed to fit Channel: the channel setting for an existing wireless network or to customize the wireless network.
-
Page 35
WEP In Repeater mode, use the same wireless security method of on your adapter and enter the same WEP key as root AP is reguired. you did on the AP. D-Link DAP-1150 User Manual… -
Page 36
AP with a wireless adapter, you will lose connectivity until you enable WPA/ WPA2 (whichever of the three options you have selected above) on your adapter and enter the same network key as you did on the AP. D-Link DAP-1150 User Manual… -
Page 37: Lan Setup
Check the box to transfer the DNS server Relay: information from your ISP to your computers. If unchecked, your computers will use the AP for a DNS server. Refer to the next page for DHCP information. D-Link DAP-1150 User Manual…
-
Page 38: Dhcp Setup Settings
Section 3 — Configuration DHCP Server Settings DHCP stands for Dynamic Host Control Protocol. The DAP-1150 has a built-in DHCP server. The DHCP Server will automatically assign an IP address to the computers on the LAN/private network. Be sure to set your computers to be DHCP clients by setting their TCP/IP settings to “Obtain an IP Address…
-
Page 39: Advanced Wireless
Select if you are not using any 802.11n wireless clients. This is the default setting. Short GI: Check this box to reduce the guard interval time therefore increasing the data capacity. However, it’s less reliable and may create higher data loss. NOTE: Some options are unavailabe in Repeater mode. D-Link DAP-1150 User Manual…
-
Page 40: Device Administration
AP. Putting an asterisk (*) into this field would present a security risk and is not recommended. Port: The port number used to access the DAP-1150. For example: http://x.x.x.x:8080 whereas x.x.x.x is the LAN IP address of the DAP-1150 and 8080 is the port used for the Web-Management interface. D-Link DAP-1150 User Manual…
-
Page 41: Save And Restore
If you want to save the current AP configuration settings, use the Save button above. Clear Language Click the Clear button to uninstall the language Pack: pack. D-Link DAP-1150 User Manual…
-
Page 42: Firmware Update
You can upgrade the firmware of the AP here. Make sure the firmware you want to use is on the local hard drive of the computer. Click on Browse to locate the firmware file to be used for the update. Please check the D-Link support site for firmware updates at http://support.dlink.com.
-
Page 43: Device Info
Section 3 — Configuration Device Info This window displays the current information for the DAP-1150. It will display the LAN, and Wireless information. Wired: Displays the MAC address and the private (local) IP settings for the AP. Wireless Displays the wireless MAC address and your 802.11N:…
-
Page 44: Log
Click the checkbox(es) of the type of log information &Level: requested: “System, Firewall & Security, AP Status, Critical, Warning and Information” Send by Mail: Enter the your SNTP server name(or IP address) and enter your mail address before sending your system log by mail. D-Link DAP-1150 User Manual…
-
Page 45: Wireless
Section 3 — Configuration Wireless The wireless client table displays a list of current connected wireless clients. This table also displays the connection time and MAC address of the connected wireless client. D-Link DAP-1150 User Manual…
-
Page 46: Statistics
Section 3 — Configuration Statistics The window below displays the Traffic Statistics. Here you can view the amount of packets that pass through the DAP-1150 on the LAN port. The traffic counter will reset if the device is rebooted. D-Link DAP-1150 User Manual…
-
Page 47: Help
Section 3 — Configuration Help Click the desired hyperlink to get more information about how to use the AP. D-Link DAP-1150 User Manual…
-
Page 48: Configuration For Router Mode
Configuration for Router Mode Web-based Configuration Utility If you wish to change the default settings or optimize the performance of the DAP-1150, you may use the configuration utility that D-Link has included a configuration utility for this purpose. After you have completed the initial installation, you can access the configuration menu, at any time, by opening the web-browser and typing in the ip address of the DAP-1150.
-
Page 49: Setup Wizard
Internet Setup window to quickly set up your router. Click Internet Connection Setup Wizard, you will be directed to the first window of the wizard. Click Next to continue. Create a new password and then click Next to continue. D-Link DAP-1150 User Manual…
-
Page 50
Clone Your PC’s MAC Address and then click Next to continue. The Host Name is optional but may be required by some ISPs. The default host name is the device name of the Router and may be changed. D-Link DAP-1150 User Manual… -
Page 51
If you selected PPTP, enter your PPTP username and password. Click Next to continue. If you selected L2TP, enter your L2TP username and password. Click Next to continue. D-Link DAP-1150 User Manual… -
Page 52
If you selected Static, enter your network settings supplied by your Internet provider. Click Next to continue. Click Connect to save your settings. Please allow 1-2 minutes for rebooting. When the router has finished rebooting, the opening window will be displayed. D-Link DAP-1150 User Manual… -
Page 53: Internet Setup
Enter the Primary DNS server IP address assigned by your Address: ISP. Secondary DNS This is optional. Address: MTU: Maximum Transmission Unit — you may need to change the MTU for optimal performance with your specific ISP. 1492 is the default MTU. D-Link DAP-1150 User Manual…
-
Page 54: Dynamic
Primary / Enter the DNS (Domain Name Server) server IP address Secondary assigned by your ISP. Addresses: MTU: Maximum Transmission Unit — You may need to change the MTU for optimal performance with your specific ISP. D-Link DAP-1150 User Manual…
-
Page 55: Pppoe
Auto-reconnect. MTU: Maximum Transmission Unit — You may need to change the MTU for optimal performance with your specific ISP. 1492 is the default MTU. Connection Select either Always-on, Manual, or Connect-on demand. Mode Select: D-Link DAP-1150 User Manual…
-
Page 56: Pptp
Time: connection is maintained during inactivity. To disable this feature, enable Auto-reconnect. MTU: Maximum Transmission Unit — You may need to change the MTU for optimal performance. Connect Mode: Select either Always-on, Manual, or Connect-on demand. D-Link DAP-1150 User Manual…
-
Page 57: L2Tp
To disable this feature, enable Auto-reconnect. MTU: Maximum Transmission Unit — You may need to change the MTU for optimal performance with your specific ISP. Connect Mode: Select either Always-on, Manual, or Connect-on demand. D-Link DAP-1150 User Manual…
-
Page 58: Dual Access(For Russia Only)
(as previously described for PPTP connections). In addition, the second step also includes an option to use a MAC address that will always be associated with the connection. The MAC address is entered manually or copied from the computer. D-Link DAP-1150 User Manual…
-
Page 59
Check this option if you would not like the SSID of your wireless network to be broadcasted by the DAP-1150. If this option Wireless: is checked, the SSID of the DAP-1150 will not be seen by Site Survey utilities so your wireless clients will have to know the SSID of your DAP-1150 in order to connect to it. -
Page 60
WEP key as you Router before your wireless network adapters. Please establish did on the Router. wireless connectivity before enabling encryption. Your wireless signal may degrade when enabling encryption due to the added overhead. D-Link DAP-1150 User Manual… -
Page 61
WPA/ WPA2 (whichever of the three options you have selected above) on your adapter and enter the same network key as you did on the router. D-Link DAP-1150 User Manual… -
Page 62
RADIUS server. 1812 is the default port. 6. Next to Shared Secret, enter the security key. 7. If you have a secondary RADIUS server, enter its IP address, port, and secret key. 8. Click Save Settings to save your settings. D-Link DAP-1150 User Manual… -
Page 63: Lan Setup
Check the box to transfer the DNS server Relay: information from your ISP to your computers. If unchecked, your computers will use the router for a DNS server. Refer to the next page for DHCP information. D-Link DAP-1150 User Manual…
-
Page 64: Dhcp Server Setting
Section 3 — Configuration DHCP Server Settings DHCP stands for Dynamic Host Control Protocol. The DAP-1150 has a built-in DHCP server. The DHCP Server will automatically assign an IP address to the computers on the LAN/private network. Be sure to set your computers to be DHCP clients by setting their TCP/IP settings to “Obtain an IP Address…
-
Page 65: Advanced Wireless
Select if you are not using any 802.11n wireless clients. This is the default setting. Short GI: Check this box to reduce the guard interval time therefore increasing the data capacity. However, it’s less reliable and may create higher data loss. D-Link DAP-1150 User Manual…
-
Page 66: Mac Filter
The schedule of time when the network filter will be enabled. The schedule may be set to Always, which will allow the particular service to always be enabled. You can create your own times in the Maintenance > Schedules section. D-Link DAP-1150 User Manual…
-
Page 67: Port Forwarding
Start Port/ Enter the port or ports that you want to open. If End Port: you want to open one port, enter the same port in both boxes. Traffic Type: Select TCP, UDP, or Any D-Link DAP-1150 User Manual…
-
Page 68: Application Rules
Some applications require multiple connections, such as Internet gaming, video conferencing, Internet telephony and others. These applications have difficulties working through NAT (Network Address Translation). Special Applications makes some of these applications work with the DAP-1150. Rule: Check the box to enable the rule.
-
Page 69: Parental Control
The schedule of time when the parental control filter will be enabled. The schedule may be set Schedule: to Always, which will allow the particular service to always be enabled. You can create your own times in the Maintenance > Schedules section. D-Link DAP-1150 User Manual…
-
Page 70: Qos Engine
Network causes the measured uplink speed to be reported slightly lower than before on such connections, but gives much better results. Detected When Connection Type is set to automatic, the automatically detected connection type is displayed here. xDSL: D-Link DAP-1150 User Manual…
-
Page 71: Firewall & Dmz
This section will allow you to set up a DMZ host and to set up firewall rules. If you have a client PC that cannot run Internet applications properly from behind the DAP-1150, then you can set the client up for unrestricted Internet access. It allows a computer to be exposed to the Internet. This feature is useful for gaming purposes.
-
Page 72: Advanced Network
UPNP provides compatibility with networking equipment, software and peripherals. Enable WAN Unchecking the box will not allow the DAP-1150 to Ping Respond: respond to Pings. Blocking the Ping may provide some extra security from hackers. Tick this checkbox to allow the WAN port to be “Pinged”.
-
Page 73: Routing
The IP address of the packets that will take this route. Subnet Mask: The subnet of the IP address of the packets that will take this route. Gateway: Specifies the next hop to be taken if this route is used. D-Link DAP-1150 User Manual…
-
Page 74: Device Administration
Port: The port number used to access the DAP-1150. For example: http://x.x.x.x:8080 whereas x.x.x.x is the WAN IP address of the DAP-1150 and 8080 is the port used for the Web-Management interface. D-Link DAP-1150 User Manual…
-
Page 75: Save And Restore
If you want to save the current router configuration settings, use the Save button above. Reboots: Click the Reboots button on the left side of the window to restart the Router. D-Link DAP-1150 User Manual…
-
Page 76: Firmware Update
You can upgrade the firmware of the Router here. Make sure the firmware you want to use is on the local hard drive of the computer. Click on Browse to locate the firmware file to be used for the update. Please check the D-Link support site for firmware updates at http://support.dlink.com.
-
Page 77: Ddns Setting
Dyn.Dns.org(free), and Dyn.Dns. org(Static). Host Name: Enter the host name of the DDNS server. Username: Enter the username given to you by your DDNS server. Password: Enter the password or key given to you by your DDNS server. D-Link DAP-1150 User Manual…
-
Page 78: System Check
Ping Test: The Ping Test is used to send Ping packets to test if a computer is on the Internet. Enter the IP Address that you wish to Ping, and click Ping. D-Link DAP-1150 User Manual…
-
Page 79: Time And Date
Saving: settings to copy your PC’s time settings. Tick the “Automatically synchronize with Server D-Link’s Internet time server” checkbox and Used: then use the drop-down menu to select an NTP Server. NTP is short for Network Time Protocol. NTP synchronizes computer clock times in a network of computers.
-
Page 80: Schedules
Tick this check box if the new schedule rule applies to the full 24-hour period. Start Time/ If the new schedule rule does not apply to the full End Time: 24-hour period, untick the previous checkbox and then enter a specific beginning and ending time. D-Link DAP-1150 User Manual…
-
Page 81: Log Settings
Click the checkbox(es) of the type of log information Level: requested: “System, Firewall & Security, Router Status, Critical, Warning and Information” Send by Mail: Enter the your SNTP server name(or IP address) and enter your mail address before sending your system log by mail. D-Link DAP-1150 User Manual…
-
Page 82: Device Info
Section 3 — Configuration Device Info This window displays the current information for the DAP-1150. It will display the LAN, WAN, and Wireless information. If your WAN connection is set up for a Dynamic IP address then a DHCP Release button and a DHCP Renew button will be displayed.
-
Page 83: Log
View the last page of the log. Previous: View the previous page. Next: View the next page. Clear: Clear the log. Link to Log Click this button to go directly to the Log Settings Settings: window (Maintenance > Log Settings). D-Link DAP-1150 User Manual…
-
Page 84: Statistics
Section 3 — Configuration Statistics The window below displays the Traffic Statistics. Here you can view the amount of packets that pass through the DAP-1150 on both the WAN and the LAN ports. The traffic counter will reset if the device is rebooted.
-
Page 85: Wireless
Section 3 — Configuration Wireless The wireless client table displays a list of current connected wireless clients. This table also displays the connection time and MAC address of the connected wireless client. D-Link DAP-1150 User Manual…
-
Page 86: Help
Section 3 — Configuration Help Click the desired hyperlink to get more information about how to use the Router. D-Link DAP-1150 User Manual…
-
Page 87: Wireless Security
Section 4 — Security Wireless Security This section will show you the different levels of security you can use to protect your data from intruders. The DAP-1150 offers the following types of security: • WPA-Personal (Pre-Shared Key) • WPA-Enterprise (Extensible Authentication Protocol) •…
-
Page 88: Configure Wep
7. Click Save Settings to save your settings. If you are configuring the access point with a wireless adapter, you will lose connectivity until you enable WEP on your adapter and enter the same WEP key as you did on the access point. D-Link DAP-1150 User Manual…
-
Page 89: What Is Wpa
WPA-EAP/WPA2-EAP incorporates user authentication through the Extensible Authentication Protocol (EAP). EAP is built on a more secure public key encryption system to ensure that only authorized network users can access the network. WPA2-Auto-PSK/WPA2-Auto-EAP accepts wireless clients that use WPA or WPA2. Authentication is sill necessary. D-Link DAP-1150 User Manual…
-
Page 90: Configure Wpa-Psk, Wpa2-Psk, And Wpa2-Auto-Psk (Personal)
7. Click Save Settings to save your settings. If you are configuring the access point with a wireless adapter, you will lose connectivity until you enable WPA-Personal, WPA2-Personal, or WPA2-Auto-Personal on your adapter and enter the same passphrase as you did on the access point. D-Link DAP-1150 User Manual…
-
Page 91: Configure Wpa-Eap, Wpa2-Eap, And Wpa2-Auto-Eap (Enterprise)
6. Next to Port, enter the port you are using with your RADIUS server. 1812 is the default port. 7. Next to Shared Secret, enter the security key. 8. Click Save Settings to save your settings. D-Link DAP-1150 User Manual…
-
Page 92: Connect To A Wireless Network Using Windows Xp
Click on a network (displayed using the SSID) and click the Connect button. If you get a good signal but cannot access the Internet, check the TCP/IP settings for your wireless adapter. Refer to the Networking Basics section in this manual for more information. D-Link DAP-1150 User Manual…
-
Page 93: Configure Wep/Wpa-Psk
It may take 20-30 seconds to connect to the wireless network. If the connection fails, please verify that the WEP or WPA-PSK settings are correct. The WEP or WPA-PSK key must be exactly the same as on the wireless access point. D-Link DAP-1150 User Manual…
-
Page 94: Using Windows ® Vista (Secured Network)
The following are step-by-step directions to connect to a secured wireless network using Windows ® Vista. 1. Right-click on Network and click on Properties. 2. Click the Manage network connections link in the Network and Sharing Center window. D-Link DAP-1150 User Manual…
-
Page 95
3. Right-click the Wireless Network Connection entry and then select Connect/Disconnect from the drop-down menu. 4. Select a network to connect to in the Select a network to connect to window and then click the Connect button. 5. The following window displays connection progress. D-Link DAP-1150 User Manual… -
Page 96
[SSID name] window. When you are finished, click the Connect button. 7. The following Successfully connected to [SSID name] window is displayed. Choose to save this network and/or start this new connection automatically. When you are finished, click the Close button. D-Link DAP-1150 User Manual… -
Page 97: Using Windows ® Vista (Unsecured Network)
The following are step-by-step directions to set up a wireless connection on an unsecured network using Windows ® Vista. 1. Right-click on Network and click on Properties. 2. Go to the Network and Sharing Center window and click the Manage Network Connections link. D-Link DAP-1150 User Manual…
-
Page 98
4. Select a network to connect to in the Select a network to connect to window and then click the Connect button. 5. Confirm that you still want to connect on the following Network Connection Status window by clicking on Connect Anyway. D-Link DAP-1150 User Manual… -
Page 99
6. The following Connect to a network wizard window displays the connection progress. 7. The following Successfully connected to [SSID name] window is displayed. Choose to save this network and/or start this new connection automatically. When you are finished, click the Close button. D-Link DAP-1150 User Manual… -
Page 100: Wireless Basics
Strictly adhering to IEEE standards, the D-Link wireless family of products allows you to securely access the data you want, when and where you want it. You will be able to enjoy the freedom that wireless networking delivers.
-
Page 101
Why D-Link Wireless? D-Link is a worldwide leader and an award winning designer, developer, and manufacturer of networking products. D-Link delivers the performance you need at a price you can afford. D-Link has all the products you need to build your network. -
Page 102
• Stay on top of everything at home as you would at the office • Remotely access your office network from home • Share an Internet connection and printer with multiple computers • No need to dedicate office space D-Link DAP-1150 User Manual… -
Page 103
Public places that offer wireless access is usually called a “hotspot”. Using a D-Link Cardbus Adapter with your laptop, you can access the hotspot to connect to Internet from remote locations like airports, hotels, coffee shops, libraries, restaurants, and convention centers. -
Page 104: Wireless Modes
An Infrastructure network contains an AP or a wireless router. All the wireless devices, or clients, will connect to the wireless router or the AP. An Ad-Hoc network contains only clients, such as laptops with wireless cardbus adapters. All the adapters must be in Ad-Hoc mode to communicate. D-Link DAP-1150 User Manual…
-
Page 105: Networking Basics
DHCP request on newly installed adapters. If you are connecting to a wireless network at a hotspot in a hotel, coffee shop, airport, or another public place, please contact an employee or administrator to verify their wireless network settings. D-Link DAP-1150 User Manual…
-
Page 106: Statically Assign An Ip Address
Set Primary DNS the same as the LAN IP address of your router (192.168.0.1). The Secondary DNS is not needed or you may enter a DNS server from your ISP. Step 5 Click OK twice to save your settings. D-Link DAP-1150 User Manual…
-
Page 107
-20 to 65 C RECEIVE SENSITIVITY OPERATING HUMIDITY SECURITY 10% to 90% non-condensing — 64/128-bit WEP data encryption STORAGE HUMIDITY — WPA-PSK, WPA2-PSK — WPA-EAP, WPA2-EAP 5% to 95% non-condensing — TKIP, AES — SSID broadcast disable function D-Link DAP-1150 User Manual… -
Page 108
Version 2.00 2010/01/15…